使用Turbopack、Biome、Next.js、Express、Tailwind CSS和ShadCN构建全栈Monorepo项目
/ 29 分钟阅读 /
目录 Table of Contents
这是一篇翻译,原文:https://www.thehalftimecode.com/building-a-full-stack-monorepo-with-turbopack-biome-next-js-express-js-tailwind-css-and-shadcn/ github 地址: https://github.com/ivesfurtado/next-express-turborepo
作为一名开发者或实习生,你可能遇到过在单个项目中管理多个应用程序或软件包的挑战。无论是在开发前端应用的同时构建后端 API,还是在项目的不同部分之间共享 UI 组件和实用工具函数,事情都可能很快变得难以管理。
这就是 monorepos 发挥作用的地方。通过将代码组织到一个包含多个应用程序和共享包的仓库中,你可以简化开发流程并改善协作。在本指南中,我们将引导你使用 Turbopack、Biome、Next.js 15、Express.js、Tailwind CSS 和 ShadCN 设置一个 monorepo。我们还将使用 pnpm 作为我们的包管理器来优化依赖管理。
在本教程结束时,你将拥有一个功能齐全的 monorepo,其中包含两个应用程序(Next.js 和 Express.js)和三个共享包(UI 组件、TypeScript 类型和实用工具函数)。让我们开始吧!
注意: 你将在文章末尾找到仓库链接。如果你以前从未设置过 monorepo,我强烈建议你通读整个教程,而不仅仅是 fork 仓库。
前提条件
在开始本教程之前,请确保已安装以下内容:
- Visual Studio Code(或支持 Biome 的类似代码编辑器)
- Biome VSC 扩展
- NodeJS(建议通过 NVM 安装以便于版本管理)
什么是 Monorepo?
在我们开始构建之前,让我们先弄清楚什么是 monorepo 以及它为什么有用。
定义
Monorepo 是一个包含多个项目或软件包代码的仓库。与为每个应用程序或共享库设置单独的仓库不同,所有内容都放在一个地方。
使用 Monorepo 的好处
- 代码共享: 轻松在不同的应用程序之间共享代码(例如,UI 组件或实用工具函数)。
- 一致性: 在所有项目中保持一致的依赖项和配置。
- 简化协作: 由于所有内容都在一个地方,因此参与项目不同部分的开发人员可以更轻松地协作。
- 原子更改: 在一次提交中跨多个应用程序或软件包进行更改。
- 集中式 CI/CD: 从一个地方管理持续集成和部署管道。
在本指南中,我们将创建一个 monorepo (turborepo),其中包含:
- 一个 Next.js 应用程序(前端)。
- 一个 Express.js 应用程序(后端)。
- 用于 UI 组件(使用 Tailwind CSS + ShadCN)、共享类型和实用工具函数的包。
为什么使用 pnpm 和 Turbopack?
为了使我们的 monorepo 高效且可扩展,我们将使用两个关键工具:用于包管理的 pnpm 和用于快速构建的 Turbopack/Turborepo。
pnpm
pnpm 是 npm 和 Yarn 的替代方案,具有以下优点:
- 更快的安装: pnpm 通过使用硬链接而不是复制文件来更快地安装依赖项。
- 磁盘空间效率: 它通过避免重复的依赖项来节省磁盘空间。
- 工作区支持: pnpm 原生支持工作区,使其非常适合具有多个项目共享依赖项的 monorepo。
Turbopack
Turbopack 是 Vercel 为 Next.js 推出的新打包器。它被设计为比 Webpack 快得多,尤其是在开发过程中:
- 更快的模块热替换 (HMR): Turbopack 通过仅在进行更改时重新加载必要的模块来加速开发。
- 优化的生产构建: Turbopack 优化你的生产构建,使其更小更快。
- 与 Next.js 15 的无缝集成: Turbopack 开箱即用地支持 Next.js 新的应用程序目录结构。
有了这些工具,让我们继续设置我们的项目结构。
项目结构概述
以下是我们的最终项目结构:
monorepo/├── .vscode/│ ├── extensions.json│ └── settings.json├── apps/│ ├── web/ # Next.js 应用│ └── server/ # Express.js 应用├── packages/│ ├── ui/ # 共享 UI 组件 (使用 Tailwind CSS + ShadCN)│ ├── types/ # 共享 TypeScript 类型│ ├── tsconfig/ # Typescript 配置│ └── utils/ # 共享工具函数├── .gitignore # 不被git追踪的文件├── biome.json # Biome 配置├── package.json # 项目配置├── turbo.json # Turbopack 配置└── pnpm-workspace.yaml # pnpm 工作区配置我们将项目组织成两个主要目录:
apps/: 这将包含我们的两个主要应用程序—web(Next.js) 和server(Express.js)。packages/: 这将包含两个应用程序都可以使用的共享代码—ui用于共享 UI 组件,types用于 TypeScript 类型,utils用于共享的工具函数,tsconfig用于typescript配置文件。
现在我们对结构有了大致的了解,让我们开始设置 monorepo。
设置 Monorepo
步骤 1:使用 pnpm 工作区初始化 Monorepo
首先,如果你还没有安装 pnpm,需要全局安装它:
接下来,创建你的主项目目录:
mkdir monorepo && cd monorepo初始化一个新的工作区:
此命令在项目的根目录创建一个 package.json 文件。现在我们需要通过在根目录创建 pnpm-workspace.yaml 文件来告诉 pnpm 哪些目录应该是工作区的一部分:
packages: - 'apps/*' - 'packages/*'此配置告诉 pnpm,apps/ 或 packages/ 中的任何文件夹都应被视为工作区的一部分。
步骤 2:配置 Turbopack
接下来,我们将通过在项目的根目录创建一个 turbo.json 文件来配置 Turbopack:
{ "$schema": "https://turbo.build/schema.json", "globalDependencies": [ "**/.env.*local" ], "tasks": { "topo": { "dependsOn": [ "^topo" ] }, "build": { "dependsOn": [ "^build" ], "outputs": [ "dist/**", ".next/**", "!.next/cache/**" ] }, "lint": { "dependsOn": [ "^topo" ] }, "format": { "dependsOn": [ "^topo" ] }, "lint:fix": { "dependsOn": [ "^topo" ] }, "format:fix": { "dependsOn": [ "^topo" ] }, "check-types": {}, "dev": { "cache": false, "persistent": true }, "add-shadcn-component": { "dependsOn": [ "^topo" ] }, "clean": { "cache": false } }}此配置定义了 Turbopack 应如何在你的工作区中处理构建。
注意
add-shadcn-component命令,这是一个自定义命令,将在我们的 UI 包中使用,以便直接从根目录轻松添加 ShadCN 的新组件。
步骤 3:全局配置
接下来,我们将更新我们的根 package.json 以添加脚本和依赖项。
{ "name": "monorepo", "private": true, "scripts": { "changeset": "changeset", "publish:packages": "changeset publish", "version:packages": "turbo build && changeset version", "add-shadcn-component": "turbo run add-shadcn-component -- --", "build": "turbo build", "dev": "turbo dev", "format": "turbo format --continue --", "format:fix": "turbo format --continue -- --write", "lint": "turbo lint --continue --", "lint:fix": "turbo lint --continue -- --apply", "clean": "turbo clean" }, "dependencies": { "@changesets/changelog-github": "^0.5.0", "@changesets/cli": "^2.27.1", "turbo": "^2.1.3" }, "devDependencies": { "@biomejs/biome": "^1.7.2", "typescript": "^5", "postcss": "^8.4.27" }, "packageManager": "pnpm@9.12.1"}对于 Biome 配置,我们将创建一个名为 biome.json 的文件:
{ "$schema": "https://biomejs.dev/schemas/1.6.4/schema.json", "files": { "ignoreUnknown": true, "ignore": [ "node_modules/*", "*.config.*", "*.json", "tsconfig.json", ".turbo", "**/dist", "**/out", ".next" ] }, "organizeImports": { "enabled": true }, "linter": { "enabled": true, "rules": { "recommended": true, "complexity": { "noForEach": "off", "noUselessFragments": "off" }, "correctness": { "useExhaustiveDependencies": "off", "noUnusedImports": "warn", "noUnusedVariables": "warn" }, "style": { "noParameterAssign": "off" } } }, "formatter": { "enabled": true, "formatWithErrors": false, "indentStyle": "space", "lineEnding": "lf", "lineWidth": 120 } }一个非常重要的文件是 .gitignore,在这个文件中,我们将告诉 Git 我们不想跟踪哪些文件。
# dependencies/node_modules/.pnp.pnp.js
node_modulespackages/*/node_modulesapps/*/node_modules.next
# next.js/.next//out/
# production/build
# misc.DS_Store*.pem
# debug.pnpm-debug.log*
# other lockfiles that's not pnpm-lock.yamlpackage-lock.jsonyarn.lock
# local env files.env.env*.local
# vercel.vercel
# typescript*.tsbuildinfonext-env.d.ts

# intellij.idea
dist/**/distpackages/*/dist
.turbo/test-results//playwright-report//playwright/.cache/
此配置定义了我们的项目默认值。现在我们已经设置了工作区配置文件,让我们继续创建我们的应用程序。
步骤 3: .vscode 文件夹
.vscode 文件夹存储专门针对 Visual Studio Code 的配置设置。这些设置允许你个性化和优化 VS Code 以满足你的项目或工作区需求。以下是两种主要的设置类型:
- 用户设置:全局应用于系统上的所有 VS Code 实例。它们非常适合你需要保持一致的设置,例如字体大小或主题。
- 工作区设置:仅应用于当前项目。这对于项目特定的配置很有用,例如从文件资源管理器中排除某些文件夹(例如,
node_modules)。
VS Code 使用 JSON 文件来存储这些设置,从而可以通过版本控制轻松进行自定义和共享。为了便于管理,你可以直接在 JSON 文件中修改设置,也可以使用设置编辑器,它提供了一个方便的图形界面。
对于我们的项目,我们将创建两个存储这些配置的文件。首先,在根目录创建一个名为 .vscode 的文件夹。然后,创建 extensions.json:
{ "recommendations": [ "yoavbls.pretty-ts-errors", "bradlc.vscode-tailwindcss", "biomejs.biome" ]}我们需要最后一个配置就是全局设置, 创建一个settings.json文件:
{  "editor.codeActionsOnSave": {    "source.organizeImports.biome": "explicit",    "source.fixAll.biome": "explicit",  },  "editor.defaultFormatter": "biomejs.biome",  "editor.formatOnSave": true,  "tailwindCSS.experimental.classRegex": [    ["cva\\(([^)]*)\\)", "[\"'`]([^\"'`]*).*?[\"'`]"],    ["cx\\(([^)]*)\\)", "(?:'|\"|`)([^']*)(?:'|\"|`)"]  ],  "typescript.enablePromptUseWorkspaceTsdk": true,  "typescript.tsdk": "node_modules/typescript/lib",
  "typescript.preferences.autoImportFileExcludePatterns": [    "next/router.d.ts",    "next/dist/client/router.d.ts"  ],  "[typescriptreact]": {    "editor.defaultFormatter": "biomejs.biome"  },  "[typescript]": {    "editor.defaultFormatter": "biomejs.biome"  },  "[json]": {    "editor.defaultFormatter": "vscode.json-language-features"  }}
创建第一个包 (tsconfig)
为了创建将在我们所有 monorepo 中使用的 typescript 配置以及我们 web 和 server 的单独配置,我们将创建我们的 tsconfig 包。
mkdir packages && cd packages && mkdir tsconfig && cd tsconfig我们将有 6 个 Typescript 配置文件:
- base:
base.json - web:
next.json - server:
express.json - ui:
ui.json - utils: utils.json
- types: types.json
首先,我们将创建我们的 package.json:
{ "name": "@monorepo/tsconfig", "version": "0.0.0", "private": true, "license": "MIT", "publishConfig": { "access": "public" }}然后我们将创建我们的 base.json 配置文件(你可以在这里找到每个 tsconfig 设置):
{ "$schema": "https://json.schemastore.org/tsconfig", "compilerOptions": { "strict": true, "noUncheckedIndexedAccess": true, "alwaysStrict": false, "module": "ESNext", "moduleResolution": "Bundler", "resolveJsonModule": true, "target": "ESNext", "lib": [ "DOM", "DOM.Iterable", "ESNext" ], "noEmit": true, "declaration": true, "declarationMap": true, "verbatimModuleSyntax": true, "moduleDetection": "force", "downlevelIteration": true, "allowJs": true, "isolatedModules": true, "esModuleInterop": true, "forceConsistentCasingInFileNames": true, "skipLibCheck": true, "skipDefaultLibCheck": true, "incremental": true, "tsBuildInfoFile": ".tsbuildinfo" }, "include": [ "**/*.ts", "**/*.tsx" ], "exclude": [ "node_modules", "src/tests" ]}现在我们将创建 next.json 配置:
{ "$schema": "https://json.schemastore.org/tsconfig", "extends": "./base.json", "compilerOptions": { "paths": { "@/*": [ "./*" ] }, "lib": [ "dom", "dom.iterable", "esnext" ], "allowJs": true, "skipLibCheck": true, "strict": true, "forceConsistentCasingInFileNames": true, "noEmit": true, "esModuleInterop": true, "resolveJsonModule": true, "isolatedModules": true, "jsx": "preserve", "incremental": true }}然后我们需要创建 express.json 配置文件:
{ "$schema": "https://json.schemastore.org/tsconfig", "display": "ExpressJS Server", "extends": "./base.json", "ts-node": { "compilerOptions": { "module": "commonjs", "moduleResolution": "Node10" } }, "compilerOptions": { "outDir": "./build", "emitDecoratorMetadata": true, "experimentalDecorators": true, "module": "ESNext" }}为我们的共享类型包创建一个 types.json 配置文件:
{ "$schema": "https://json.schemastore.org/tsconfig", "display": "Shared Types", "extends": "./base.json", "compilerOptions": { "outDir": "./dist", "declaration": true, "emitDecoratorMetadata": true, "experimentalDecorators": true, },}此外,我们需要添加最后一个配置文件 ui.json,此文件将在我们的共享 UI 包中使用。
{ "$schema": "https://json.schemastore.org/tsconfig", "display": "Shared UI", "extends": "./base.json", "compilerOptions": { "paths": { "@/*": [ "./*" ] }, "allowJs": true, "skipLibCheck": true, "strict": false, "forceConsistentCasingInFileNames": true, "noEmit": true, "incremental": true, "esModuleInterop": true, "resolveJsonModule": true, "isolatedModules": true, "jsx": "preserve" }}最后, 创建utils.json配置:
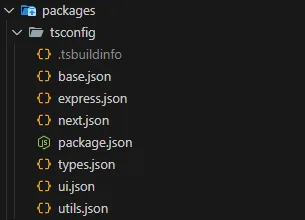
{ "$schema": "https://json.schemastore.org/tsconfig", "display": "Shared UI", "extends": "./base.json", "compilerOptions": { "paths": { "@/*": [ "./*" ] }, "allowJs": true, "skipLibCheck": true, "strict": false, "forceConsistentCasingInFileNames": true, "noEmit": true, "incremental": true, "esModuleInterop": true, "resolveJsonModule": true, "isolatedModules": true, "jsx": "preserve" }}这是你的 tsconfig 包文件夹的样子:
恭喜,我们刚刚完成了 typescript 的配置。现在让我们进入激动人心的部分:创建我们的应用程序!
创建应用程序
步骤 1:设置 Next.js 15 应用 (web)
创建并导航到 apps/ 目录:
cd ../.. && mkdir apps && cd apps使用 pnpm 创建一个新的 Next.js 应用程序:
pnpm create next-app@latest web --ts --app --turbopack --no-eslint --tailwind --src-dir --skip-install --import-alias @/*此命令将在 web/ 文件夹中创建一个新的 Next.js 应用程序,并启用 TypeScript,将 Turbopack 设置为默认打包器和 Tailwind CSS。
要将我们的 tsconfig 包集成到 Web 应用程序中,我们需要更新默认的 package.json:
...,"dependencies": { "@monorepo/types": "workspace:*", "@monorepo/ui": "workspace:*", "@monorepo/utils": "workspace:*", "react": "19.0.0-rc-02c0e824-20241028", "react-dom": "19.0.0-rc-02c0e824-20241028", "next": "15.0.2"},"devDependencies": { "@monorepo/tsconfig": "workspace:*", "@types/node": "^20", "@types/react": "^18", "@types/react-dom": "^18", "postcss": "^8", "tailwindcss": "^3.4.1", "@biomejs/biome": "^1.7.2"}...,现在,更新默认的 tsconfig.json:
{ "extends": "@monorepo/tsconfig/next.json", "compilerOptions": { "plugins": [ { "name": "next" } ], }, "include": [ "next-env.d.ts", "**/*.ts", "**/*.tsx", ".next/types/**/*.ts", "tailwind.config.ts" ], "exclude": [ "node_modules" ]}添加 biome.json,以便我们可以在文件夹上激活它:
{ "extends": ["../../biome.json"]}你的 Next.js 应用程序现已设置完毕!让我们继续使用 Express.js 设置我们的后端应用程序。
步骤 2:设置 Express 应用 (server)
导航回 apps/ 目录并创建一个 Express 应用程序:
cd .. && mkdir server && cd server && pnpm init更新服务器的 package.json 以添加 Express、其类型、cors、morgan 和 ts-node-dev:
{ "name": "server", "version": "1.0.0", "description": "", "main": "index.js", "keywords": [], "author": "", "license": "ISC", "scripts": { "dev": "ts-node-dev --transpile-only src/server.ts" }, "dependencies": { "@monorepo/types": "workspace:*", "express": "^4.21.1", "ts-node-dev": "^2.0.0", "cors": "2.8.5", "morgan": "^1.10.0" }, "devDependencies": { "@monorepo/tsconfig": "workspace:*", "@types/express": "^5.0.0", "@types/morgan": "^1.9.9", "@types/cors": "2.8.17" }}将 tsconfig.json 添加到服务器:
{ "extends": "@monorepo/tsconfig/express.json", "include": [ "src" ],}在 src/server.ts 中创建一个基本的 Express 服务器:
import cors from "cors";import express from "express";import morgan from "morgan";
const app = express();
app.use(morgan("tiny"));app.use(express.json({ limit: "100mb" }));
app.use(  cors({    credentials: true,    origin: ["http://localhost:3000"],  }),);
const port = process.env.PORT || 3001;
app.get("/", (_, res) => {  res.send("Hello from Express!");});
app.listen(port, () => {  console.log(`Server is running on http://localhost:${port}`);});
你现在已经设置了前端 (Next.js) 和后端 (Express) 应用程序!让我们继续创建两个应用程序都可以使用的共享包。
创建共享包
在本节中,我们将创建三个共享包:一个用于 UI 组件 (ui),一个用于 TypeScript 类型 (types),一个用于实用工具函数 (utils)。这些包将位于 packages/ 目录中。
步骤 1:创建 utils 包
我们将创建的第一个包是用于实用工具函数 (utils) 的包。要进行设置:
在 packages/ 中创建文件夹,并进行初始化:
cd ../.. && mkdir packages && cd packages && mkdir utils && cd utils && pnpm init && mkdir src && touch src/styles.ts更新 package.json 以添加脚本和导出:
{ "name": "@monorepo/utils", "version": "1.0.0", "description": "", "main": "index.js", "scripts": { "check-types": "tsc --noEmit", "build": "tsup", "lint": "biome lint ./src", "format": "biome format ./src " }, "keywords": [], "author": "", "license": "ISC", "dependencies": { "clsx": "^2.1.1", "tailwind-merge": "^2.5.4" }, "devDependencies": { "@monorepo/tsconfig": "workspace:*" }, "exports": { ".": "./src", "./styles": "./src/styles.ts" }}添加 biome.json:
{ "extends": [ "../../biome.json" ]}添加 tsconfig.json:
{ "extends": "@monorepo/tsconfig/utils.json", "include": [ "**/*.ts", ], "exclude": [ "node_modules" ],}我们将创建的第一个(也是唯一的)util 函数是 cn,这是一个用于有条件地合并 tailwind 类的实用工具函数,它在 ShadCN 组件中大量使用。我们需要添加以下依赖项:
pnpm add clsx tailwind-merge在 src/style.ts 中添加 cn 通用实用工具函数:
import clsx, { type ClassValue } from "clsx";import { twMerge } from "tailwind-merge";
export function cn(...inputs: ClassValue[]) {  return twMerge(clsx(inputs));}
步骤 2:创建 ui 包 (Tailwind CSS + ShadCN)
导航回 packages/ 目录:
cd .. && mkdir ui && cd ui && pnpm init安装 React 以及 Tailwind CSS(开发依赖项)和 ShadCN(我们将使用 new york 样式):
pnpm add -D @types/react @types/react-dom autoprefixer postcss react tailwindcss typescriptpnpm add shadcn @types/react tailwindcss-animate class-variance-authority clsx tailwind-merge @radix-ui/react-icons按照与我们在 Next.js 应用程序中执行的类似步骤设置 Tailwind CSS—初始化 Tailwind CSS (npx tailwindcss init) 并在 tailwind.config.ts 中对其进行配置:
import type { Config } from "tailwindcss";import tailwindcssAnimate from "tailwindcss-animate";import { fontFamily } from "tailwindcss/defaultTheme";
const config = {  darkMode: ["class"],  content: [    "./pages/**/*.{ts,tsx}",    "./components/**/*.{ts,tsx}",    "./app/**/*.{ts,tsx}",    "./src/**/*.{ts,tsx}",    "../../packages/ui/src/**/*.{ts,tsx}",  ],  prefix: "",  theme: {    container: {      center: true,      padding: '2rem',      screens: {        '2xl': '1400px'      }    },    extend: {      colors: {        border: 'hsl(var(--border))',        input: 'hsl(var(--input))',        ring: 'hsl(var(--ring))',        background: 'hsl(var(--background))',        foreground: 'hsl(var(--foreground))',        primary: {          DEFAULT: 'hsl(var(--primary))',          foreground: 'hsl(var(--primary-foreground))'        },        secondary: {          DEFAULT: 'hsl(var(--secondary))',          foreground: 'hsl(var(--secondary-foreground))'        },        destructive: {          DEFAULT: 'hsl(var(--destructive))',          foreground: 'hsl(var(--destructive-foreground))'        },        muted: {          DEFAULT: 'hsl(var(--muted))',          foreground: 'hsl(var(--muted-foreground))'        },        accent: {          DEFAULT: 'hsl(var(--accent))',          foreground: 'hsl(var(--accent-foreground))'        },        popover: {          DEFAULT: 'hsl(var(--popover))',          foreground: 'hsl(var(--popover-foreground))'        },        card: {          DEFAULT: 'hsl(var(--card))',          foreground: 'hsl(var(--card-foreground))'        }      },      borderRadius: {        lg: '`var(--radius)`',        md: '`calc(var(--radius) - 2px)`',        sm: 'calc(var(--radius) - 4px)'      },      fontFamily: {        sans: ["var(--font-sans)", ...fontFamily.sans]      },      keyframes: {        'accordion-down': {          from: {            height: '0'          },          to: {            height: 'var(--radix-accordion-content-height)'          }        },        'accordion-up': {          from: {            height: 'var(--radix-accordion-content-height)'          },          to: {            height: '0'          }        },      },      animation: {        'accordion-down': 'accordion-down 0.2s ease-out',        'accordion-up': 'accordion-up 0.2s ease-out'      }    }  },  plugins: [tailwindcssAnimate],} satisfies Config;
export default config;
我们还需要为 Tailwind CSS 配置 postcss.config.mjs:
/** @type {import('postcss-load-config').Config} */const config = {  plugins: {    tailwindcss: {},    autoprefixer: {},  },};
export default config;
由于我们还将在该包上使用 Biome,因此请添加 biome.json:
{ "extends": [ "../../biome.json" ]}更新 package.json 以添加 tsconfig、utils 包和自定义脚本:
{ "name": "@monorepo/ui", "version": "1.0.0", "description": "", "main": "index.js", "scripts": { "check-types": "tsc --noEmit", "add-shadcn-component": "pnpm dlx shadcn@latest add", "build": "tsup", "lint": "biome lint ./src", "format": "biome format ./src " }, "keywords": [], "author": "", "license": "ISC", "devDependencies": { "@monorepo/tsconfig": "workspace:*", "@types/react": "^18.3.12", "@types/react-dom": "^18", "autoprefixer": "^10.4.20", "postcss": "^8.4.47", "react": "19.0.0-rc-02c0e824-20241028", "tailwindcss": "^3.4.1" }, "dependencies": { "@monorepo/utils": "workspace:^", "@radix-ui/react-accordion": "^1.2.1", "@radix-ui/react-icons": "^1.3.1", "@radix-ui/react-select": "^2.1.2", "class-variance-authority": "^0.7.0", "clsx": "^2.1.1", "shadcn": "^2.1.3", "tailwind-merge": "^2.5.4", "tailwindcss-animate": "^1.0.7" }, "exports": { "./globals.css": "./src/styles/globals.css", "./postcss.config": "./postcss.config.mjs", "./tailwind.config": "./tailwind.config.ts", "./components/*": "./src/*.tsx" }}创建一个 tsconfig.json 文件:
{ "extends": "@monorepo/tsconfig/ui.json", "include": [ "**/*.ts", "**/*.tsx", "tailwind.config.ts", ], "exclude": [ "node_modules" ],}在 src/styles/globals.css 创建一个样式文件:
@tailwind base;@tailwind components;@tailwind utilities;
@layer base {  :root {    --background: 0 0% 100%;    --foreground: 222.2 47.4% 11.2%;
    --muted: 210 40% 96.1%;    --muted-foreground: 215.4 16.3% 46.9%;
    --popover: 0 0% 100%;    --popover-foreground: 222.2 47.4% 11.2%;
    --border: 214.3 31.8% 91.4%;    --input: 214.3 31.8% 91.4%;
    --card: 0 0% 100%;    --card-foreground: 222.2 47.4% 11.2%;
    --primary: 222.2 47.4% 11.2%;    --primary-foreground: 210 40% 98%;
    --secondary: 210 40% 96.1%;    --secondary-foreground: 222.2 47.4% 11.2%;
    --accent: 210 40% 96.1%;    --accent-foreground: 222.2 47.4% 11.2%;
    --destructive: 0 100% 50%;    --destructive-foreground: 210 40% 98%;
    --ring: 215 20.2% 65.1%;
    --radius: 0.5rem;  }
  .dark {    --background: 224 71% 4%;    --foreground: 213 31% 91%;
    --muted: 223 47% 11%;    --muted-foreground: 215.4 16.3% 56.9%;
    --accent: 216 34% 17%;    --accent-foreground: 210 40% 98%;
    --popover: 224 71% 4%;    --popover-foreground: 215 20.2% 65.1%;
    --border: 216 34% 17%;    --input: 216 34% 17%;
    --card: 224 71% 4%;    --card-foreground: 213 31% 91%;
    --primary: 210 40% 98%;    --primary-foreground: 222.2 47.4% 1.2%;
    --secondary: 222.2 47.4% 11.2%;    --secondary-foreground: 210 40% 98%;
    --destructive: 0 63% 31%;    --destructive-foreground: 210 40% 98%;
    --ring: 216 34% 17%;
    --radius: 0.5rem;  }}
@layer base {  * {    @apply border-border;  }  body {    @apply bg-background text-foreground;    font-feature-settings: "rlig" 1, "calt" 1;  }}
ShadCN 要求你创建一个 components.json(启用 CLI 使用):
{ "$schema": "https://ui.shadcn.com/schema.json", "style": "new-york", "rsc": true, "tsx": true, "tailwind": { "config": "tailwind.config.ts", "css": "src/styles/globals.css", "baseColor": "slate", "cssVariables": true }, "aliases": { "components": "src/", "ui": "src/", "utils": "@monorepo/utils/styles" }}现在你可以开始在此包中添加可重用的 UI 组件!例如,要导入 ShadCN Button 组件,只需在根工作区运行以下命令:
pnpm add-shadcn-component card你可以在此处找到每个 ShadCN 组件,以及在此基础上创建的其他组件。现在我们准备设置我们的共享类型包并集成我们设置的所有内容!
步骤 3:创建 types 包
types 包将包含两个应用程序都可以使用的共享 TypeScript 类型。要创建它:
导航回 packages/,创建文件夹并进行初始化:
cd .. && mkdir types && cd types && pnpm init创建biome.json文件:
{ "extends": [ "../../biome.json" ]}创建 tsconfig.json 文件:
{ "extends": "@monorepo/tsconfig/types.json", "include": [ "**/*.ts", ], "exclude": [ "node_modules" ],}我们将创建的第一个类型将是一个简单的 API 客户端,以便我们可以在 server 和 web 之间共享类型。创建 src/ 文件夹,并在其中创建 api/ 文件夹。然后创建 simple-api-client.ts:
export interface GetTestResponse {  message: string;}
export type GetTest = () => Promise<GetTestResponse>;
export interface SimpleApiClient {  getTest: GetTest;}
更新 package.json 以添加导出、脚本和 devDependencies:
{ "name": "@monorepo/types", "version": "1.0.0", "description": "", "scripts": { "build": "tsc", "lint": "biome lint ./src", "check-types": "tsc --noEmit" }, "keywords": [], "author": "", "license": "ISC", "devDependencies": { "@monorepo/tsconfig": "workspace:*" }, "exports": { ".": "./src/index.ts" }}现在,在 src/api 文件夹中创建一个 index.ts 并从 simple-api-client.ts 导出所有内容(你将使用其他文件复制它以获得单一导入源):
export * from "./simple-api-client";最后,在 src 文件夹中创建一个 index.ts 并从 api 导出所有内容:
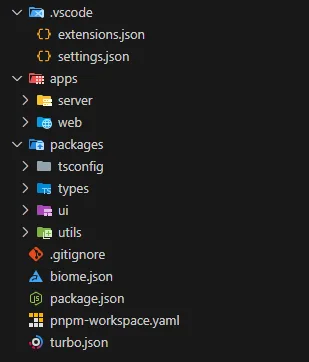
我们的共享类型包已全部设置完毕!你的存储库应如下所示:
现在,让我们继续本教程的最后一部分:集成所有内容并运行开发环境。
在本地运行你的 Monorepo
现在一切都设置好了,让我们在本地运行这两个应用程序!
步骤 1:安装所有依赖项
一次性安装工作区中的所有依赖项(记得将目录更改回根目录):
pnpm install
此命令将安装两个应用程序(`web`、`server`)以及所有共享包(`ui`、`types` 等)的所有必要依赖项。
### **步骤 2:同时运行两个应用程序**
pnpm turbo run dev此命令将安装两个应用程序(web、server)以及所有共享包(ui、types 等)的所有必要依赖项。
此命令会同时启动你的前端 (Next.js)(在端口 3000 上)和后端 (Express)(在端口 3001 上)!
Web 和 Server 集成
为了在我们的应用程序和包之间创建一个简单的集成,我们将开发一个组件,该组件将使用我们在本教程前面创建的共享类型从服务器获取数据。但是,在此之前,让我们更新我们的 Tailwind CSS 文件和全局样式以使用我们在 UI 包中定义的那些。将 tailwind.config.ts 的内容替换为以下内容:
export * from "@monorepo/ui/tailwind.config";现在将 postcss.config.mjs 内容替换为:
export { default } from "@monorepo/ui/postcss.config";在我们的根布局 (src/app/layout.tsx) 中,更新 globals.css 导入以使用我们在 UI 包中创建的那个:
import "@monorepo/ui/globals.css";import "./style.css";import type { Metadata } from "next";import localFont from "next/font/local";
const geistSans = localFont({  src: "./fonts/GeistVF.woff",  variable: "--font-geist-sans",  weight: "100 900",});const geistMono = localFont({  src: "./fonts/GeistMonoVF.woff",  variable: "--font-geist-mono",  weight: "100 900",});
export const metadata: Metadata = {  title: "Create Next App",  description: "Generated by create next app",};
export default function RootLayout({  children,}: Readonly<{  children: React.ReactNode;}>) {  return (    <html lang="en">      <body className={`${geistSans.variable} ${geistMono.variable} antialiased dark`}>{children}</body>    </html>  );}
这样做是为了我们可以从共享 UI 包控制我们的应用程序 UI 样式和配置,这样如果我们创建另一个 Web 应用程序(例如管理仪表板),我们将拥有一致的样式!
要开始开发我们的应用程序,我们将按照以下规则组织我们的 Web 文件夹结构:仅在页面中使用的组件应位于 app 目录中与页面文件夹同级的名为 components 的文件夹中。应用程序共享组件应位于 src/components 文件夹中。
因此,让我们在 app 目录 src/app/components 中创建一个 components 文件夹(我们将创建一个仅在第一页中使用的组件),并创建一个名为 get-test.tsx 的文件,其中包含以下内容:
"use client";
import type { GetTestResponse } from "@monorepo/types";import { Card, CardContent, CardHeader } from "@monorepo/ui/components/card";import { cn } from "@monorepo/utils/styles";import { useEffect, useState } from "react";
const GetTest = () => {  const [test, setTest] = useState<string>("");
  useEffect(() => {    const fetchTest = async () => {      const response = await fetch("http://localhost:3001/test");      const data: GetTestResponse = await response.json();      setTimeout(() => {        setTest(data.message);      }, 3000);    };    fetchTest();  }, []);
  return (    <div>      <Card>        <CardHeader>          <h1 className={cn("text-xl text-yellow-500", test !== "" && "text-green-500")}>Get Test</h1>        </CardHeader>        <CardContent>          <p>{test}</p>        </CardContent>      </Card>    </div>  );};
export default GetTest;
看看该文件,我们有一个使用我们在共享类型中定义的类型化响应对服务器进行的简单提取,这使我们可以轻松地处理响应。服务器路由将很快定义。首先,让我们通过在我们的 page.tsx 中导入组件来完成 web 部分:
import GetTest from "./components/get-test";
export default function Home() {  return (    <div className="grid grid-rows-[20px_1fr_20px] items-center justify-items-center min-h-screen p-8 pb-20 gap-16 sm:p-20 font-[family-name:var(--font-geist-sans)]">      <GetTest />    </div>  );}
Web 设置完成后,转到 server 应用程序并使用我们将使用的路由更新 server.ts。在 app.listen 之前添加以下路由:
app.get("/test", (_, res) => { const testJson: GetTestResponse = { message: "Hello from Express API!", }; res.json(testJson);});最后,一切都完成了,你可以使用以下命令运行整个应用程序(记得将目录更改回根目录):
你将能够在页面上查看呈现的以下组件。

组件呈现后,我们会在 useEffect 中获取服务器并设置要呈现的状态(不需要 setTimeout,它只是为了可视化状态更改),然后你将看到以下内容。

总结
恭喜!你已经成功地设置了一个可扩展的 monorepo,其中包含两个应用程序——一个使用 Next.js 构建的前端,使用 Tailwind CSS 设置样式,通过来自 ShadCN 的可重用组件增强,以及一个 Express 后端——所有这些都使用 pnpm 工作区进行有效管理,以及由 Turbopack 提供支持的极快构建和使用 Biome 进行的几乎即时的校验!
以下是你今天完成的工作:
- 在一个仓库中创建了两个独立的应用程序。
- 设置了四个包,三个包含可重用代码,一个用于 typescript 配置。
- 使用 pnpm 工作区通过有效的依赖管理实践在应用程序之间链接这些包。
我们已经完成了本教程,现在你可以自由地发挥你的想象力,使用最好的 monorepo 架构创建任何你想要的东西