Frontend Developer's Notes on Learning Docker (Part 2)
Table of Contents 目录
Hi everyone, I’m Axing. In my previous post: Docker Tutorial for Front-End Developers (Part 1), I covered Docker basics and how to containerize and deploy a pure front-end project. But real-world projects always involve a backend. Below, I’ll use a project that requires Next.js + Redis as an example to get started with Docker Compose.
Running the Project Locally
First, let’s run the project locally. Just clone the repo with git:
git clone -b day1 git@github.com:mqyqingfeng/next-react-notes-demo.gitRun locally:
cd next-react-notes-demo && npm i && npm run devSince this project needs Redis, open a new terminal and run redis-server. If Redis is not installed, install it first.
Containerized Deployment
Using the knowledge from the previous post, let’s containerize and deploy both Redis and the Next.js project.
- Pull the Redis image:
docker pull redis - Stop the locally launched Redis, then start Redis with Docker:
docker run -p 6379:6379 redis redis-server. After stopping the local Redis, refreshing our project will show an error: Once Redis is started with Docker, it works again.
 - We’ve containerized Redis. Now we need to deploy the Next.js project in its own container. But each container is an isolated space. At this point, the Next.js service that will be containerized cannot access our Redis service. So we need to connect the two containers. Docker can connect multiple containers by adding them to a custom Docker network.
Docker supports custom networks. Here we use a bridge network to connect multiple containers, enabling communication between them!
- Create a custom Docker network:
docker network create -d bridge react-notes
-d bridge: specifies the Docker network type, options includebridgeandoverlay.react-notesis the name of our custom network.
- Stop or delete the previously started Redis container and run a new Redis container connected to the
react-notesnetwork:
docker run -p 6379:6379 --network react-notes redis redis-server- Find the IP address of the Redis container:
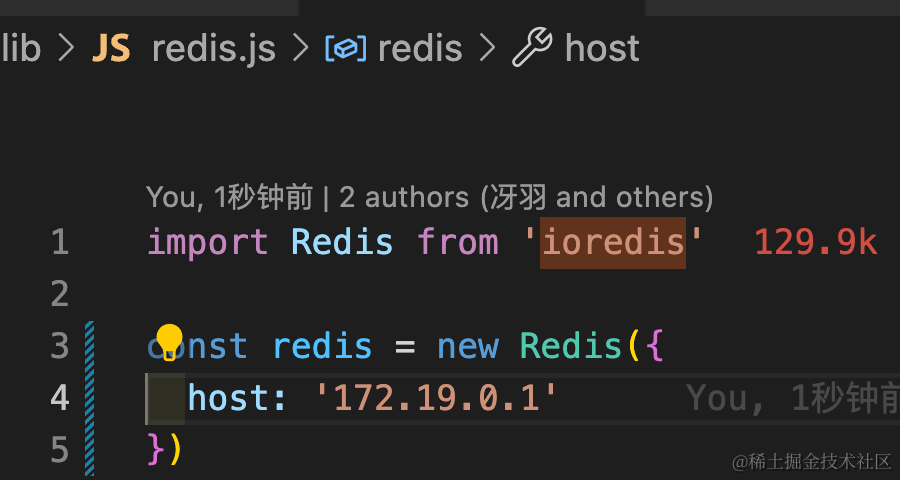
docker network inspect react-notes. Get theIPv4Addresshost and set it as the Redis host inlib/redis.js.
- Create a Dockerfile for the Next.js project. The previous post explained the meaning of each command:
FROM node:18-alpineWORKDIR /appCOPY . .RUN npm install --registry=https://registry.npmmirror.comCMD npm run build && npm startEXPOSE 3000- With the Dockerfile, we can build the image. Run:
docker image build -t next-react-notes-demo:0.0.1 . - Run the built image to create an instance:
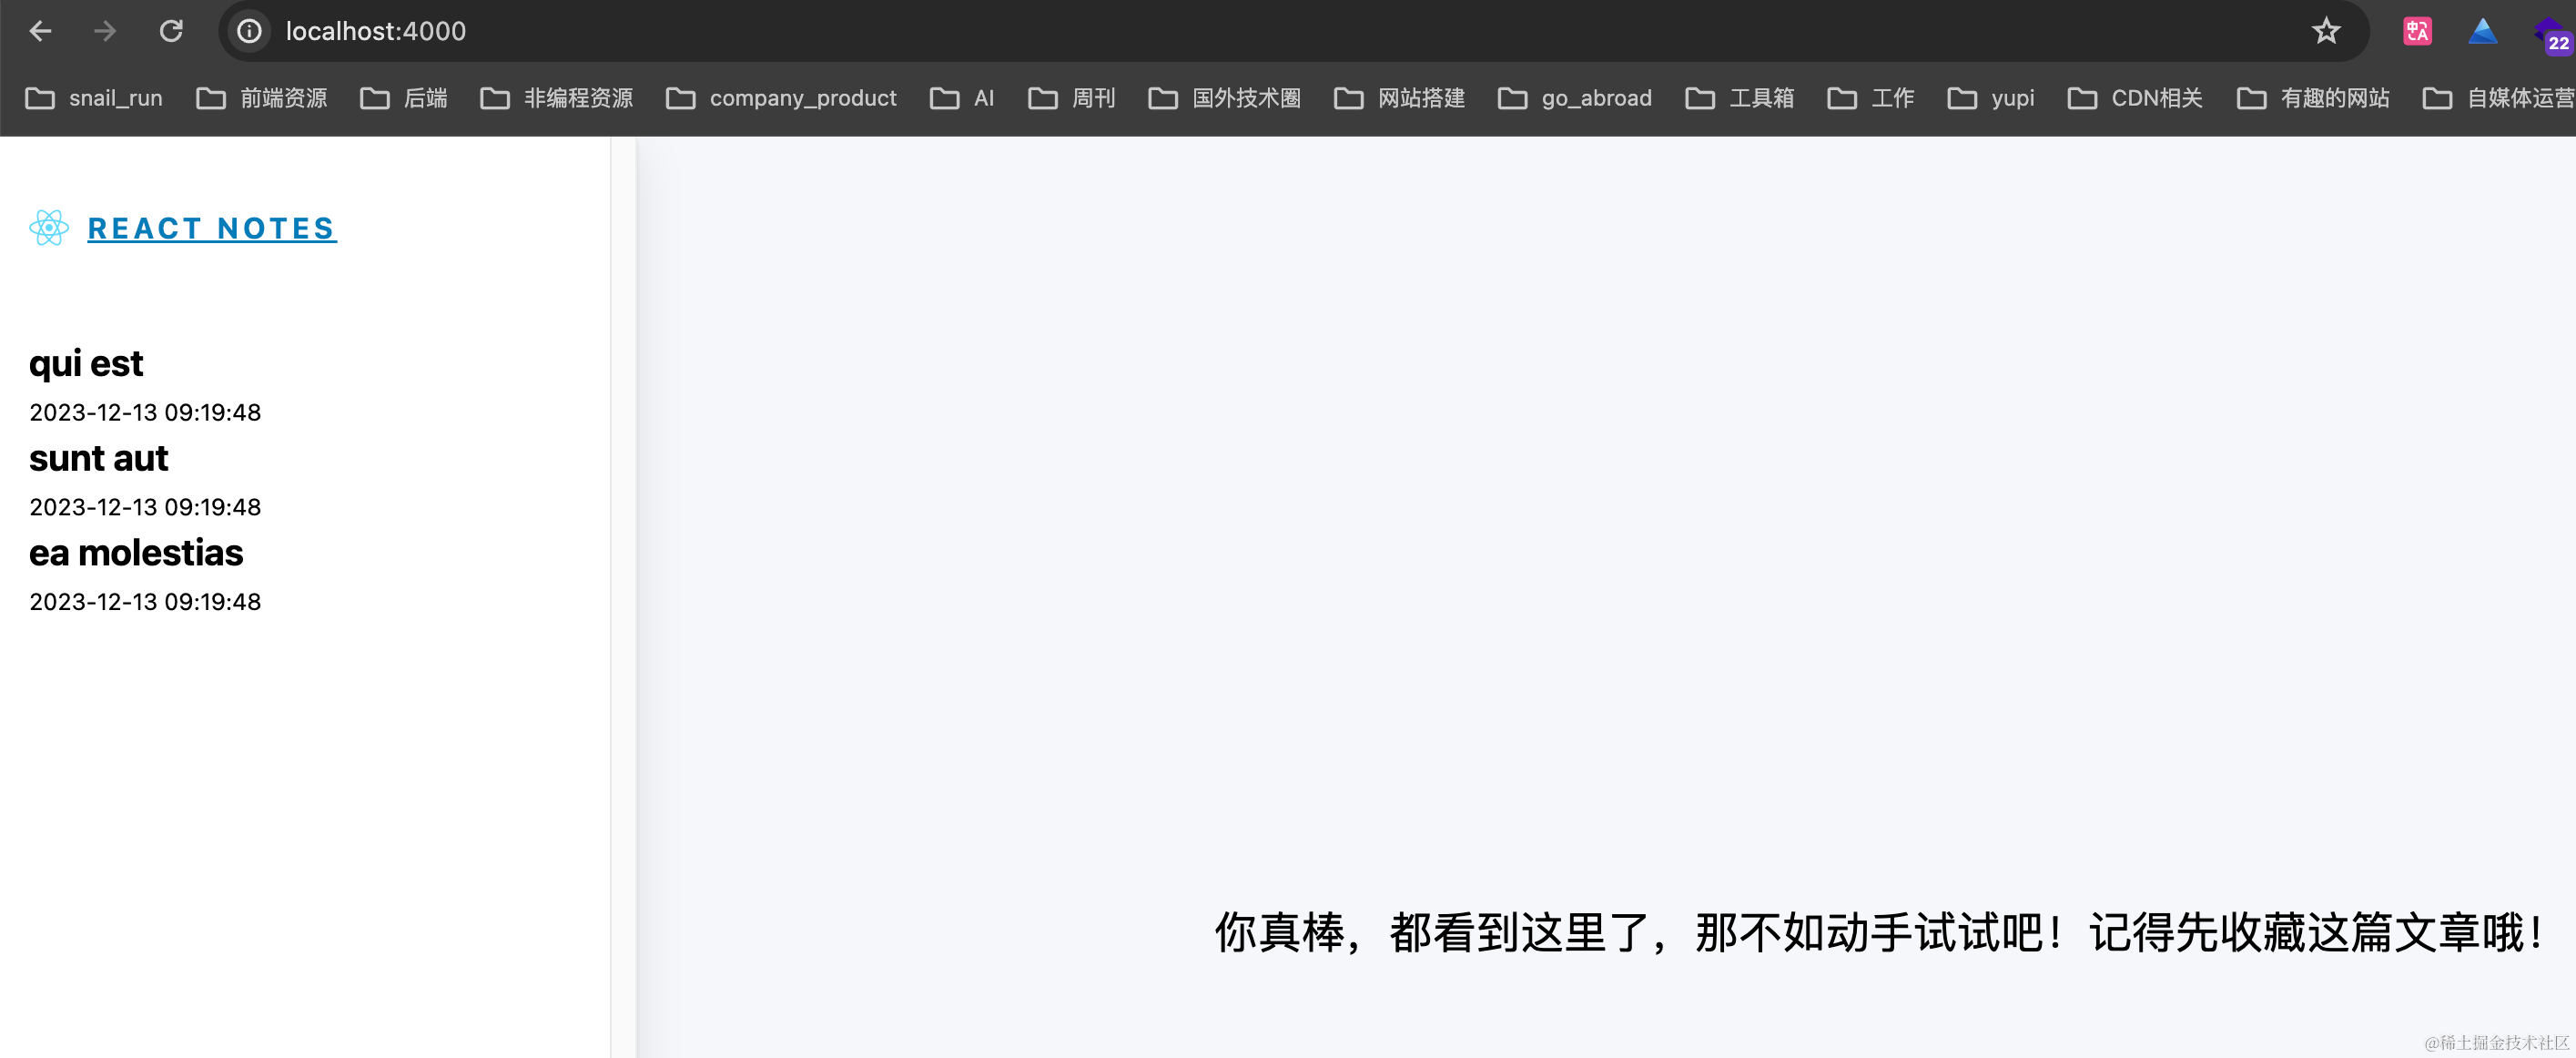
docker run -p 4000:3000 --network react-notes next-react-notes-demo:0.0.1. Visit http://localhost:4000 locally, and we should see the page. But setting up the network this way and configuring each container individually is quite tedious, right? That’s where Docker Compose comes in to help us manage multiple containers.
Docker Compose
Docker Compose is a tool for defining and running multi-container Docker applications. By writing a
docker-compose.ymlfile, you can define all services, networks, and volumes in it, then start and manage these services with a single command.
Three core concepts:
- Service: the container, e.g., the frontend web service and Redis service above.
- Network: Docker Compose creates a default network to connect all services, but you can also define custom networks.
- Volume: used to share and persist data between services (containers). You can create data volumes at the top and assign them to services.
First, check if Docker Compose is installed (it’s usually included with Docker Desktop):
docker-compose --version# Should see something like: Docker Compose version v2.27.0-desktop.2Let’s write the docker-compose.yml file (for explanations of the template file directives, refer to https://yeasy.gitbook.io/docker_practice/compose/compose_file):
# Use Docker Compose file format version 3.8. This version supports new features and properties while ensuring compatibility with the Docker engine.version: '3.8'# Defines all services for the application, each service corresponds to a container.services: # Service name, can be any string. Here it's the Redis service. redis: # Specify the image; pulls it from Docker Hub. image: redis # Map container port 6379 to host port 6379. This allows accessing Redis on the host via port 6379. ports: - '6379:6379' # Specify the command to run when the container starts. Here it's redis-server, which starts the Redis server. command: redis-server # Next.js frontend web service nextapp: # Build the image from the current directory. The nextapp service image will be built using the Dockerfile in the current directory. build: . # Map container port 3000 to host port 4000. ports: - '4000:3000' # nextapp service depends on the redis service. This means Docker Compose will start redis before starting nextapp. depends_on: - redisI added comments for each line. Remember to remove the comments when using, otherwise there might be issues. We also need the previously created Dockerfile, and we need to modify redis.js:
const redis = new Redis({ host: 'redis' // Use the service name defined in docker-compose.yml});Now run the Docker Compose script from the command line: docker-compose up. docker-compose up automatically handles:
- Building images
- (Re)creating services
- Starting services
- Connecting related service containers
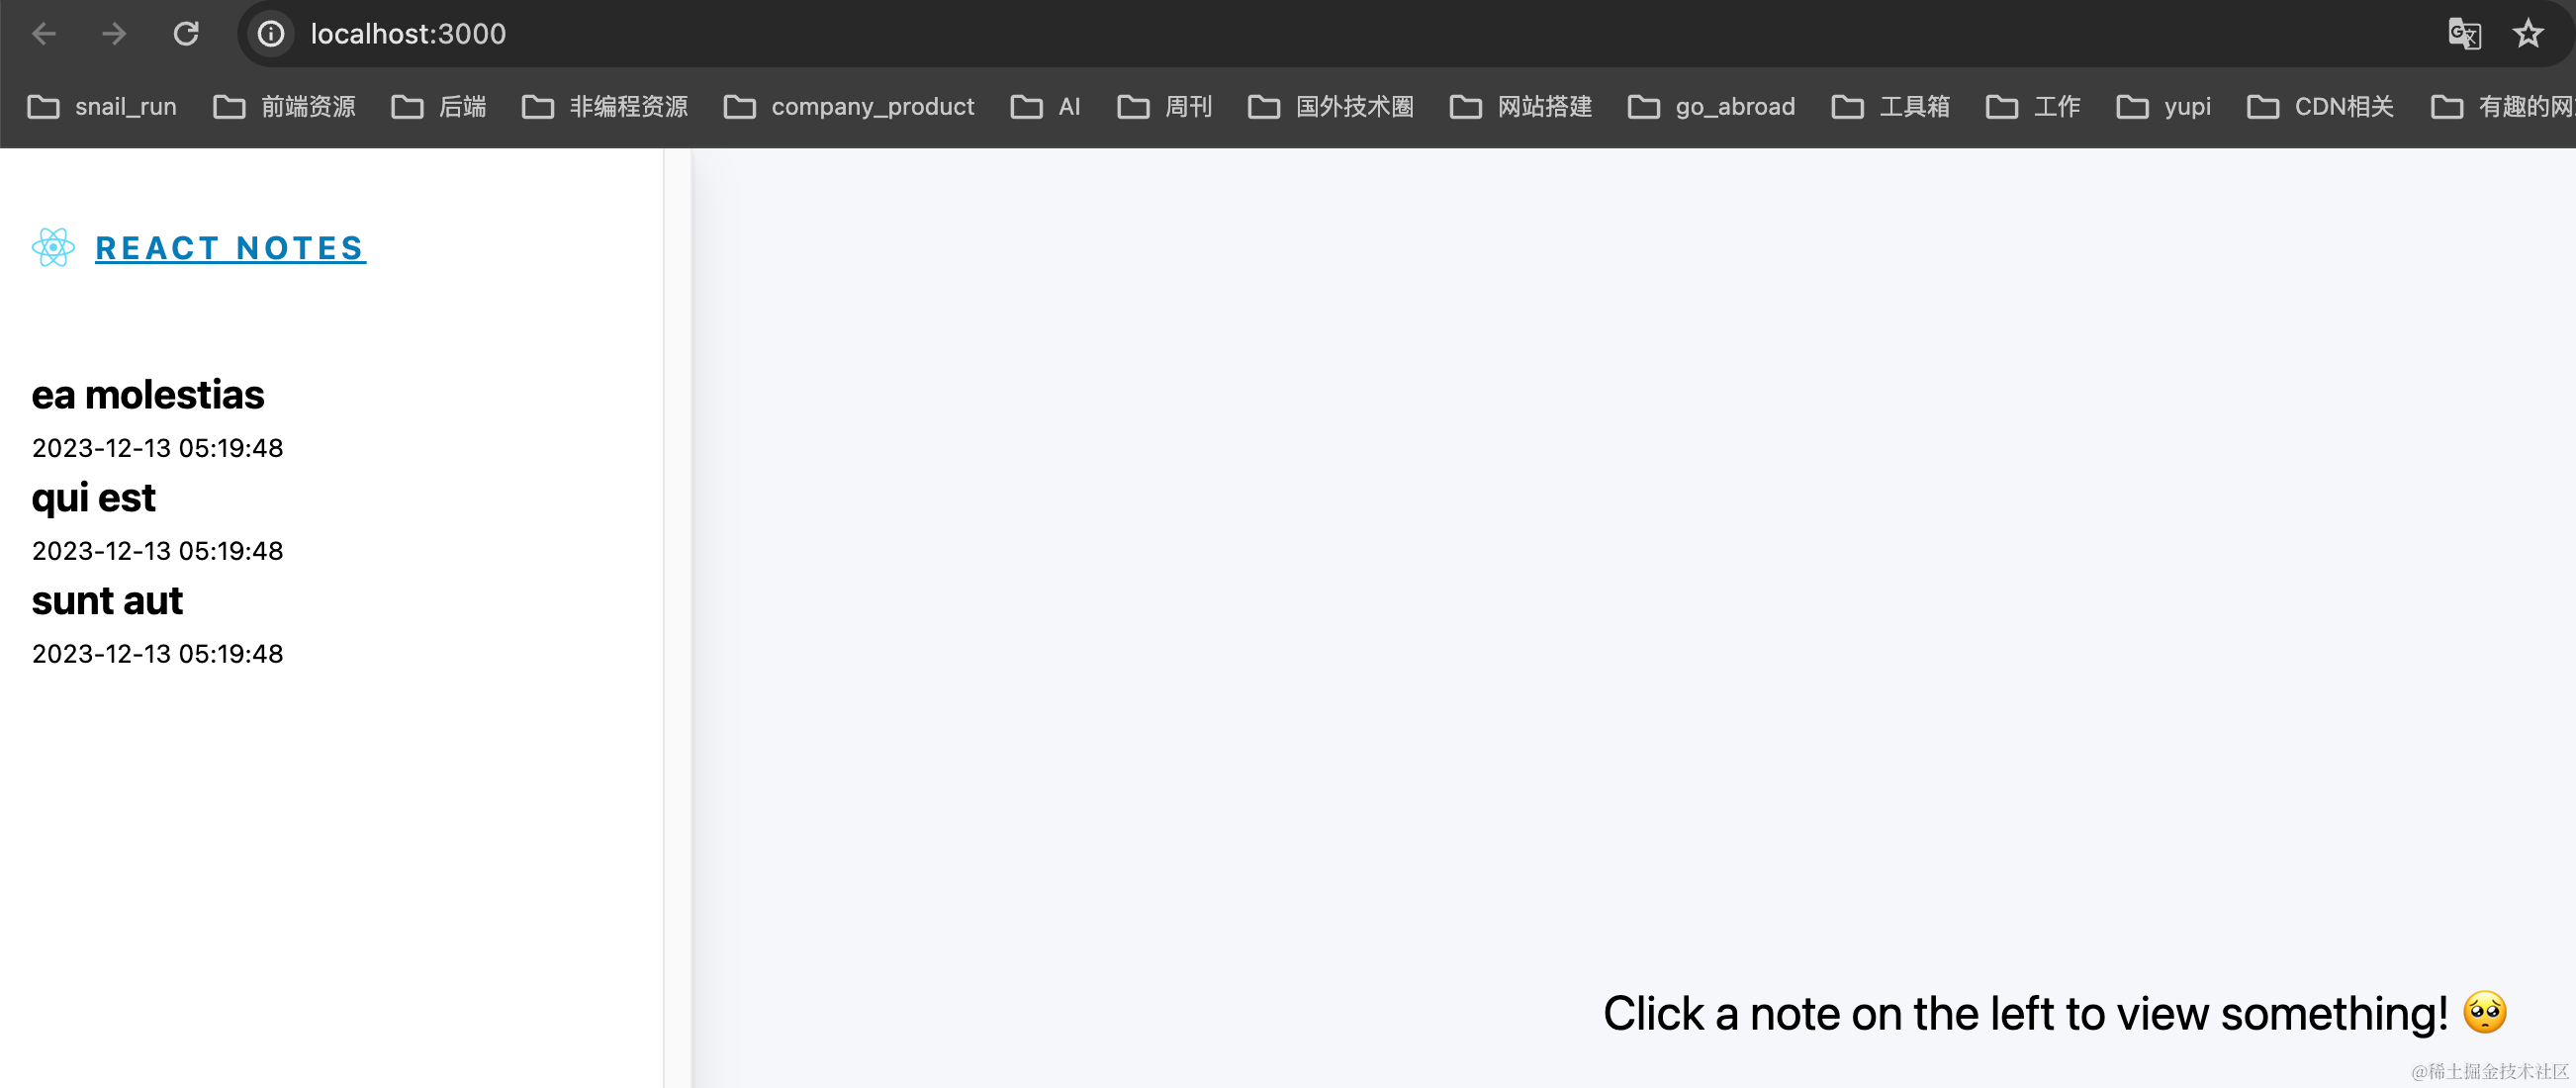
Our project should now be running. Visit http://localhost:4000 again, and we’ll see:
Everything we did manually before is now handled with just one command. Great! If using Docker Compose saves 1 minute per deployment (probably more!), think of the total time saved for everyone using Docker. That’s the beauty of technology—more time to play games!
But there’s still a problem: the data in Redis is stored inside the container. If the container is destroyed, the data disappears too. For production, that’s unacceptable. Data is the most important thing. We need to synchronize and back up the container’s data to the host, so even if the container is destroyed, the data persists. This requires volumes. Let’s continue.
Volumes
Volumes are a mechanism provided by Docker for sharing data between containers and the host. Volumes exist independently of the container’s lifecycle, meaning even if the container is deleted, the data in the volume is not lost. Their features:
- Persistence: Volume data persists until explicitly deleted, even if the container is removed.
- Sharing and Reuse: Volumes can be shared and reused across multiple containers.
- Backup and Recovery: Volumes can be easily backed up and restored.
- Performance: Volumes perform better than storing data directly inside containers.
In the deployment above, Redis data is not stored on the host. Let’s verify:
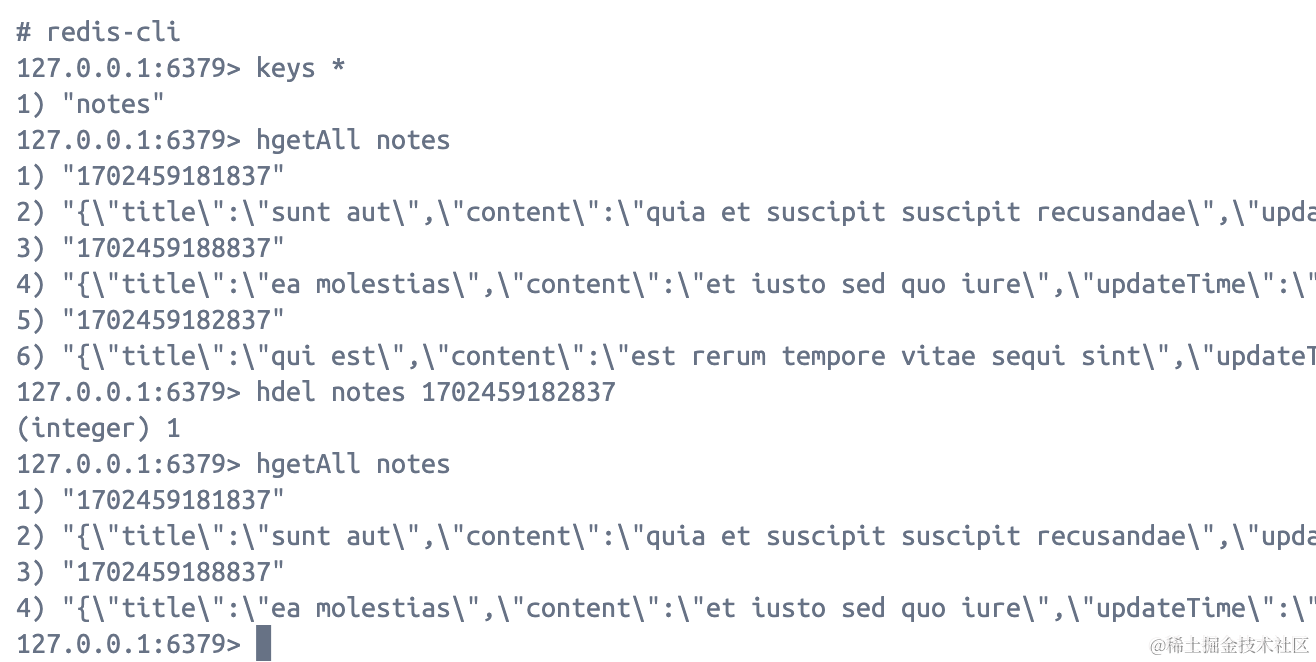
# Find the container ID of the Redis containerdocker container ls# Enter the container (here, the Redis container)docker exec -it 6ddf48e06645 bashTerminal output:

Run some Redis commands to delete a piece of data:
redis-clikeys *hgetAll noteshdel notes 1702459182837hgetAll notes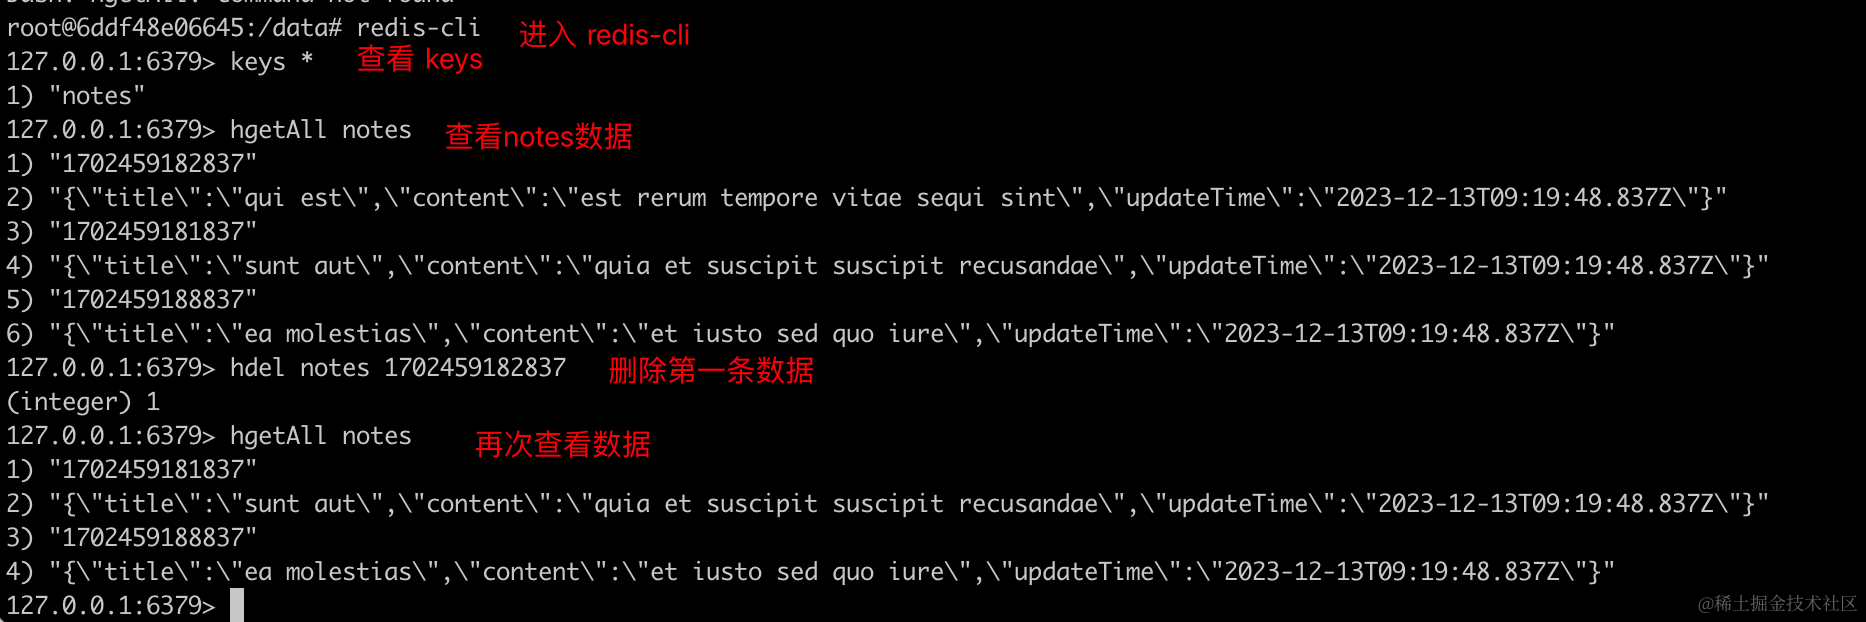
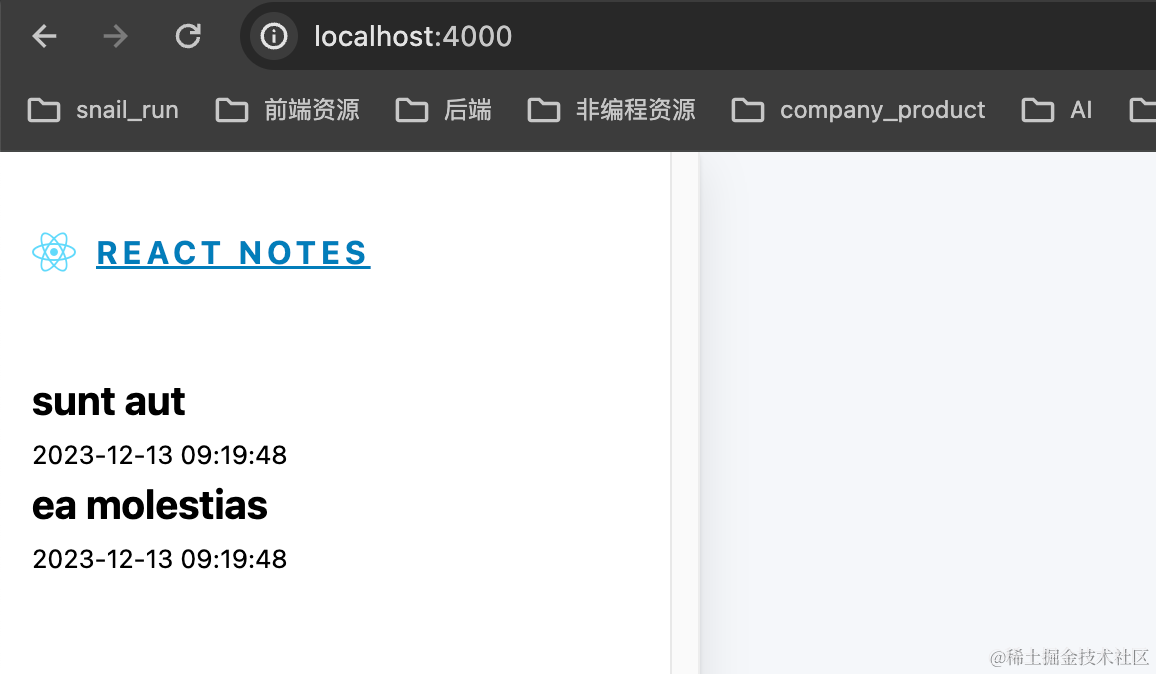
# Find the container ID of the Next.js containerdocker container ls# Restart the Next.js containerdocker container restart 74776b12c032We see:
Now, if we delete all containers (including Redis) and run again: first docker-compose down, then docker-compose up.
We’ll see that the data is back to three entries. If I want the deletion to persist, I need to use volumes. Volumes store data in a region of the host filesystem. Let’s create a folder named redis in the project root directory and modify docker-compose.yml as follows:
version: '3.8'services:
  redis:    image: redis    ports:      - '6379:6379'    command: redis-server    volumes:      - ./redis:/data
  nextapp:    build: .    ports:      - '4000:3000'    depends_on:      - redis
./redis:/data is split by :; the left side is the host path, the right side is the container path. You’ll see this pattern often: left is host info, right is container info.
With this configuration, data in the container is synced to the host, achieving data persistence.
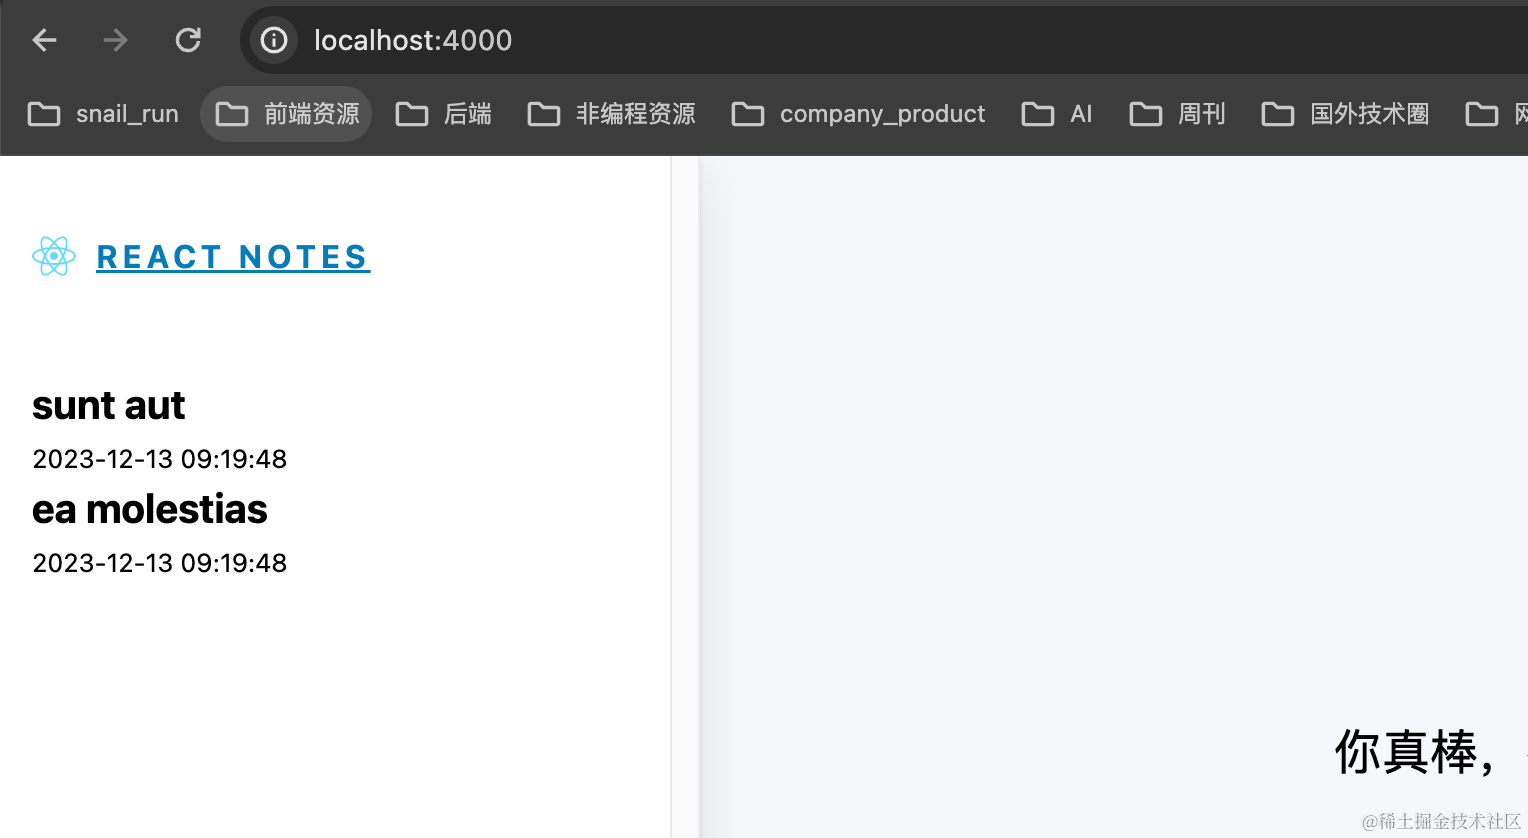
Delete the old image and rebuild, because data is now persistent. Repeat the earlier operation: open the page again; if the data shows only two entries, the volume has taken effect. Let’s try it!
# List imagesdocker image ls# Delete the imagedocker rmi next-react-demo-nextapp# List images againdocker image ls# Re-run docker composedocker-compose up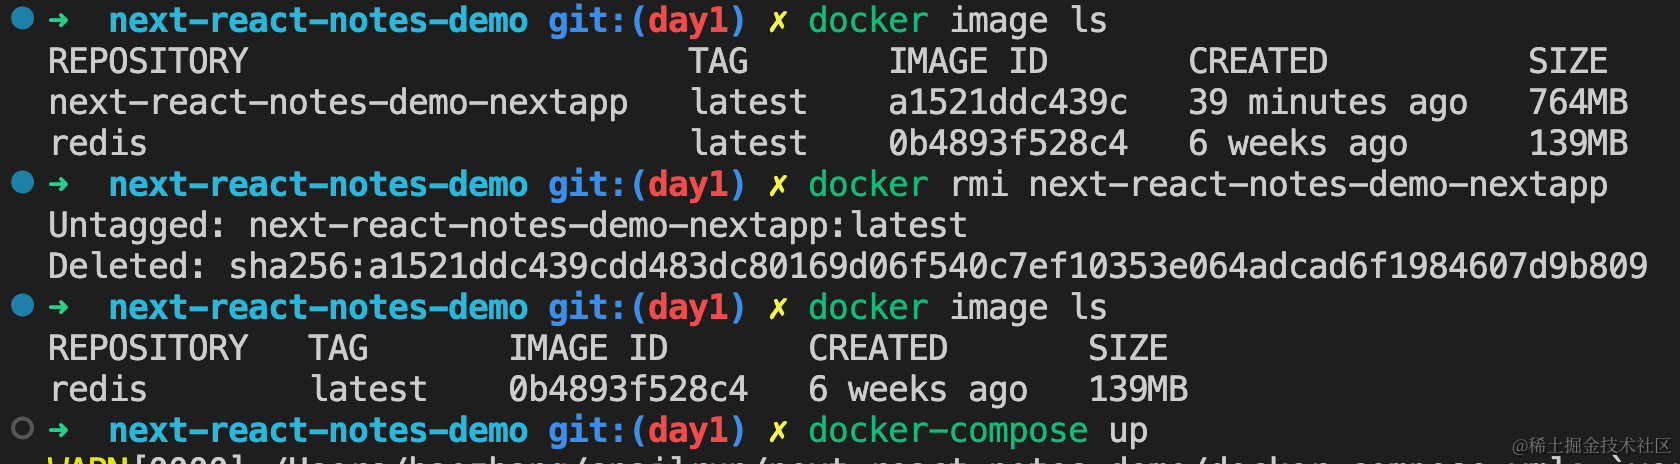
Delete data:
Restart the nextapp container, then refresh http://localhost:4000:
Now stop all containers, then restart. The data will still be two entries. Data persistence is achieved!
If you’re observant, you’ll notice a new file in the host’s redis directory:
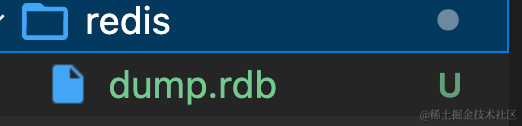
This file is a binary file—it’s a full backup of Redis data. When docker-compose up runs, Redis reads and loads this file, achieving persistence.
dump.rdb is a manifestation of Redis’s persistence mechanism. Redis has two persistence mechanisms:
- RDB (Redis Database): a snapshot, the default.
- AOF (Append Only File): enabled by passing
--appendonlywhen starting a Redis container.
Other Volume Commands
- Create:
docker volume create my-vol - List:
docker volume ls - Inspect (show host path):
docker volume inspect my-vol
Create a volume in docker-compose.yml:
version: '3.8'# Create a data volume named redis-datavolumes:  redis-data:
services:
  redis:    image: redis    ports:      - '6379:6379'    command: redis-server    # Mount the volume to the container    volumes:      - redis-data:/data
  nextapp:    build: .    ports:      - '4000:3000'    depends_on:      - redis
That’s it for this section. But there are still two problems with this deployment:
- The built Next.js image is very large—we need to optimize.
- Currently, it’s only accessible locally. We deploy to make it accessible to everyone, but that’s not achieved yet.
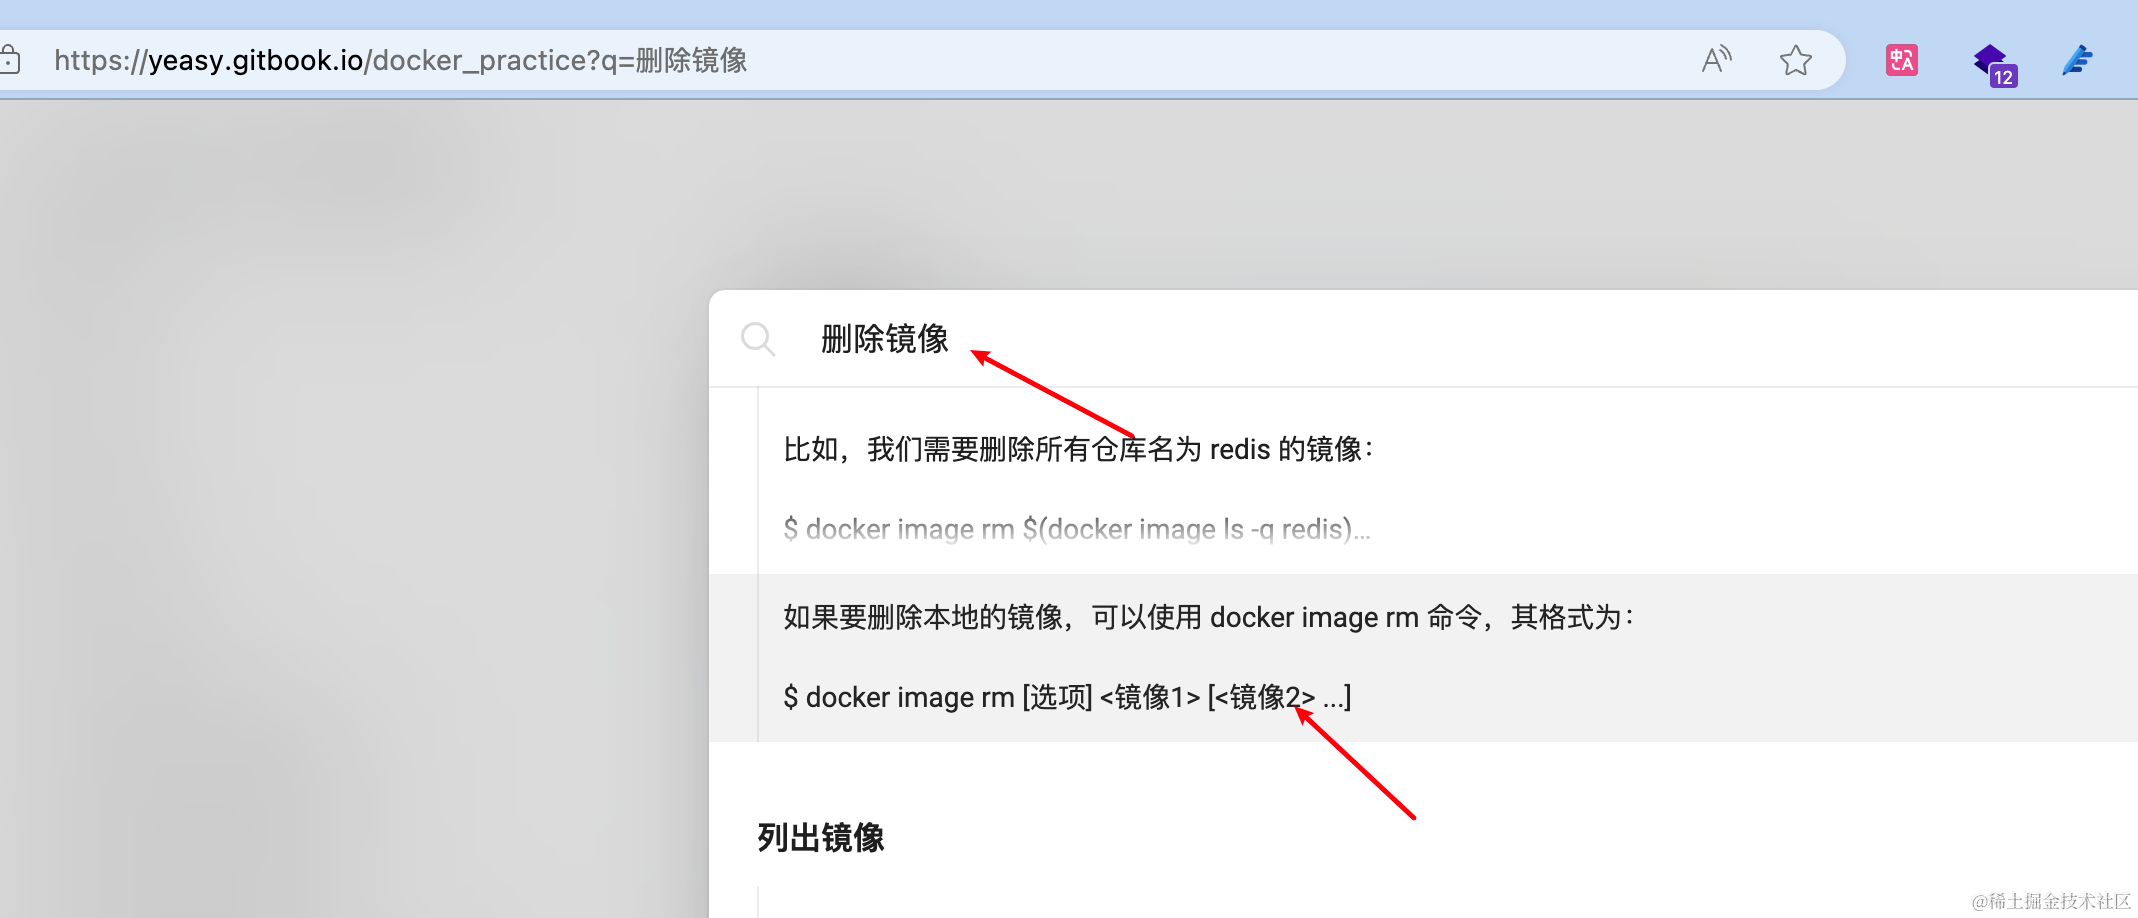
In the next section, we’ll dive deeper into Docker to solve these two problems. I’ve noticed that there are many Docker commands, and if you don’t use them often, it’s hard to remember (though Docker Desktop can help with quick operations). If you forget a command, I recommend this Chinese documentation—a comprehensive handbook: https://yeasy.gitbook.io/docker_practice. You can quickly find the code you need.