Frontend Programmer's Notes on Learning Docker (-)
Table of Contents 目录
Hi, I’m A-Xing. Our company recently used Docker for project deployment, but I didn’t know Docker yet. So I patched that knowledge gap and wrote some notes to record my learning—because the best way to learn is to teach! Since I’m a frontend developer, I’ll be sharing my Docker learning from a frontend perspective.
What is Docker?
Official explanation: “Accelerate how you build, share, and run applications. Docker helps developers build, share, run, and verify applications anywhere — without tedious environment configuration or management.” In plain English: It speeds up building, sharing, and running applications. Docker helps developers build, share, run, and verify applications anywhere, without tedious environment configuration or management.
Why Docker?
Knowing what Docker is still might not answer what it’s for. Let me give an example: Developer Zhang built a web app locally and it worked perfectly. Now Zhang wants to deploy it to a remote server so everyone can see it. Zhang would need to create an environment on the remote server identical to the local one — database, web server, etc. Even if those environments match, the software might not run because the server’s operating system differs from the local one. To simulate the exact local development environment, one might think of using virtual machines, but VMs simulate hardware and run an entire operating system, which has several drawbacks:
- Bloated size
- High memory usage
- Degraded application performance
That’s where Docker comes in. Docker is very similar to a virtual machine, but much lighter. It doesn’t simulate low‑level hardware; it provides a completely isolated runtime environment for each application. Inside that environment you can configure different tools and software, and different environments don’t interfere with each other. This environment is called a container in Docker.
Four Important Concepts in Docker
- Dockerfile: Like an automation script, it’s mainly used to create images. Think of it as installing an OS and software in a VM — the Dockerfile automates the installation so you don’t need to do it manually.
- Image: A Docker image is a special filesystem that, besides providing the programs, libraries, resources, and configuration files needed at container runtime, also contains some runtime‑ready configuration parameters (e.g., anonymous volumes, environment variables, users). The image contains no dynamic data, and its content never changes after building. You can think of it as a snapshot of a VM.
- Container: From an image, we can create many different containers. Think of a container as a running VM that runs your application. Each container runs independently and they don’t affect each other.
- Repository: After building an image locally, you can push it to a remote repository. Repositories can be public or private. The largest public repository is Docker’s official Docker Hub. This is very similar to Git — the largest public Git repository is GitHub.
The relationship between an image and a container is like that between a class and an instance in object‑oriented programming: the image is a static definition, and the container is the runtime entity of the image. Containers can be created, started, stopped, deleted, paused, etc.
Practice
The following demonstrations are all based on Windows 11.
Installing Docker Desktop
If you’re on Windows or Mac, you can download an app called Docker Desktop from the official site. On Windows 10 or later, you can use WSL2 (Windows Subsystem for Linux) to run Docker. Just follow the documentation step by step.
Note: To run Windows containers, you need Windows 10 or Windows 11 Pro or Enterprise. Windows Home or Education only allows you to run Linux containers.
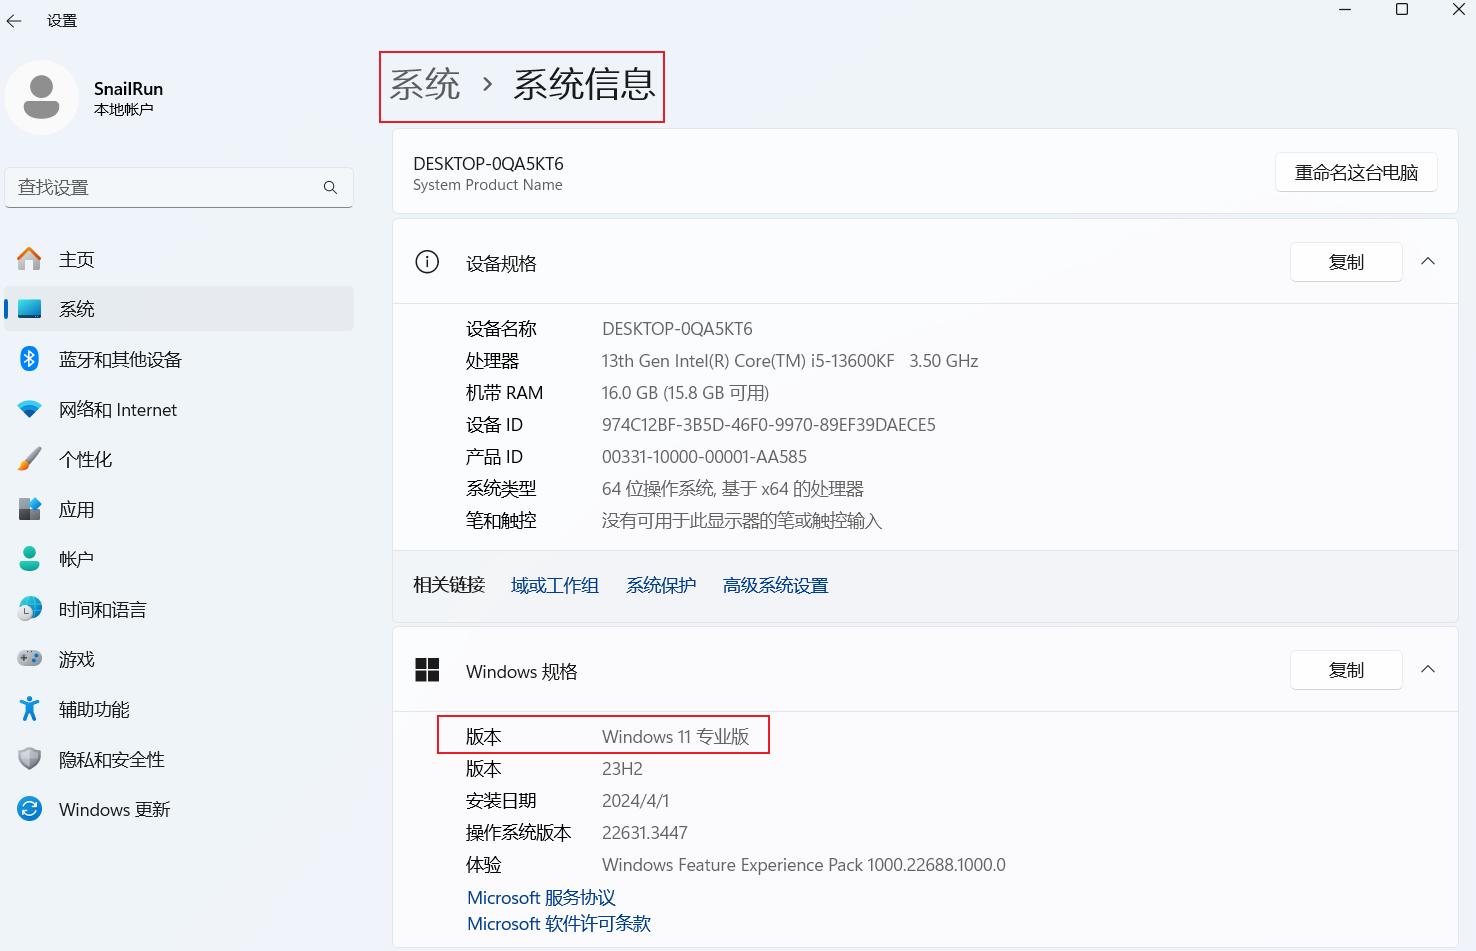
Check your system:
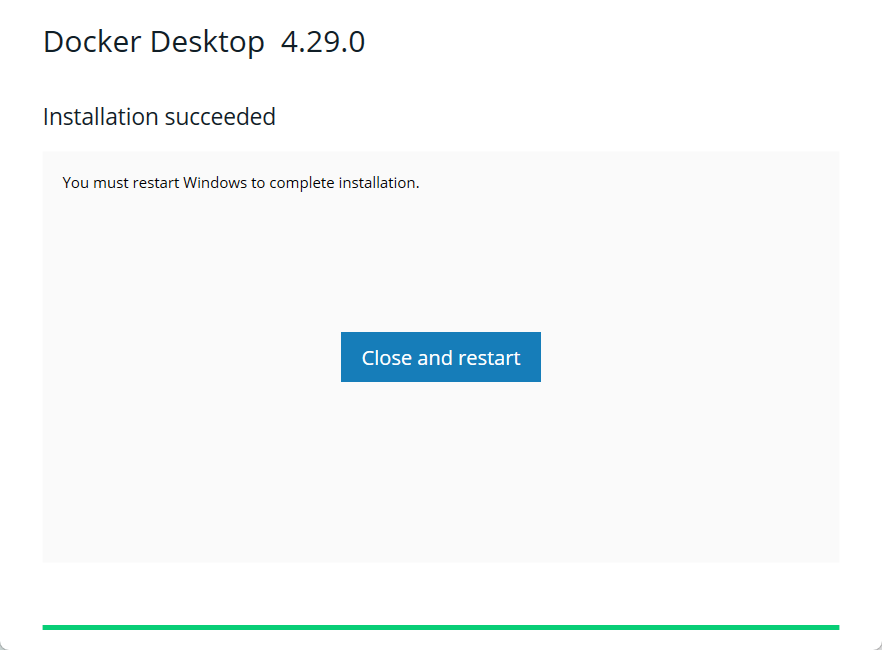
 Windows 11 Pro environment installation success screen:
 After installation, verify from the command line:
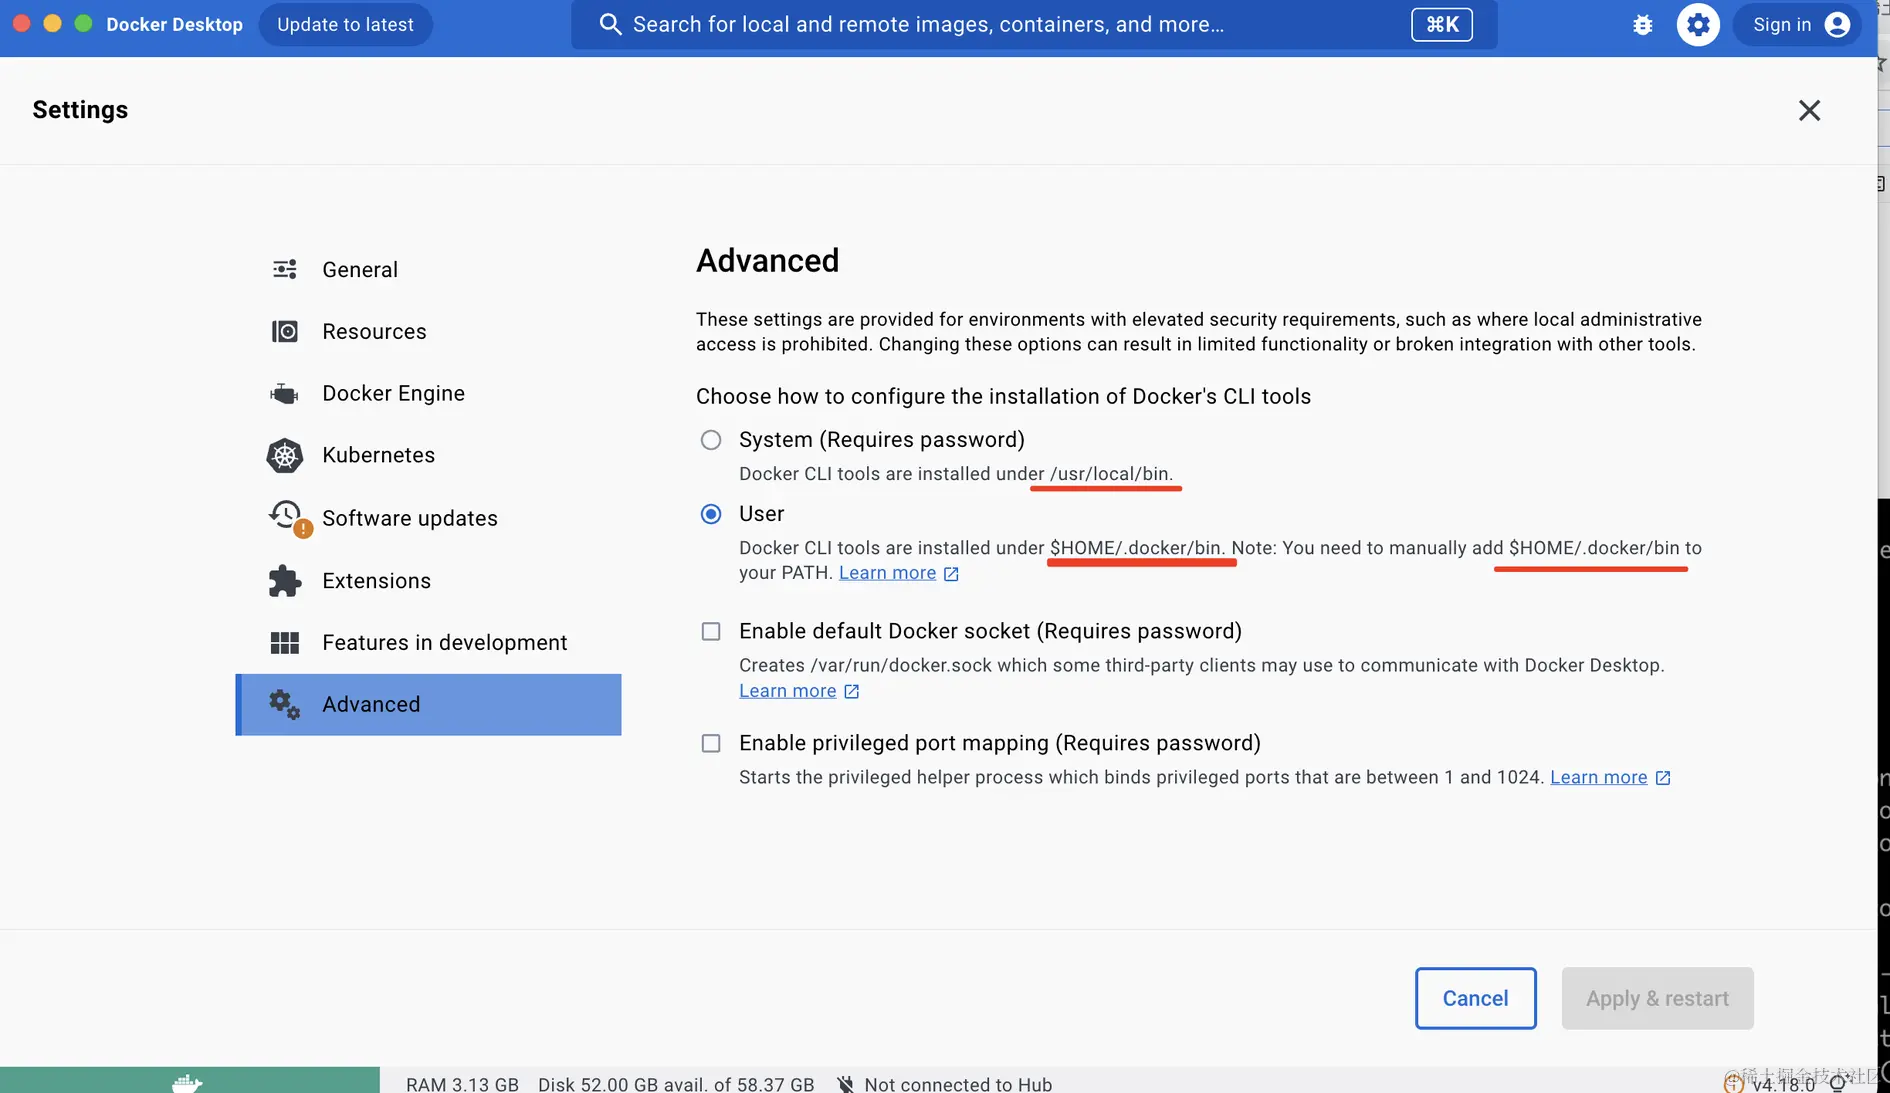
 If it doesn’t work, you might need to configure this:
 Pulling images from Docker Hub inside China can sometimes fail, so you can configure a mirror accelerator. Useful mirrors can be found at: gist.github.com/y0ngb1n/7e8…. You can:
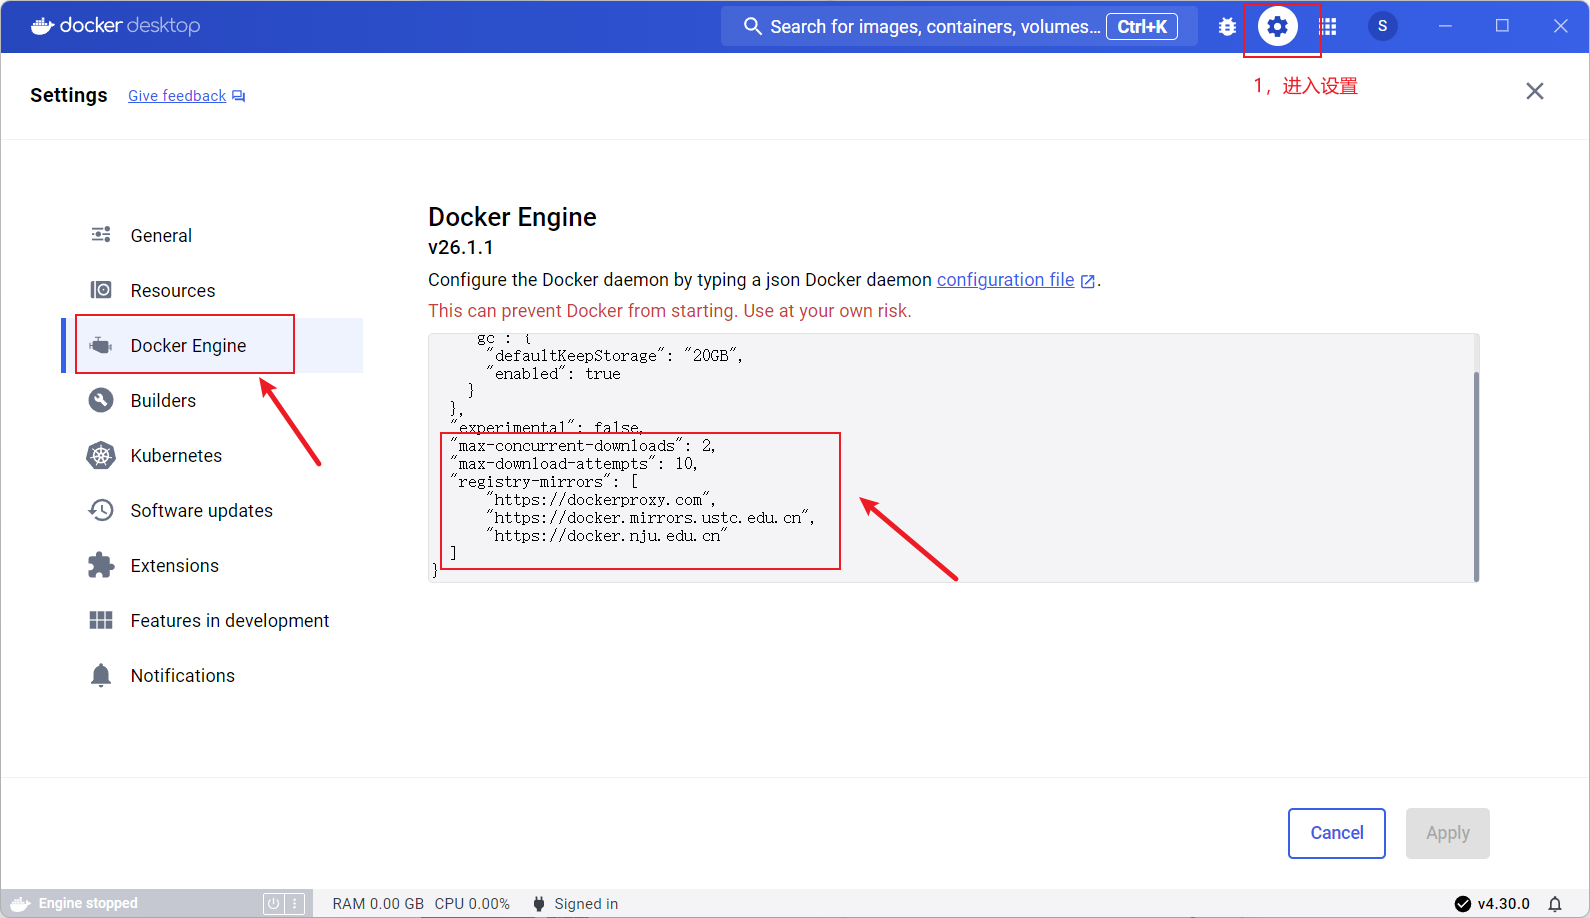 Here’s the config:
{ // ... "max-concurrent-downloads": 2, "max-download-attempts": 10, "registry-mirrors": [ "https://dockerproxy.com", "https://docker.mirrors.ustc.edu.cn", "https://docker.nju.edu.cn" ] // ...}Getting Familiar with Docker Desktop
If after opening it looks like this, refer to this to fix it:

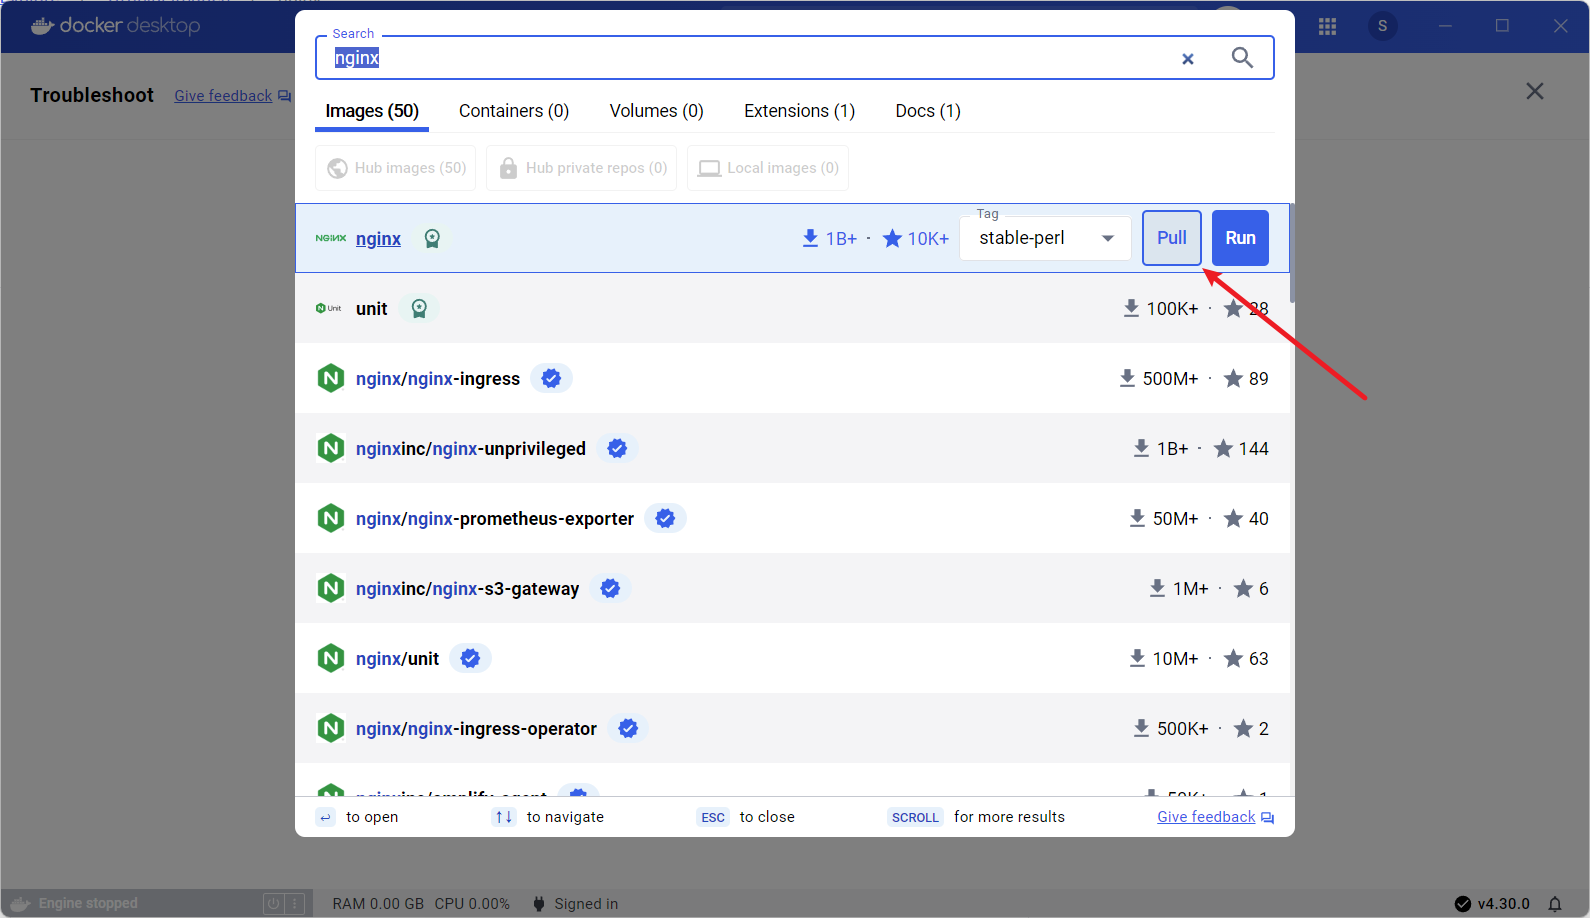
Search & pull images (may need VPN/proxy):
Docker Deploying a Next.js Project
If you use VSCode, you can install the Docker extension. It provides code hints for Dockerfile and docker-compose.yml files, and through the Docker Explorer view you can intuitively manage Docker resources such as containers, images, volumes, networks, and registries. You can directly perform Docker operations like starting/stopping containers, viewing logs, and much more.

Here, I use VSCode as my editor. I create a Next.js project with npx create-next-app@latest, then modify the code as follows:
Now add a Dockerfile to this project:
- Create a
.dockerignorein the root directory. It works like.gitignore, excluding unnecessary files and directories to reduce image size and improve build efficiency. Write:
Dockerfile.dockerignorenode_modulesnpm-debug.logREADME.md.nextdocker.git- Create a
Dockerfilein the root directory and write the following (recommended to use VSCode with Docker extension):
FROM node:18-alpineWORKDIR /appCOPY . .RUN npm install --registry=https://registry.npmmirror.com && npm run buildCMD npm startEXPOSE 3000A Dockerfile is a text file used to custom‑build images. Each line is an instruction. See the documentation for all instructions and their meanings. A quick explanation of the above:
FROMspecifies the base image. When you custom‑build an image, you start from a base image and customize on top of it.FROMis mandatory and must be the first instruction. Here we usednode:18-alpinefollowing Next.js’ official Docker example.WORKDIRsets the working directory for all subsequent Docker commands. If the directory doesn’t exist, WORKDIR creates it.COPYcopies files into Docker. The first dot is the local path, the second dot is the target path (container‑relative or absolute). Here it means: copy all files from the current directory into/app.RUNexecutes shell commands. You can run any shell command. Here we install project dependencies.CMDsets the default command for the container. There can be multiple RUN instructions, executed during image build. There can only be one CMD, executed after the container starts. As mentioned earlier, a container is a process. When starting a container, you need to specify the program and arguments to run. CMD defines the default main process.EXPOSEdeclares which port the container listens on at runtime. It’s just a declaration — it doesn’t actually open that port inside the container, but it helps users understand which port to map.
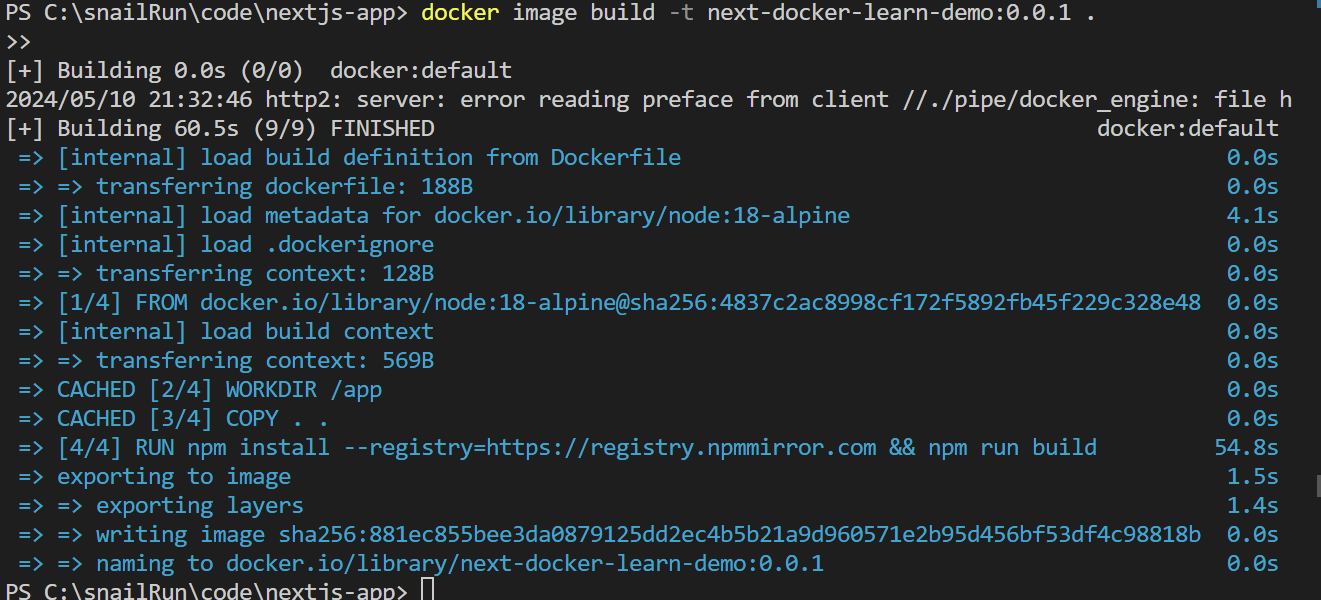
Go to the project root directory and run docker image build -t next-docker-learn-demo:0.0.1 . to build the image. You’ll see:
Explanation of the build parameters:
-tgives the image a name; you can optionally add a tag after a colon. If omitted, the default tag islatest. Don’t forget the trailing dot.— it tells Docker the build context is the current directory and that the Dockerfile is there.
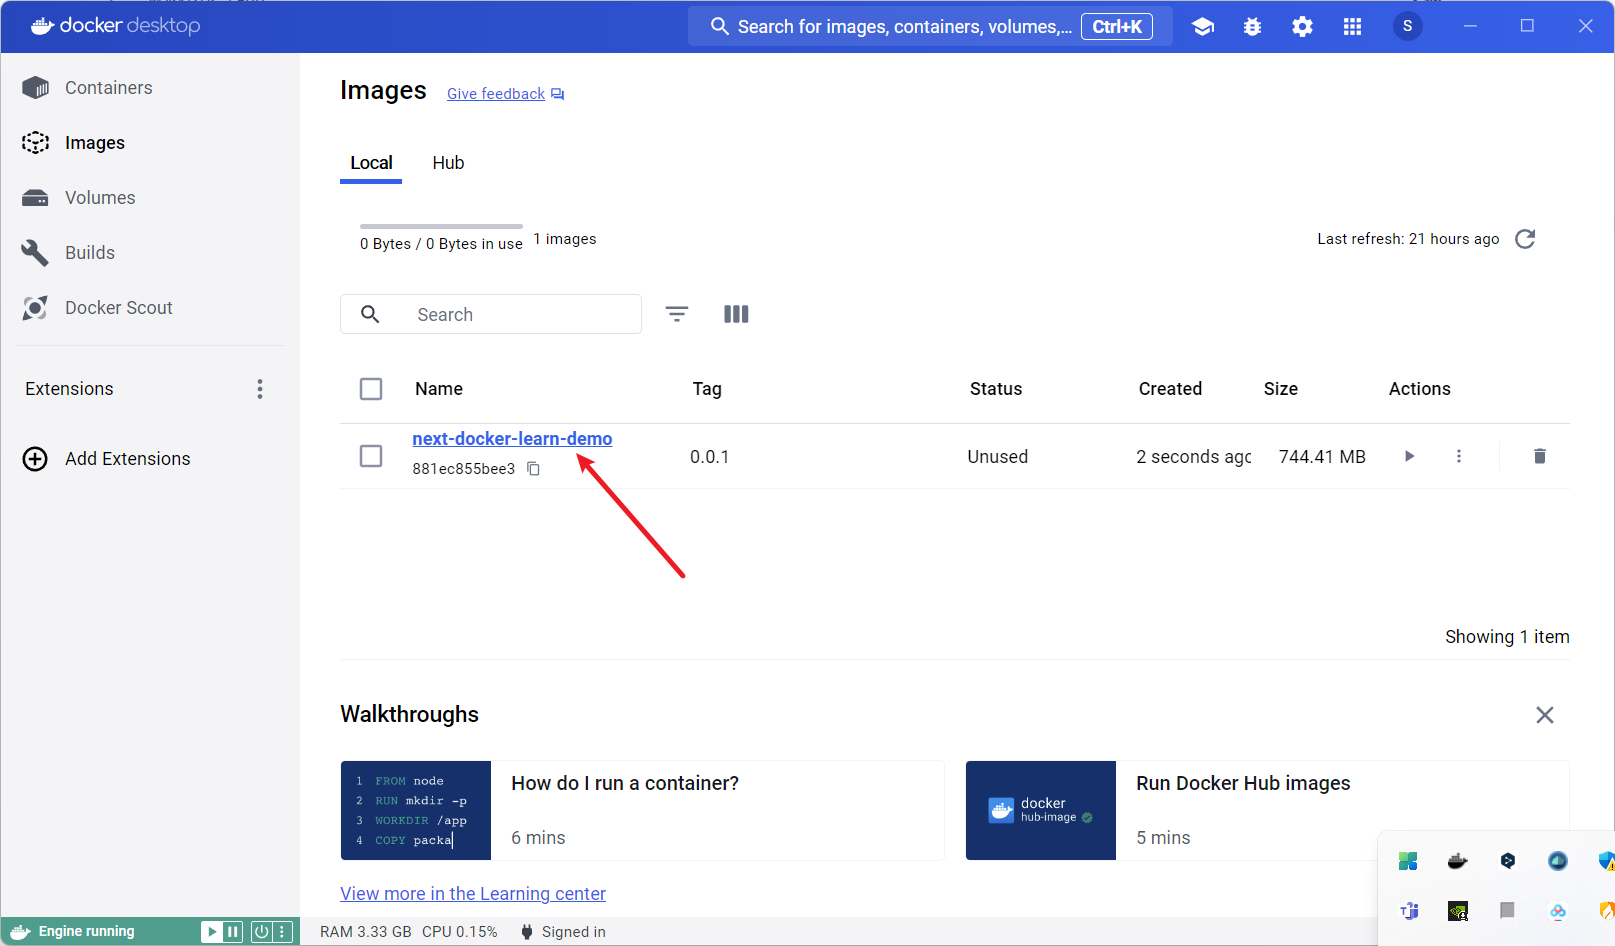
The first build may be slower, but subsequent builds are much faster because Docker caches each layer. After building, you can view it in the Docker client:
You can also run docker images locally to list images:

Now that we have an image, we use docker run to create and start a new container instance. From the terminal:
docker run -p 4000:3000 next-docker-learn-demo:0.0.1-pmaps ports:<host port>:<container port>. Here, container port 3000 is mapped to host port 4000.next-docker-learn-demo:0.0.1specifies the Docker image (name:tag ).
You can also run it from the Docker client. Fill in the parameters:

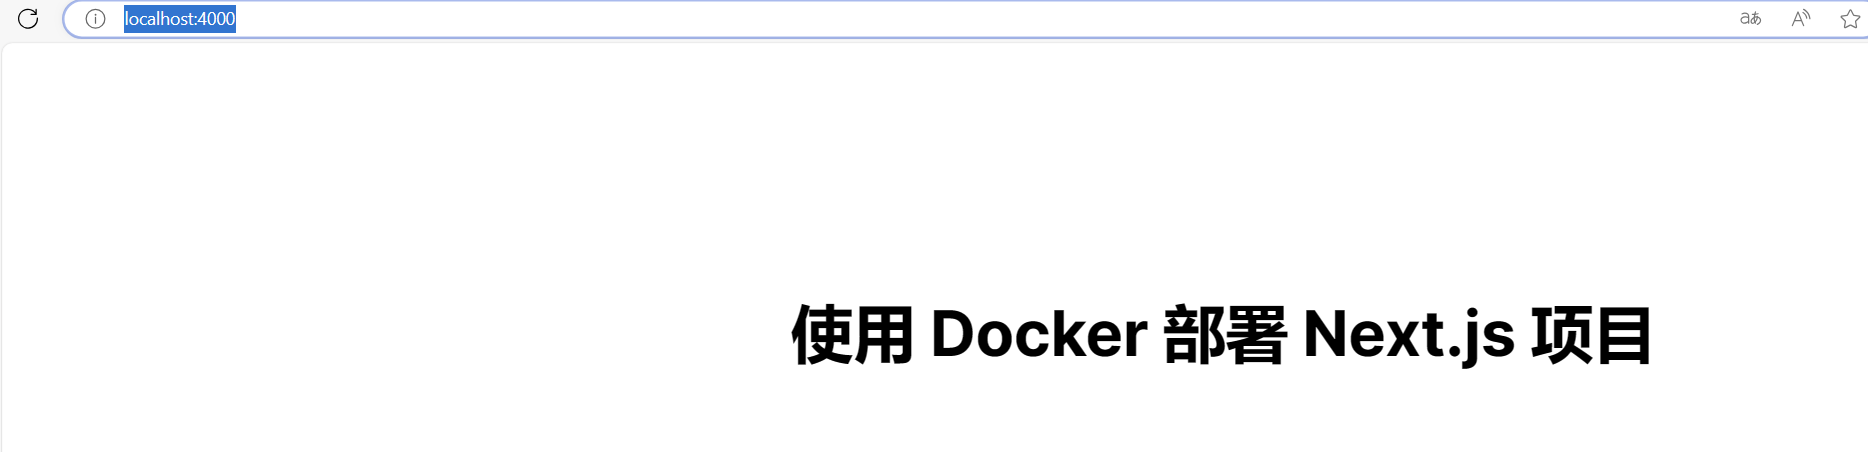
Visit http://localhost:4000
/ locally:
Check the Docker client:
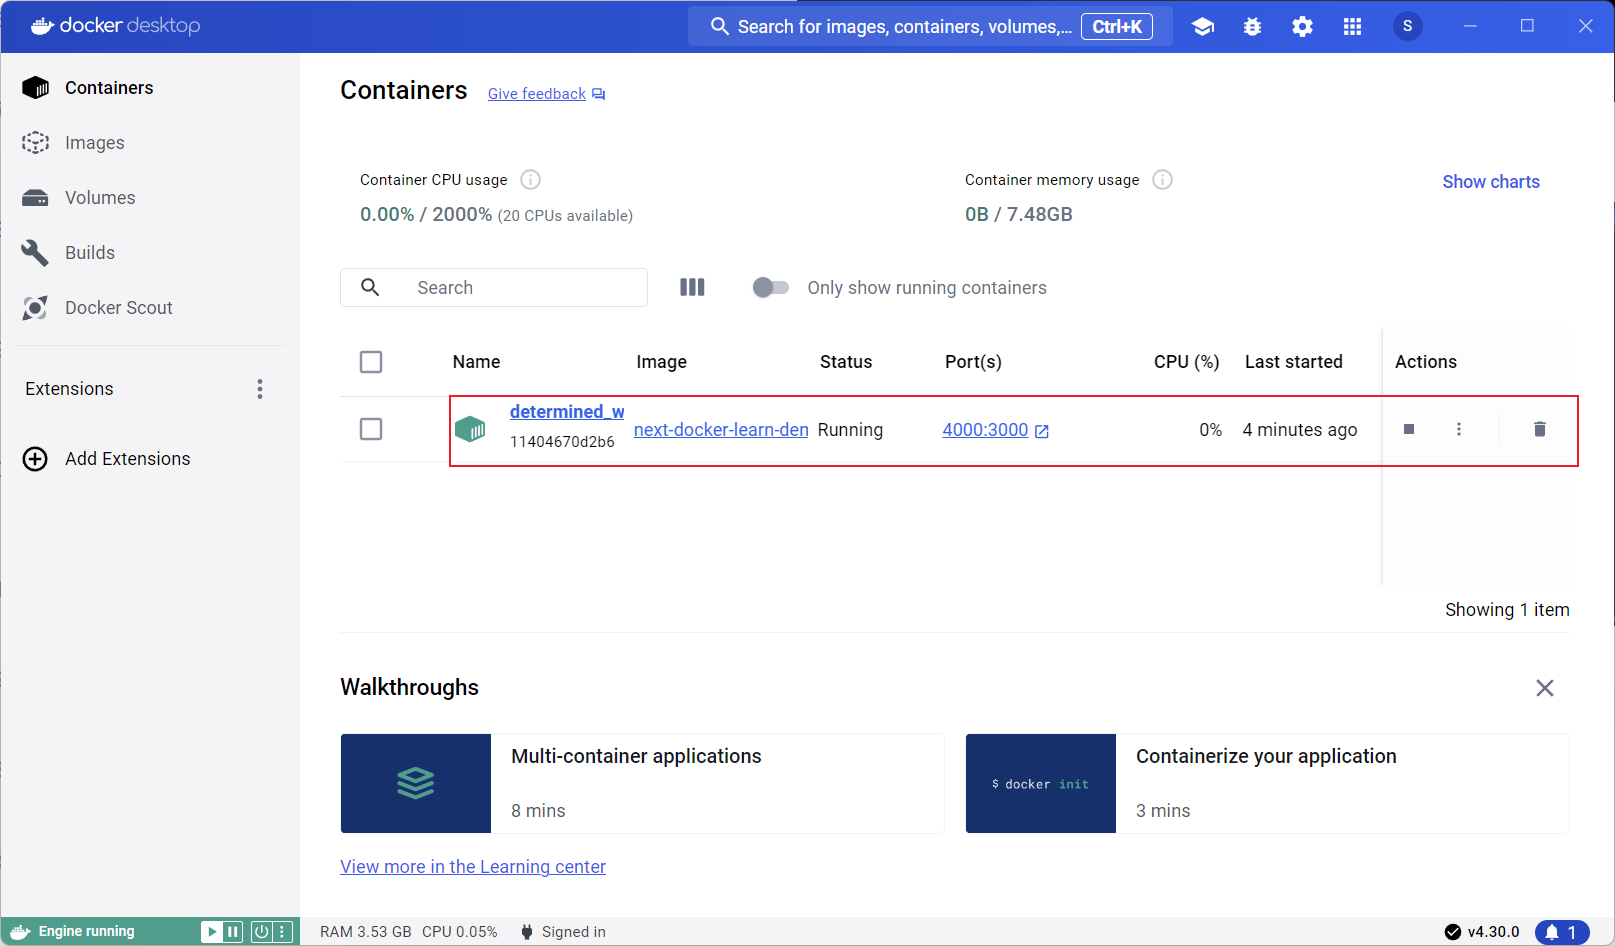
You can also use docker ps in the terminal:

Use the following commands to start, stop, delete containers, etc.:
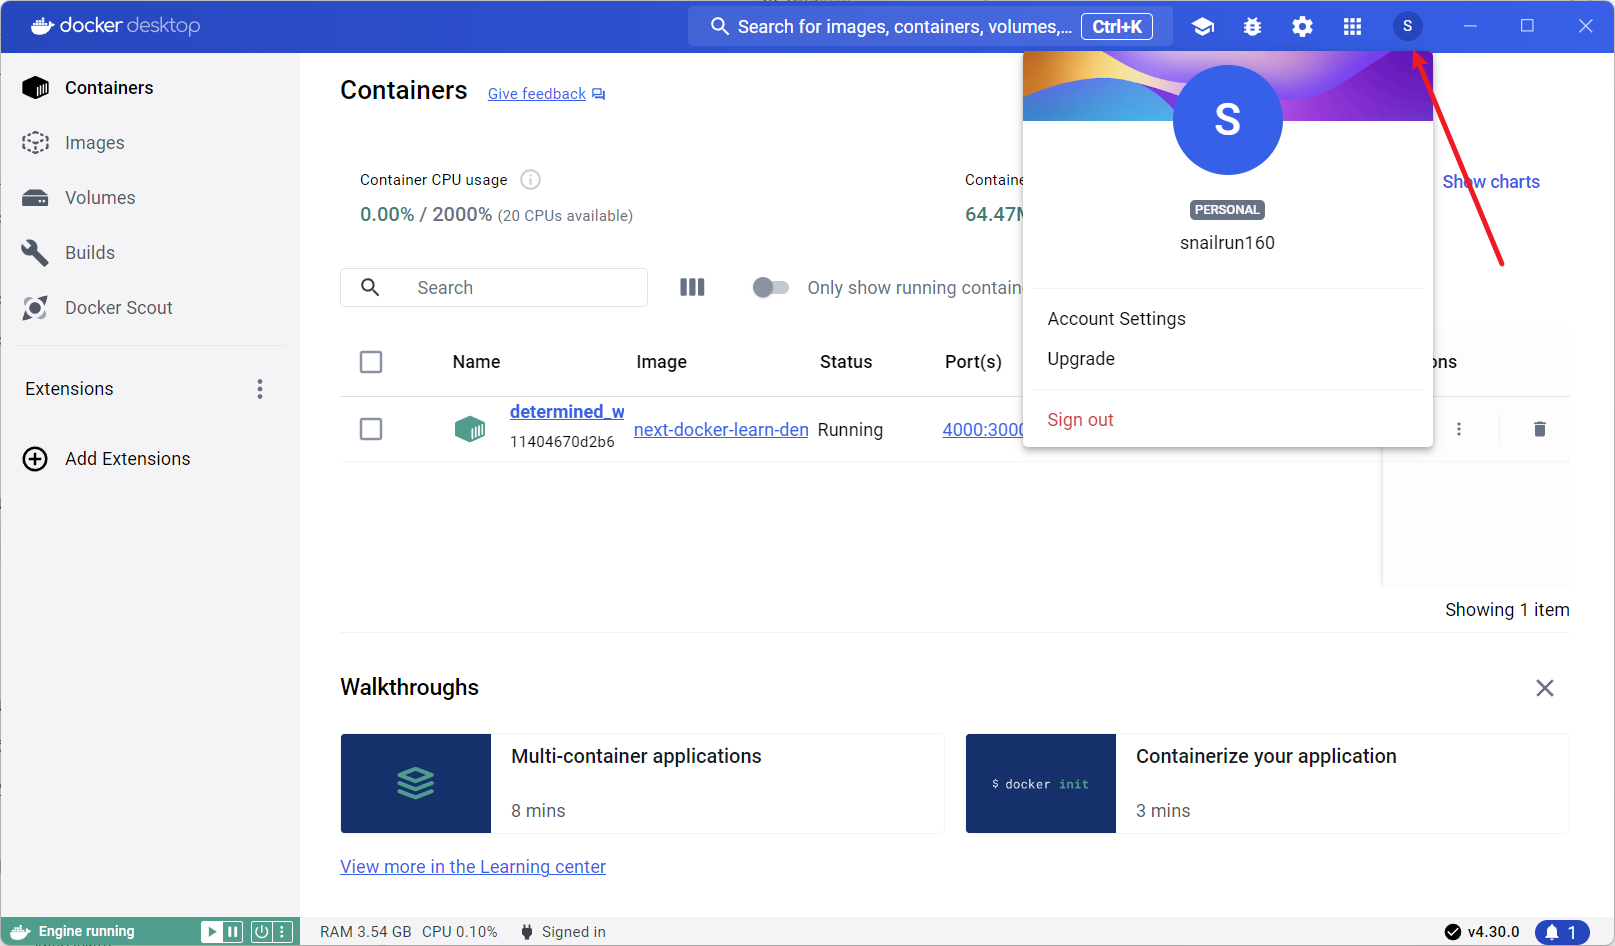
# List containersdocker container ls# Stop a containerdocker container stop container-id# Start a containerdocker container start container-id# Restart a containerdocker container restart container-id# Delete a containerdocker container rm container-idNow we can publish the image to Docker Hub (like pushing code to GitHub). First, register an account at https://hub.docker.com/. You can also sign in directly from the Docker client:
In the terminal, run docker login to confirm you’re logged in:

Now publish next-docker-learn-demo to Docker Hub. First, tag the local image with your repository name:
# Format:# docker image tag SOURCE_IMAGE[:TAG] TARGET_IMAGE[:TAG]# snailrun160 is my Docker Hub usernamedocker image tag next-docker-learn-demo:0.0.1 snailrun160/next-docker-learn-demo:0.0.1Then push it to Docker Hub:
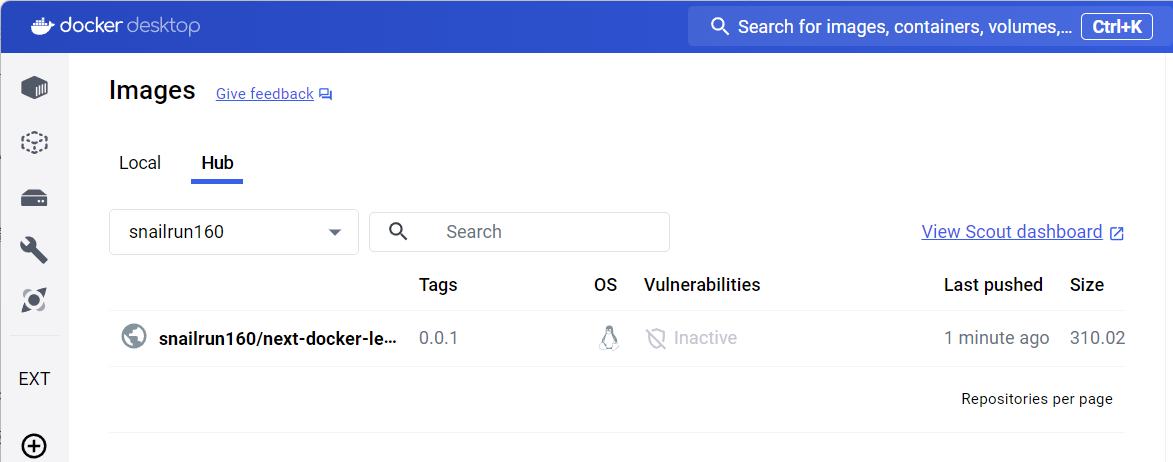
# Format:# docker image push [OPTIONS] NAME[:TAG]docker image push snailrun160/next-docker-learn-demo:0.0.1After publishing, you can see it under the Hub tab in Docker Desktop:
Once it’s on Docker Hub, others can pull your image directly:
docker image pull snailrun160/next-docker-learn-demo:0.0.1Then run it:
docker run -p 4000:3000 snailrun160/next-docker-learn-demo:0.0.1That covers the most basic usage of Docker. Pretty simple, right? But this is just the tip of the iceberg. I plan to write three posts about my Docker learning journey — after that I’ll have enough for my needs!
Recap
Let’s summarize what we learned:
- What is Docker? What problems does it solve?
- How to install Docker on your computer?
- Getting to know Docker Desktop and the VSCode Docker extension
- How to use Docker for a simple Next.js frontend project deployment
In the next chapter, I’ll introduce Docker Compose and manage multiple containers (with Nginx, Redis, MySQL) using Docker Compose.
References:
- Official site: https://www.docker.com/
- Docker 10‑minute quick start: https://www.bilibili.com/video/BV1s54y1n7Ev
- Docker from Beginner to Practice: https://yeasy.gitbook.io/docker_practice