I successfully launched my first full-stack project within the company, and it was incredibly rewarding.
/ 9 min read /
Table of Contents 目录
Hi everyone, I’m luckySnail. At the end of the week before last, my leader told me: next week I’m handing you a simple frontend + backend project to develop. I was thrilled to hear that — although I’ve built a full-stack project from scratch before (SVG Show), that was a personal experiment. Compared to real enterprise environments and actual business requirements, there’s still a big difference. After a week of work, I managed to deploy the first version online last Thursday night, and did optimizations on Friday. The service is running stably now, and I want to record and share this development process and what I learned — hope it helps you!
Taking Over the Requirements
When my leader gave me the task, the requirements document was already provided. I skimmed through it: it was a simple user permission management + survey collection + tag management system — basically the most common type of admin system. After confirming the business flow, I briefly organized the requirements to help me develop faster and better.
Clients:
- Fill out the survey via a link shared by the operations team
Operations:
- Create form collection links (carrying their own user ID)
- Mark a client’s survey as completed, then flip the status to finance
- Can tag surveys
Finance:
- Review the survey info: either reject (send back to operations) or process payment (complete)
Admin:
- View all this information
- Manage surveys, tags, and users
My leader said this service needs to be integrated into the existing system, and they wanted it online quickly. The current system is frontend/backend separated. The frontend for this project is mine to handle, so I could integrate quickly. But the backend is currently using Fastify and already quite complex — I couldn’t afford the time to familiarize myself with the project norms. Luckily, this project’s backend could be separated from the current backend service, so I decided not to integrate it into the existing backend.
Technology Choices
In real enterprise development, system stability is the most important thing. So when choosing technologies, you should pick mature ones, widely used, and ones you can handle well. Also important is to choose the tech stack your company uses. This time I decided based on all the above:
- supabase: Our login service relies on it, and we recently bought their premium plan with many unused resources. Time to make the most of it — don’t waste the money.
- honojs: Extremely small, adapts to various environments, native TypeScript support, active community, many users.
Using Supabase to provide both the database and its corresponding backend API capabilities is fully sufficient for my needs. Let me briefly introduce Supabase: it’s an open-source Firebase alternative, built on PostgreSQL, offering a complete set of Backend-as-a-Service (BaaS) features that help developers quickly build full-stack apps without building a backend from scratch. So what exactly does it provide?
- Realtime Database: Based on PostgreSQL logical replication and WebSocket, supports listening to data changes.
- Auth: Provides user registration, login, third-party login (Google, GitHub, etc.), password reset, supports JWT tokens and Row Level Security (RLS).
- Storage: Supports file upload and management (images, videos, etc.), permissions controlled via RLS, like a cloud storage service.
- Auto-generated APIs: Supabase automatically generates RESTful and GraphQL APIs for your database tables.
- Row Level Security (RLS): Using PostgreSQL’s native RLS mechanism, you can achieve fine-grained data access control without writing extra backend logic.
- CLI Tools: Provides
supabase clifor more convenient local development, debugging, and deployment management. It brings the capabilities of your cloud Supabase project to your local environment, improving development efficiency and consistency. Especially useful for database migrations in team collaboration and CI/CD. - Open Source & Self-hostable: Supabase is 100% open source (MIT license) and supports deployment on your own servers.
And a quick intro to honojs: an ultra-lightweight, high-performance web framework designed for edge runtimes (like Cloudflare Workers, Deno, Bun, etc.) and Node.js. If you want to learn more, check the official docs.
Database Design
Once the technologies were decided, I could start database design — create the tables, and half the code writes itself! Because we use Supabase, it automatically generates interfaces based on the tables. With tables, the interfaces are ready! Here’s my database designed with AI help:
Table 1: user table
create table public.user (  id text not null,  created_at timestamp with time zone not null,  email text null,  role public.userType null,  is_banned text null,  constraint user_pkey primary key (id),  constraint user_email_key unique (email),  constraint user_id_key unique (id)) TABLESPACE pg_default;
Table 2: tag table
create table public.user (  id text not null,  created_at timestamp with time zone not null,  email text null,  role public.userType null,  is_banned text null,  constraint user_pkey primary key (id),  constraint user_email_key unique (email),  constraint user_id_key unique (id)) TABLESPACE pg_default;
Table 3: payout_requests table
create table public.payout_requests (  id bigint generated by default as identity not null,  created_at timestamp with time zone not null default now(),  owner_operator_id uuid null,  kol_account text null,  real_name text null,  pay_account text null,  sfz_name text null,  sfz_account text null,  phone text null,  pay_amount numeric null,  form_source_id uuid null,  tags json null,  status public.payout_status null,  notes text null,  "isDelete" boolean not null default false,  from_user_email text null,  constraint payout_requests_pkey primary key (id),  constraint payout_requests_id_key unique (id),  constraint payout_requests_form_source_id_fkey foreign KEY (form_source_id) references auth.users (id) on update CASCADE on delete CASCADE,  constraint payout_requests_owner_operator_id_fkey foreign KEY (owner_operator_id) references auth.users (id) on update CASCADE on delete CASCADE) TABLESPACE pg_default;
I first created two enums in the Supabase dashboard:
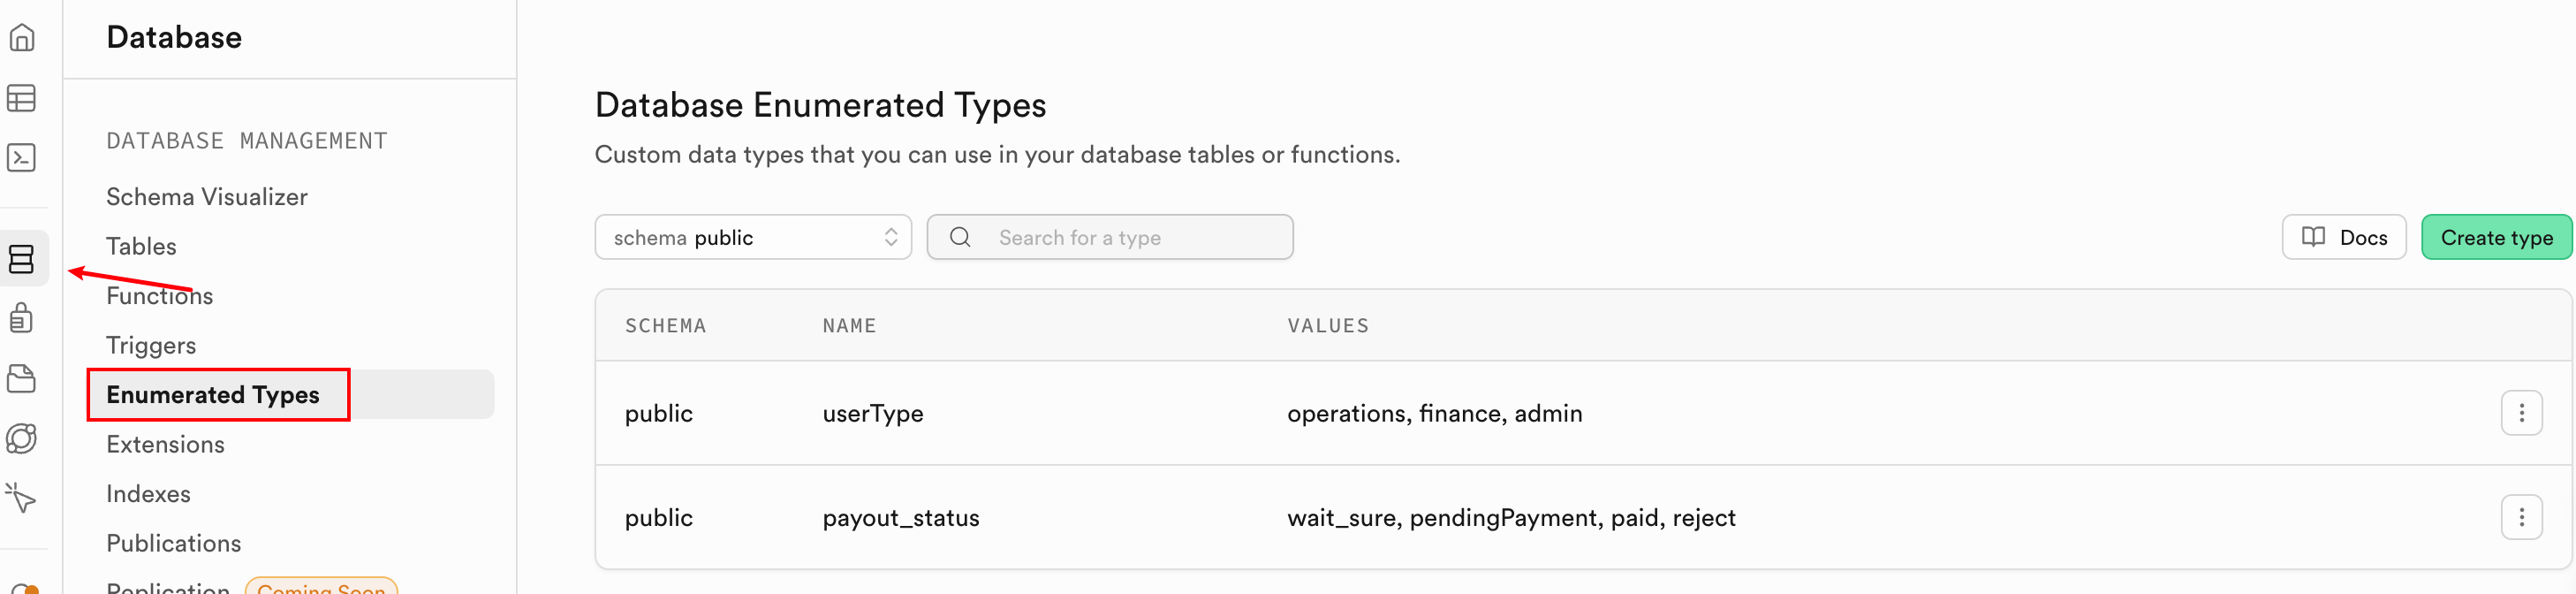
userType: operations, finance, admin
payout_status: wait_sure, pendingPayment, paid, reject
Honestly, there are problems with this database design and naming — I wonder how many you can spot? But I only found out during the process. To make sure I shipped on time, I decided to launch first. Also, this service is internal, might not need changes later, so I’ll leave it as is for now.
Backend Development
With the database tables ready, I could start backend development. I debated whether to use honojs for a bit — theoretically I could use purely Supabase’s built-in capabilities to fulfill the requirements, but two things forced me to write my own APIs:
- I wasn’t very familiar with Supabase and was afraid I couldn’t implement the requirements in a short time.
- This service needs to serve Chinese users calling the backend API, but Supabase’s service is inaccessible from mainland China.
So I ended up using honojs to develop APIs faster, then deploy the service anywhere.
First, I referenced https://supabase.com/docs/guides/getting-started/quickstarts/hono to scaffold the backend project. After scaffolding, I launched Codex (if you use Claude Code or Cursor, you can use your own AI coding tool).
Step 1: Initialize project and database
Run Codex’s /init to generate AGENT.md, then have the AI install Supabase CLI for us. Prompt:
Refer to https://supabase.com/docs/guides/local-development docs, install supabase CLI on the current machine.---After installation, verify with supabase --versionThen use Supabase to connect to our online Supabase project (you should have created your project by now), then initialize the database. With the CLI, we don’t need to create tables one by one in the web dashboard — just use the CLI. It also generates corresponding migration records, which is very useful for CI/CD.
# Associate CLI with your online project SUPABASE_URL: https://your_project_ref.supabase.cosupabase link --project-ref your_project_ref# Verify connectionsupabase status# Initialize: creates a supabase folder, all operations recorded heresupabase init# Create a new migration filesupabase migration new init_tables# After running, you'll see something like:supabase/migrations/20251027_init_tables.sql# Edit the migration file — put the table creation SQL into it. AI can help.# Sync migration file to cloud, then check Supabase dashboard to see three tablessupabase db push# This command:# - Checks SQL syntax# - Executes on cloud Supabase project# - Automatically records migration history# Verify: supabase db pull pulls back the latest database structureStep 2: Configure environment variables and verify connection to Supabase
# Get your keys at https://supabase.com/dashboard/project/_/settings/apiSUPABASE_URL=xxxSUPABASE_ANON_KEY=xxSUPABASE_SERVICE_ROLE_KEY=your-service-role-keyDuring this process, if any errors occur, ask Codex to help fix bugs. After initializing the database, the corresponding database APIs are ready!

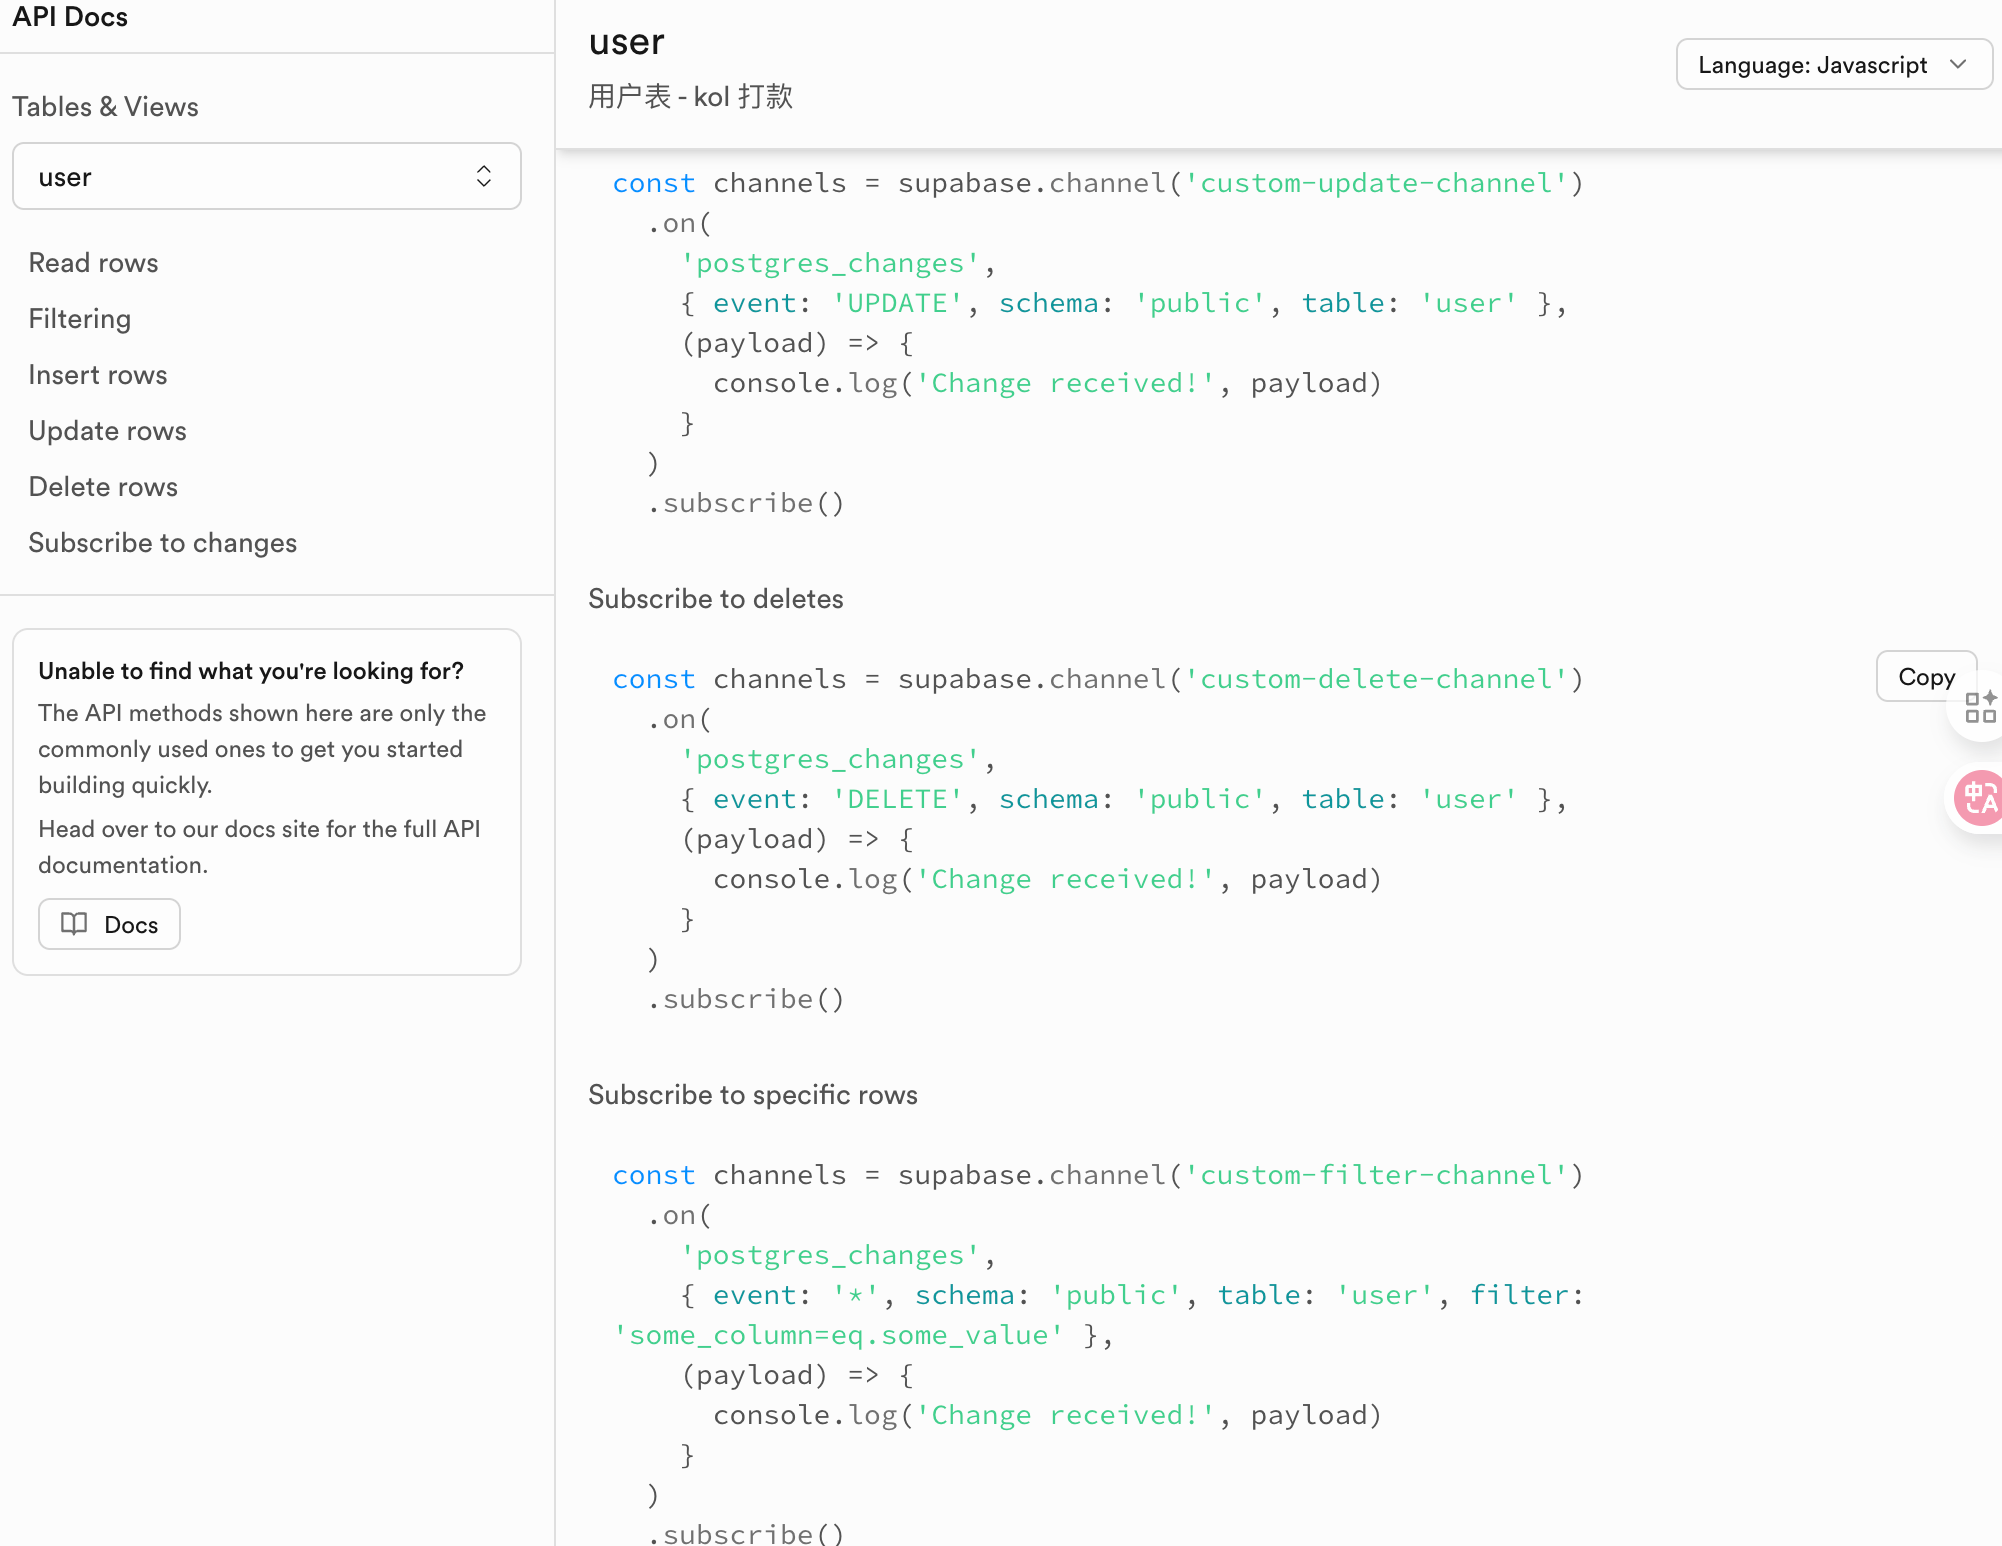
You can see the API docs. Next, use Supabase’s package locally to develop the APIs. First, create a /user endpoint — simple, it gets auth info from the request, calls Supabase’s auth service, and returns user info.
 app.get('/user', async (c) => {    const supabase = getSupabase(c);
    const { data: { user }, error } = await supabase.auth.getUser();
    if (error || !user) {      return c.json({ message: 'Not logged in' }, 401);    }
    return c.json({      id: user.id,      email: user.email,      message: 'Logged in'    });  });
If this endpoint works, then let AI go wild developing the rest! All endpoints follow the same pattern: permission check → data processing → return data and status. Here’s a sample prompt:
Now develop the payout_requests table related endpoints: CRUD. Note that delete is a soft delete (set isDelete to true). The delete endpoint is admin-only. There's also a status update endpoint accessible by all roles. The create endpoint does not require authentication. Follow RESTful conventions.Basically, that’s the pattern. After development, do code review + testing. Once backend is done, move on to frontend.
Frontend Development
According to requirements, two pages are needed: one form for clients to fill out, and one admin page for operations, finance, and admin users. Very simple — just ensure correct permission checks. Here’s a sample AI prompt for frontend:
Based on the current payout_requests table related endpoints, develop the corresponding page. Use Ant Design's List component to display data. In the last column, show action buttons: edit, delete (delete button only visible to operations and admin). Also a dropdown to set status with three enum values — create a constant and display the Chinese label for each status.Same as backend: I review code + verify results. One thing to note: you need to tell the AI about the finished backend code so it can work better.
Deployment
After local development and testing, it’s time to deploy! The backend is a honojs service, easy to deploy to Cloudflare, Vercel, etc. If you want to deploy to your own server, it’s also simple — just install Node.js.
One thing to note: if deploying on Docker, you need to use hono/adapter to dynamically get environment variables, and configure corresponding environment variables inside Docker.
Mini Summary
Even though this project is as simple as it gets, I still learned new things from taking over to shipping. For example, the tags field in the payout_requests table would be better designed as a separate relation table.
Also, while developing both frontend and backend, I gained a better understanding of what should be done on the frontend vs the backend.
Finally, during development, I was essentially acting as requirement giver, code reviewer, and result verifier — if not for the need to code review, I’d say I felt more like a test developer.
By the way, I’m planning to create a tutorial on AI programming for absolute beginners. So I’d like to survey: are you familiar with AI programming? Do you want to turn your ideas into real products through coding?