Automated Website Updates with Cloud COS Service + GitHub Actions
/ 4 min read /
Table of Contents 目录
Background
If you have a need to use documentation-site generators like VuePress, VitePress, or Astro as your blog, and then deploy it via cloud service providers’ COS (Cloud Object Storage) services, you’ll find that every time you update content, you have to manually build the project and then upload the build output to the corresponding directory in the COS service. If you’re familiar with CI/CD, you’ll definitely want to solve this problem with automated deployment, and it also helps avoid issues caused by manual mistakes. With that in mind, I decided to give it a try.
Key Concepts
Before we dive into development, let’s first understand GitHub Actions. It’s a continuous integration and continuous delivery (CI/CD) platform. Here’s how it works:
-
Event-Based Triggering System
- GitHub Actions triggers workflows based on events in the repository, such as:
- Code push
- Pull request creation
- Issue creation
- Scheduled events
- Manual triggers (
workflow_dispatch)
-
Runtime Environment (Runner)
GitHub Actions runs on servers. Specifically:
- GitHub provides a virtual machine environment called “Runner” to execute workflows
- Official VMs are available for Linux (Ubuntu), Windows, and macOS
- Each job runs independently on a fresh VM instance
- You can also choose to use your own servers as “self-hosted runners”
-
Workflow Components
A GitHub Actions workflow consists of the following main parts:
- Workflow: The configuration of the entire automation process
- Job: An independent unit within a workflow, can run in parallel or sequentially
- Step: The smallest execution unit within a job
- Action: A reusable automation unit (e.g.,
actions/checkout@v3)
-
Execution Flow
The workflow executes according to the YAML configuration, which we’ll cover below.
-
Secure Credential Management
GitHub provides “Secrets” to securely store sensitive information (like API keys). You can reference them in your workflow using the syntax
${{ secrets.SECRET_NAME }}.
Development
Let’s first outline the requirements:
What I want is: when I push code updates, GitHub Actions watches for file changes, automatically builds the project, and syncs the output to Tencent Cloud COS.
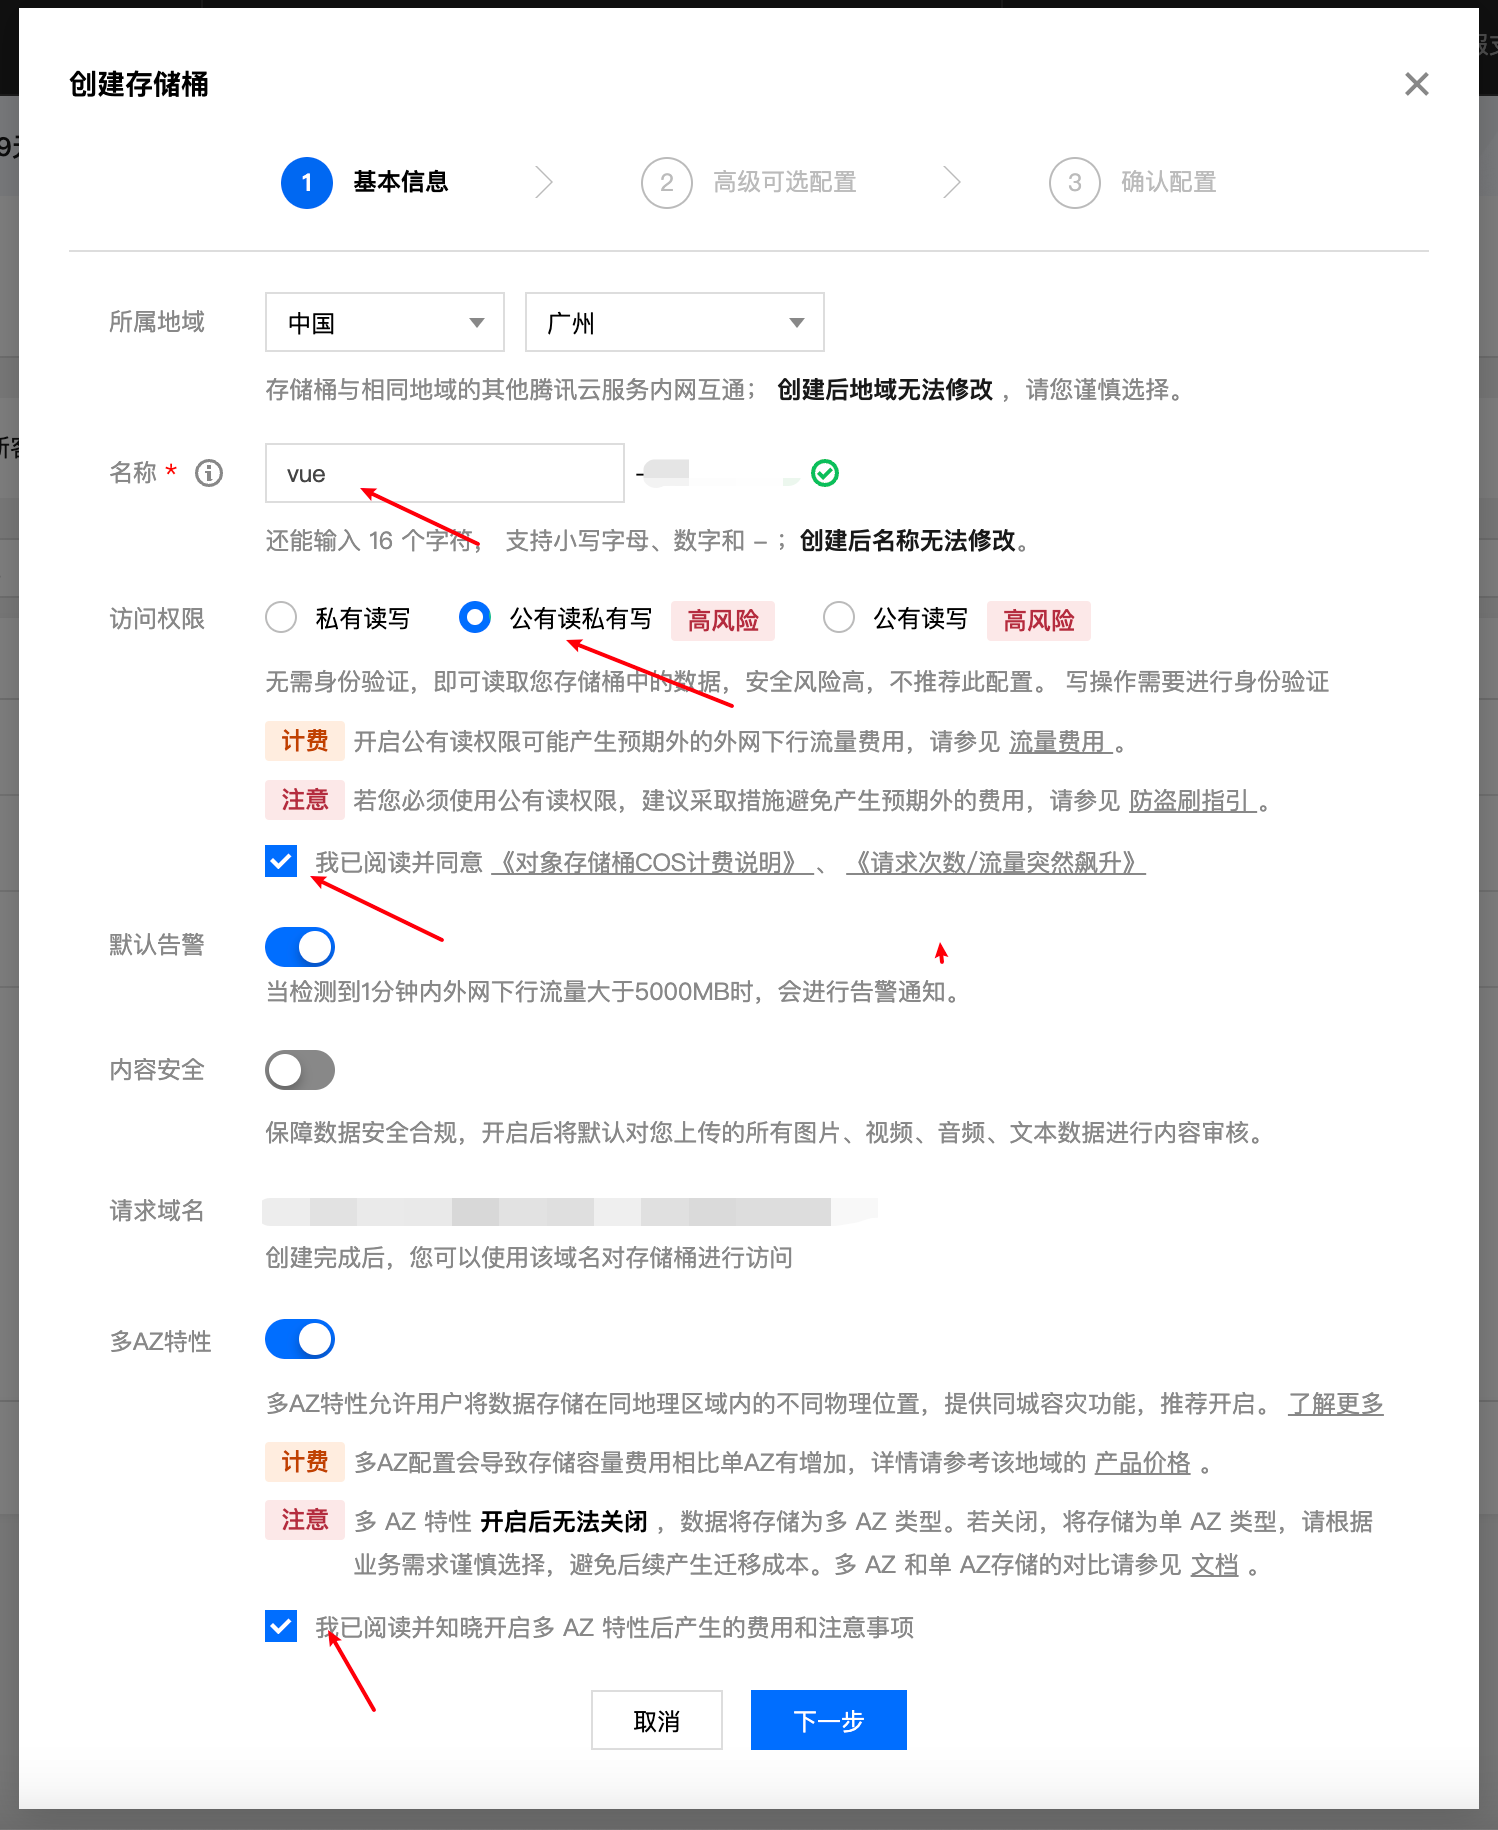
Create a Static Website Bucket
Create a bucket. Fill in the initial info, click next, and keep the defaults.
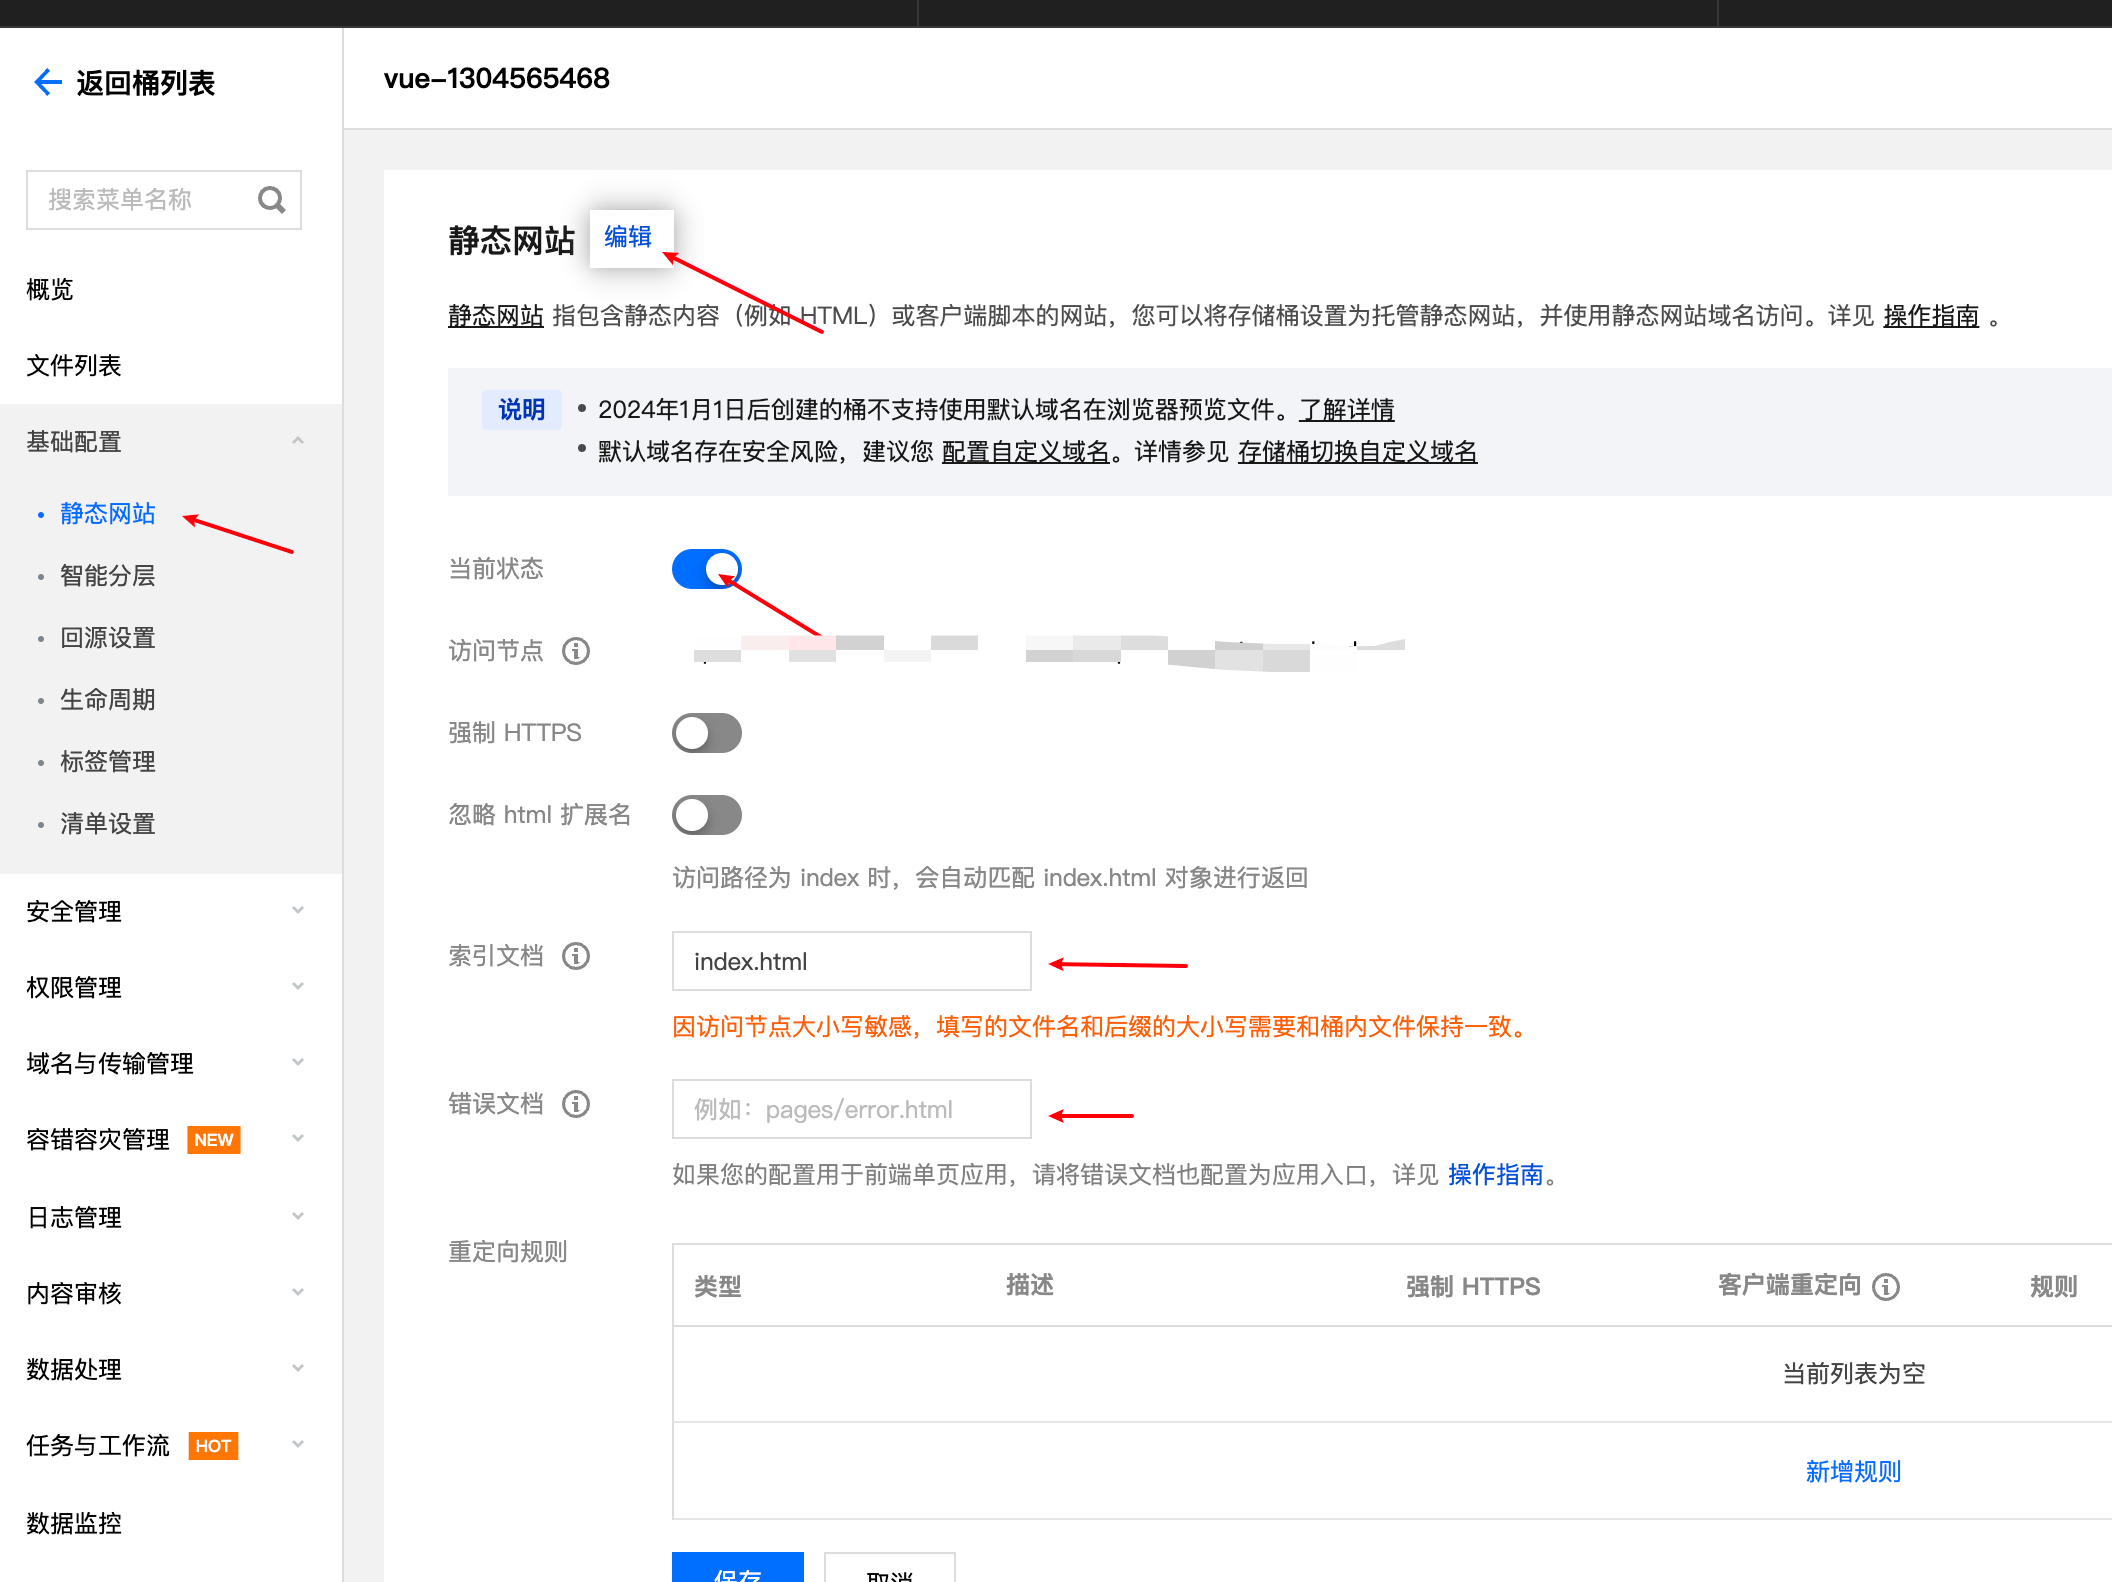
Configure static website hosting:
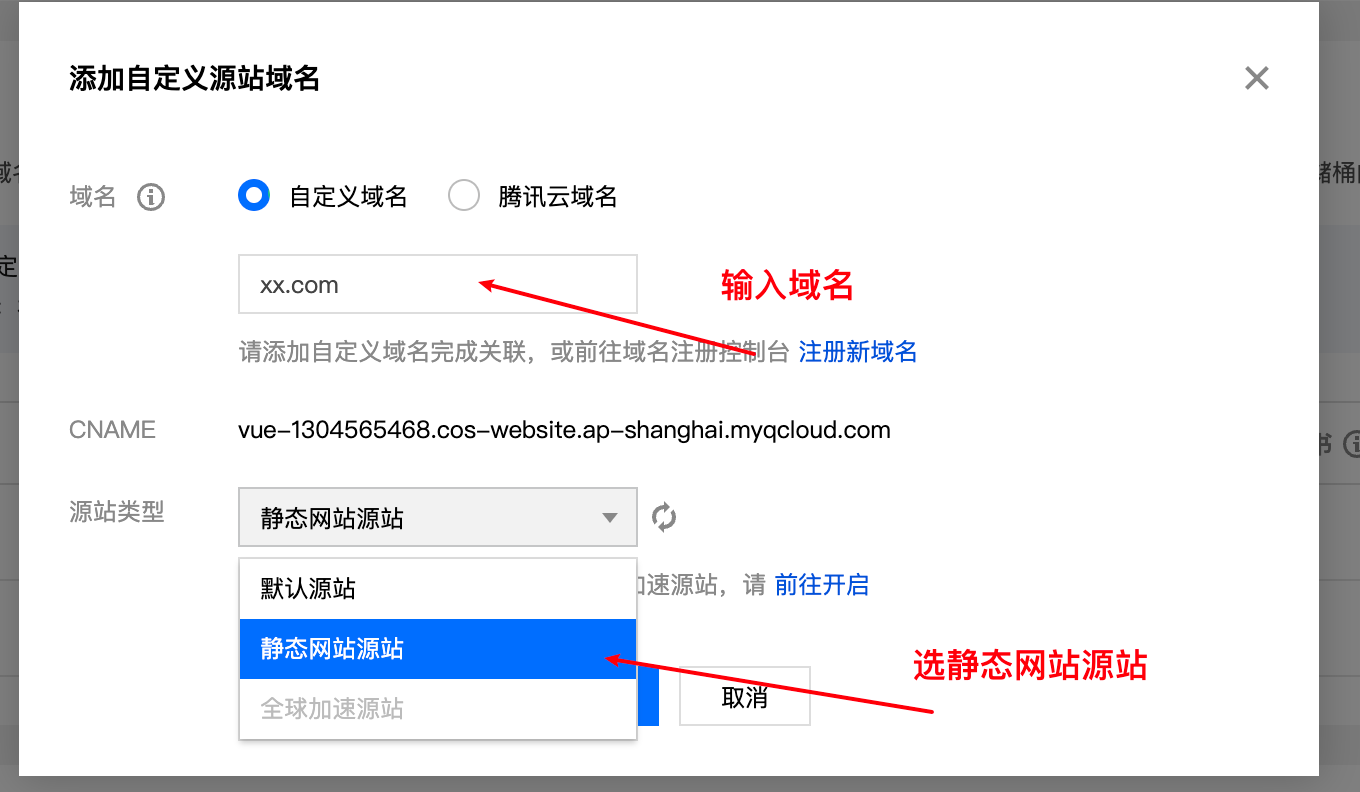
Configure origin:
Go to DNS resolution to add the record.
After completing the above, we can upload our website content!
Automate File Upload via Script + GitHub Actions
name: Build and Deploy to Tencent Cloud COS
on:  push:    branches: [main] # Change to your main branch name  workflow_dispatch: # Allow manual triggering
jobs:  build-and-deploy:    runs-on: ubuntu-latest    steps:      - name: Checkout code        uses: actions/checkout@v3
      - name: Setup Node.js environment        uses: actions/setup-node@v3        with:          node-version: "16" # Adjust version based on your project's needs
      - name: Install dependencies        run: npm install
      - name: Cache dependencies        uses: actions/cache@v3        with:          path: ~/.npm          key: ${{ runner.os }}-node-${{ hashFiles('**/package-lock.json') }}          restore-keys: |            ${{ runner.os }}-node-
      - name: Build        run: npm run docs:build
      # Add this step to set a compatible Python version      - name: Setup Python 3.10        uses: actions/setup-python@v4        with:          python-version: "3.10"
      - name: Install Tencent Cloud CLI        run: pip install coscmd
      - name: Configure Tencent Cloud COS authentication        run: |          coscmd config -a ${{ secrets.TENCENT_SECRET_ID }} -s ${{ secrets.TENCENT_SECRET_KEY }} -b ${{ secrets.COS_BUCKET }} -r ${{ secrets.COS_REGION }}
      - name: Upload to Tencent Cloud COS        run: |          coscmd upload -r .vuepress/dist/ /      # - name: Deploy to Tencent Cloud COS      #   uses: TencentCloud/cos-action@v1      #   with:      #     secret_id: ${{ secrets.TENCENT_SECRET_ID }}      #     secret_key: ${{ secrets.TENCENT_SECRET_KEY }}      #     cos_bucket: ${{ secrets.COS_BUCKET }}      #     cos_region: ${{ secrets.COS_REGION }}      #     local_path: .vuepress/dist/      #     remote_path:      #     clean: true # Optional: clean the target path before uploading
Here we use the Tencent Cloud CLI to upload files. A few caveats:
branchesshould be set to the branch you push updates to.node-version: make sure the Node version matches your project requirements.coscmd upload -r .vuepress/dist/ /.vuepress/dist/is the path to your build output./is the target directory in the bucket.
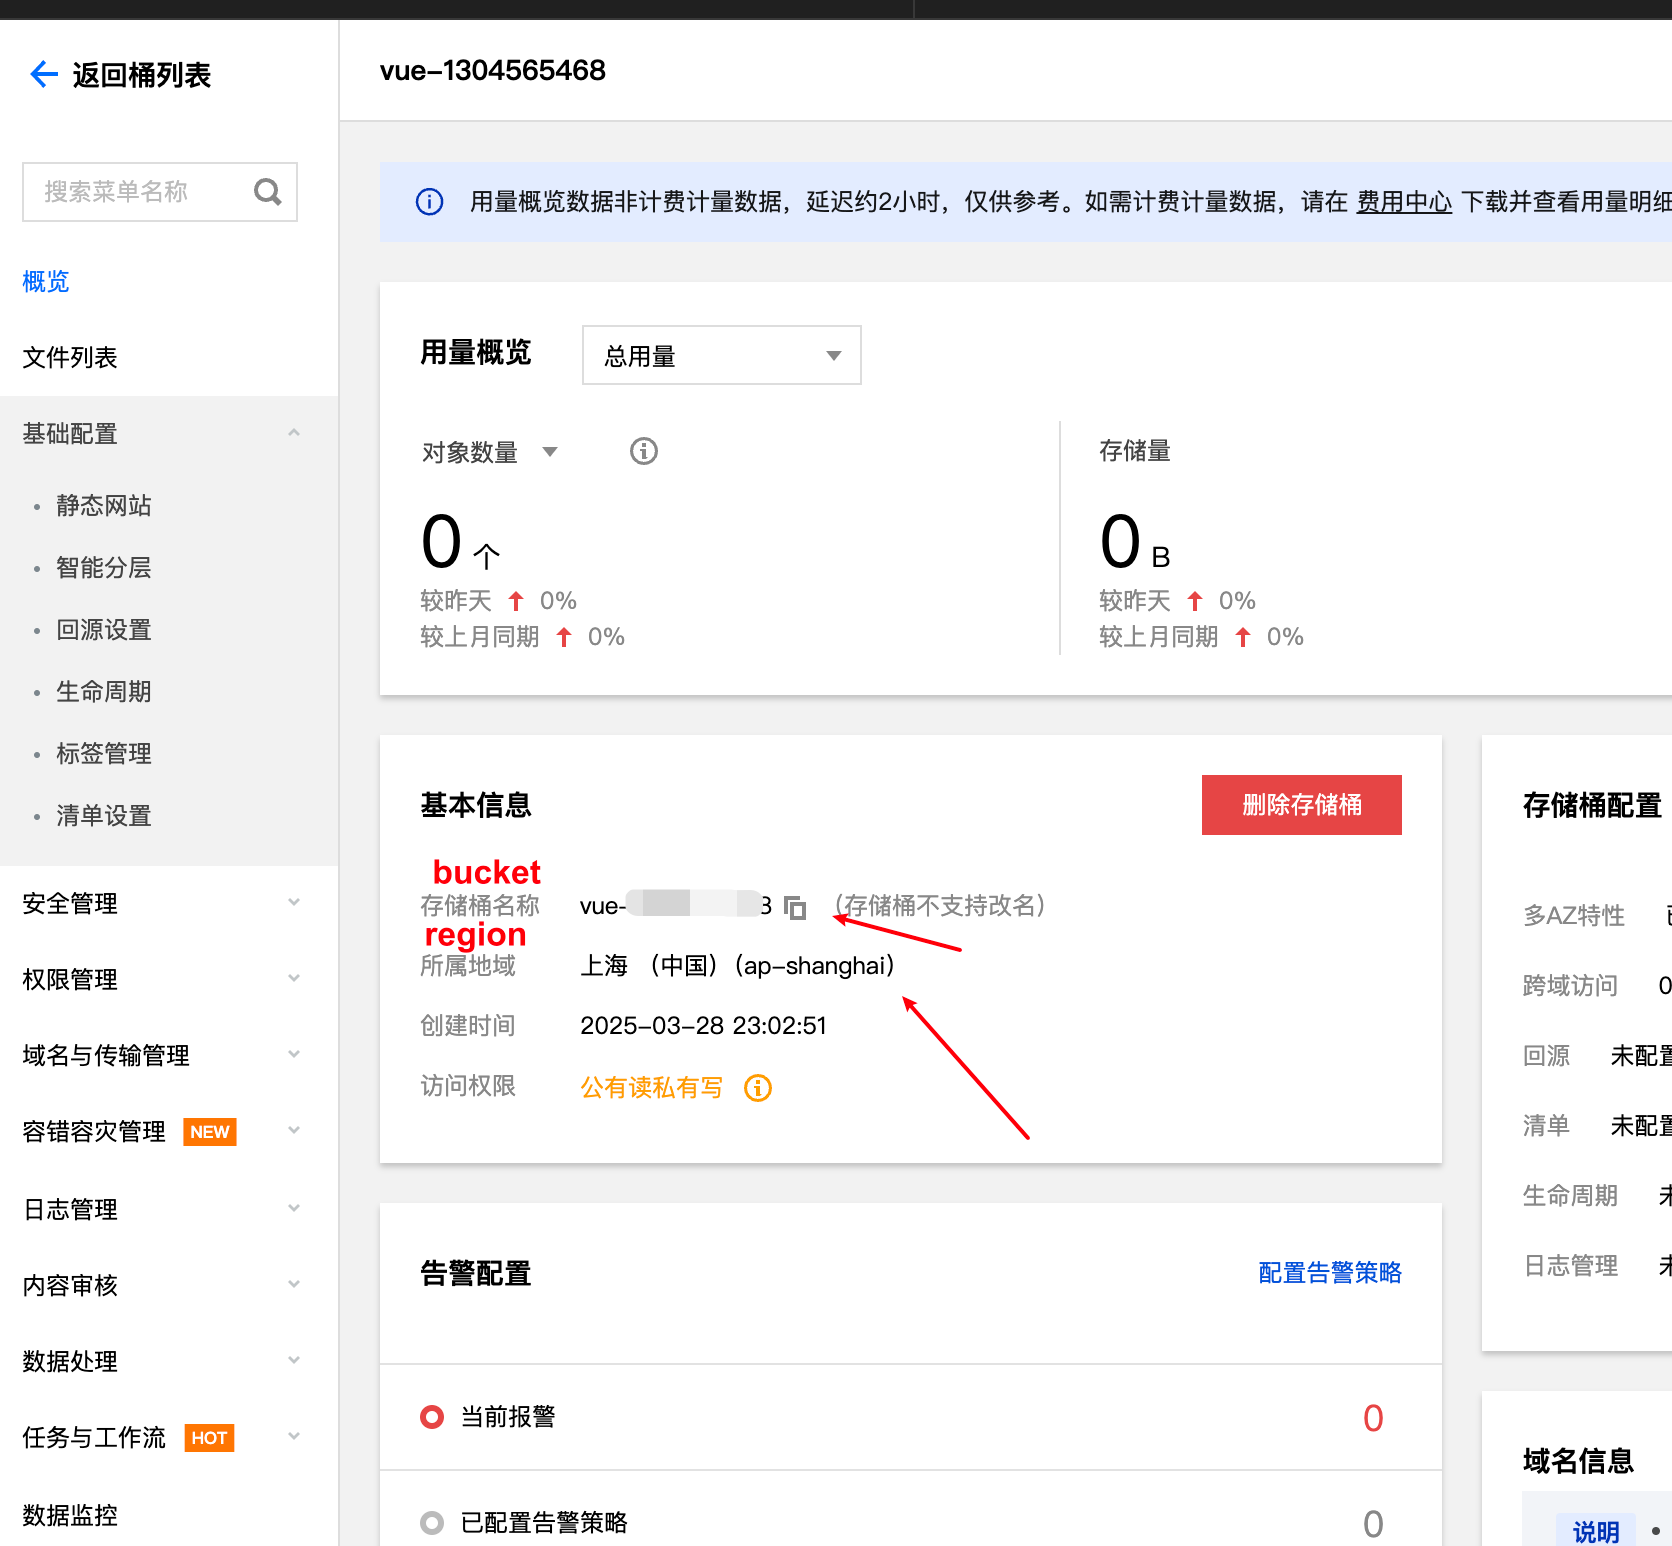
First, go to https://console.cloud.tencent.com/cam/capi to obtain the TENCENT_SECRET_ID and TENCENT_SECRET_KEY needed for the Tencent Cloud COS service. You’ll also need:
COS_BUCKET: the bucket nameCOS_REGION: the bucket region
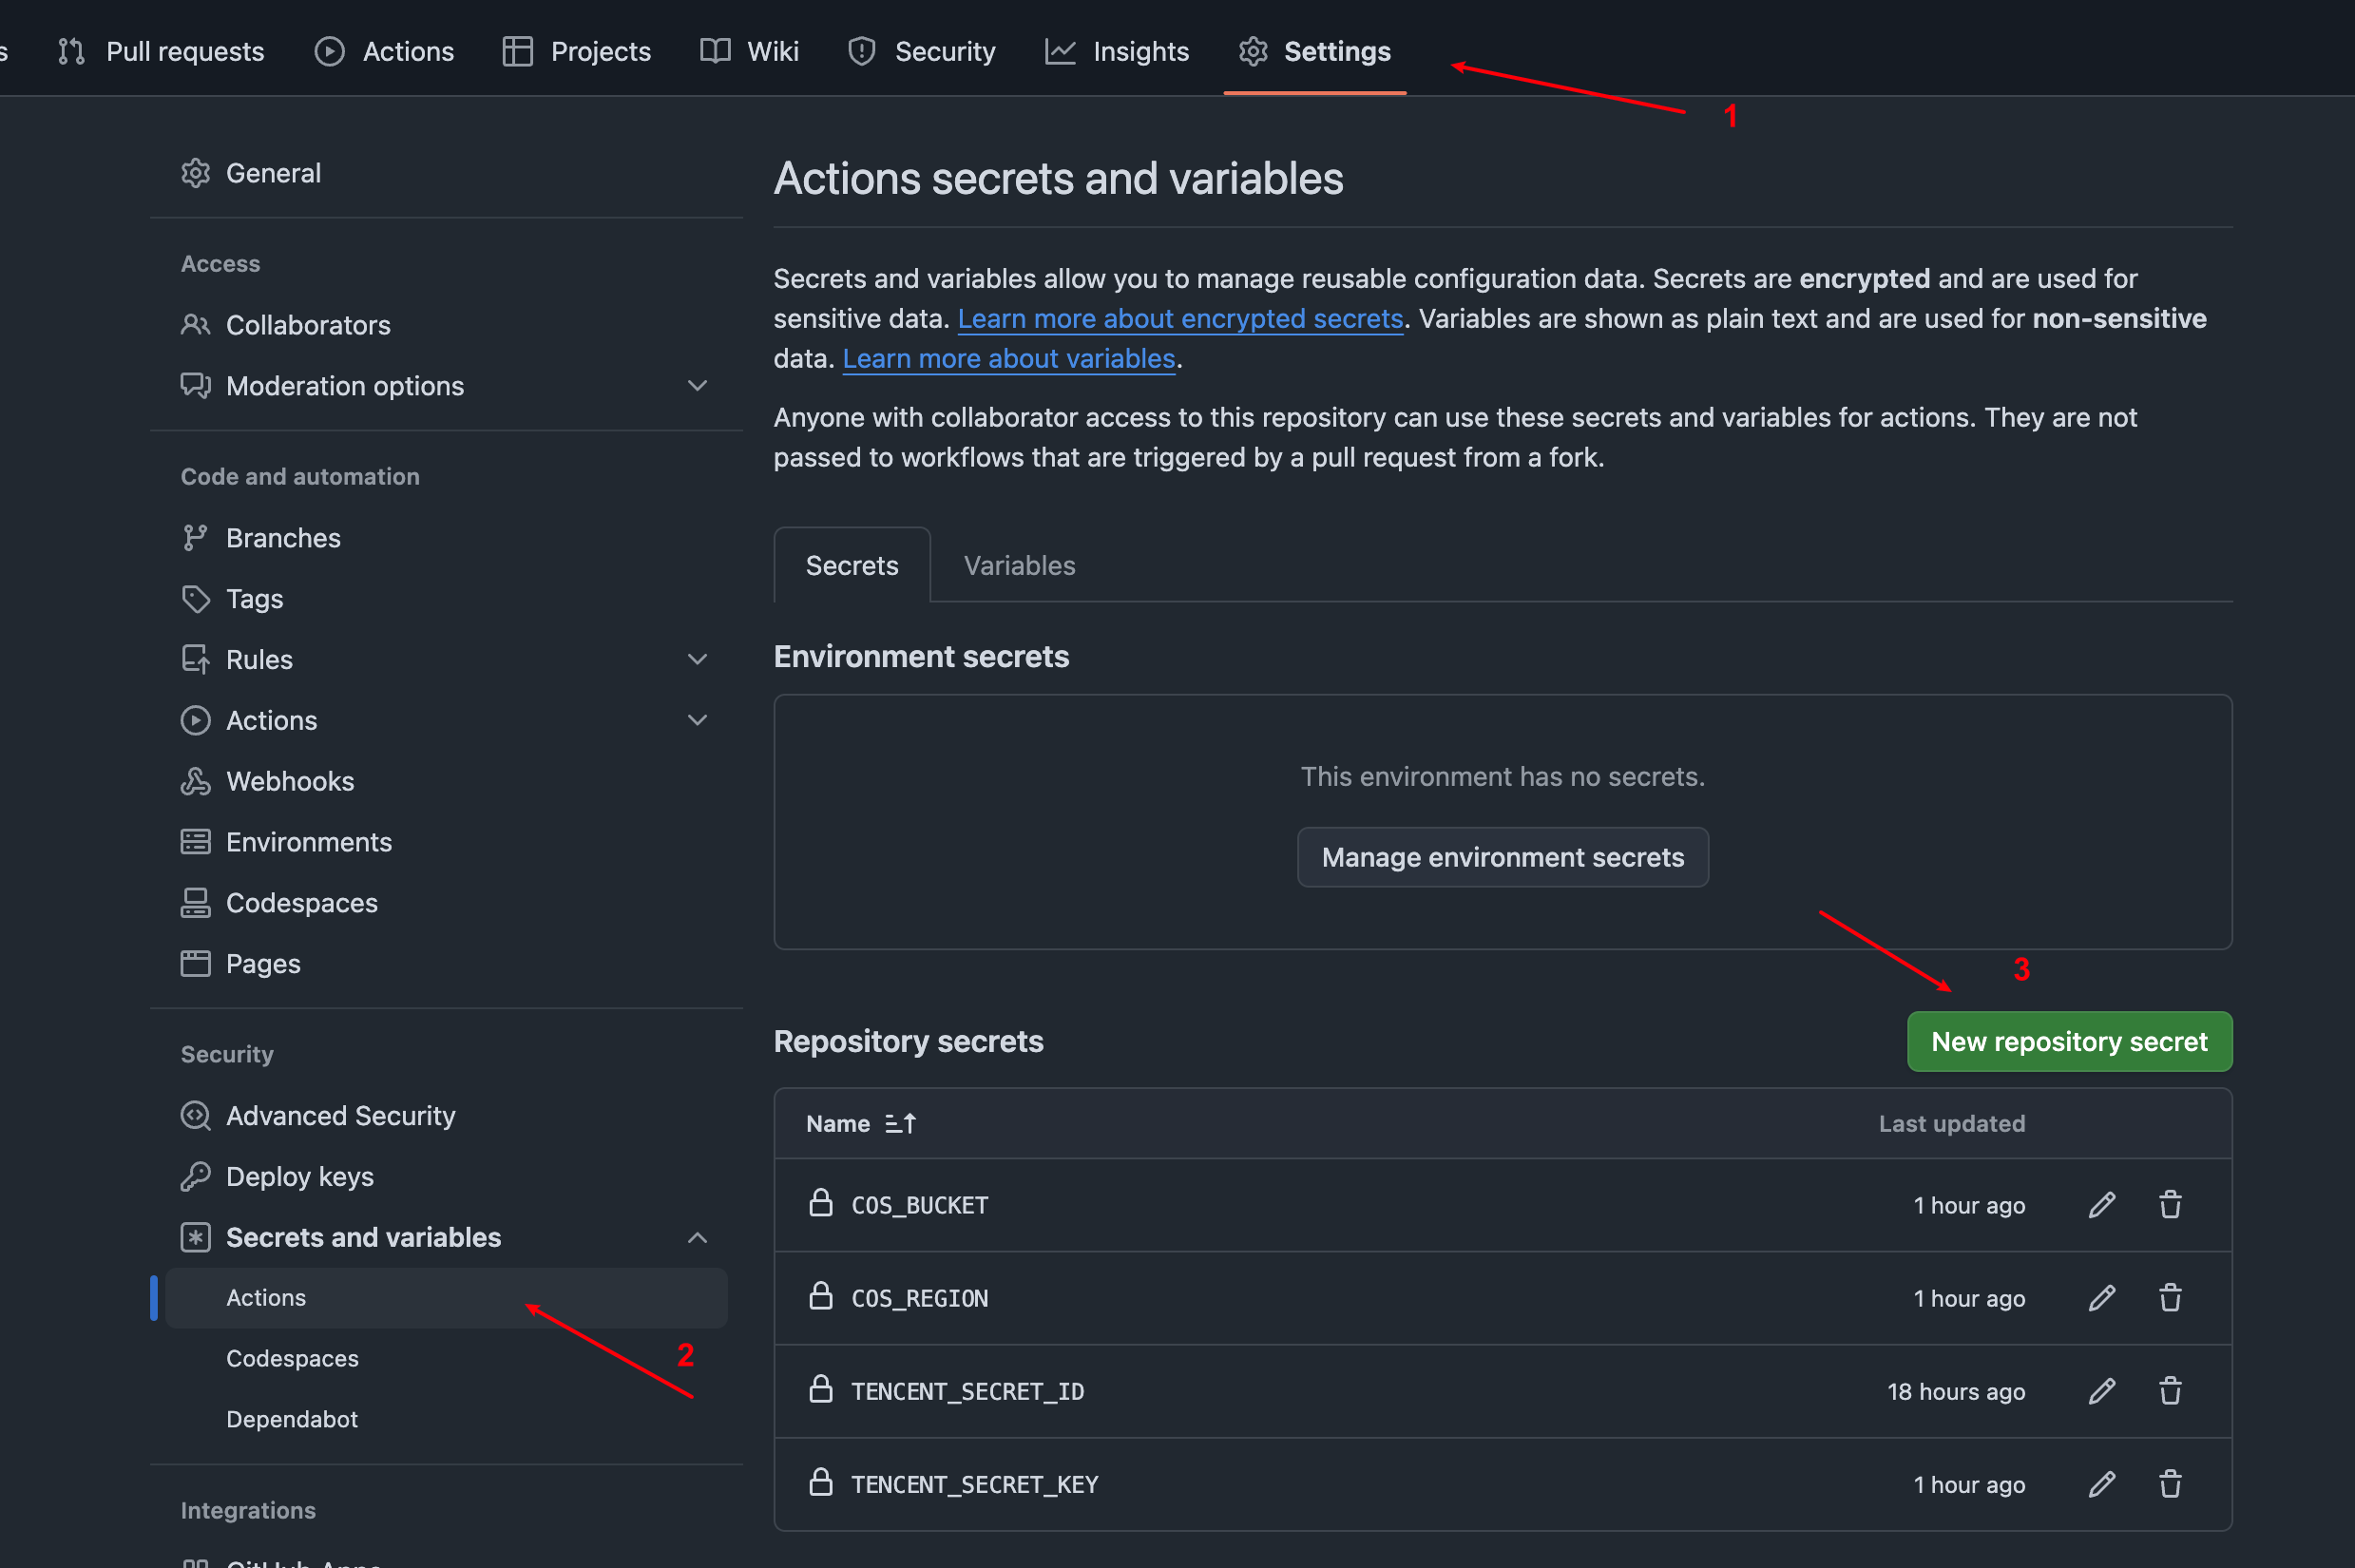
After obtaining these, go to GitHub to configure the secrets.
Fill in the secret information:
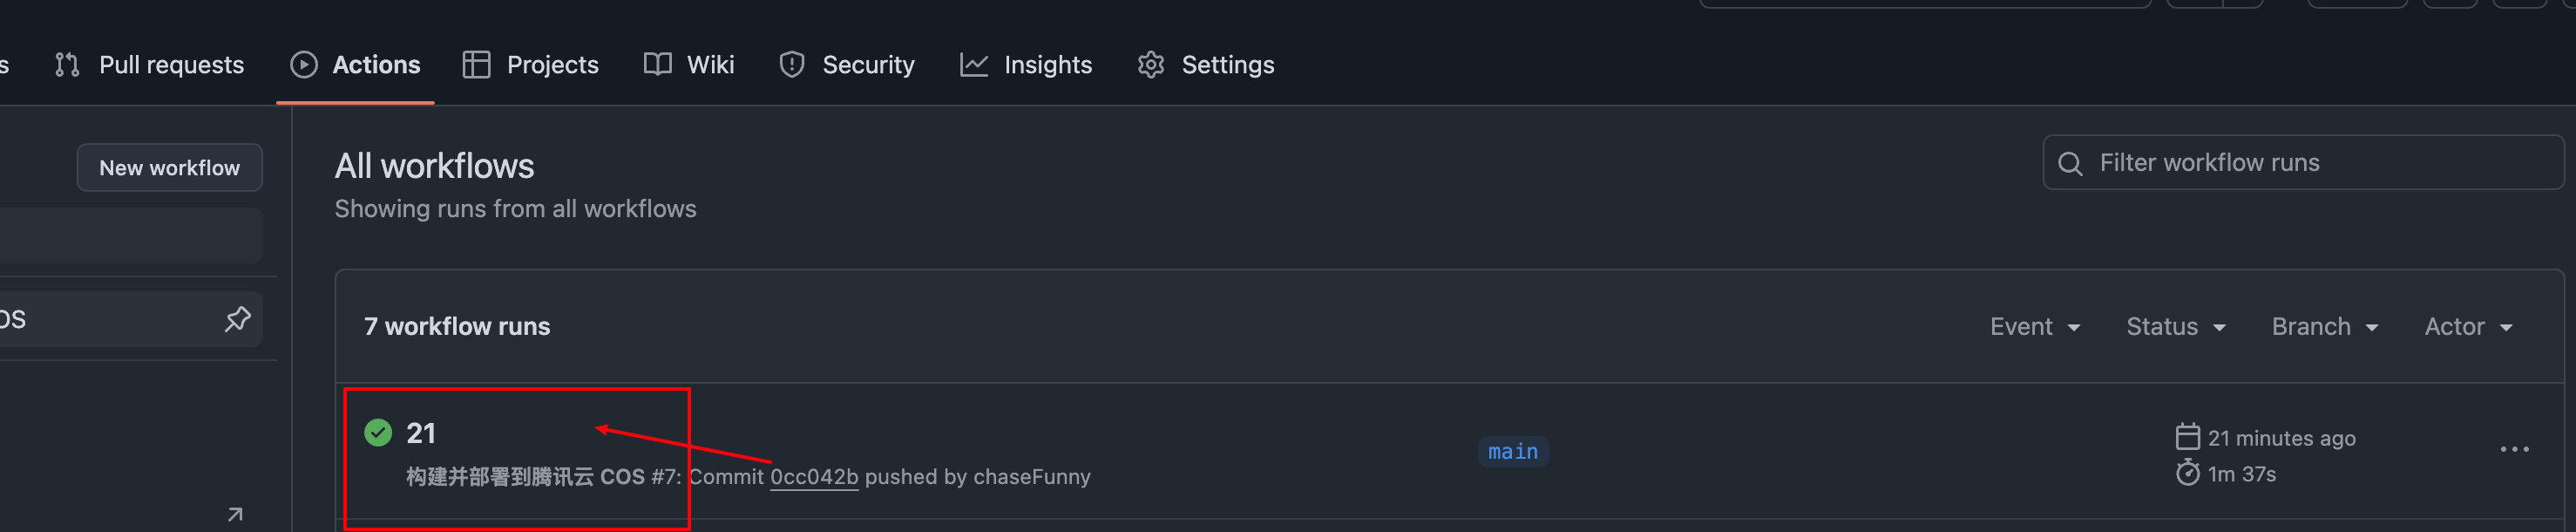
We can now trigger a file push, and then check under Actions:
        # Add email notification service        - name: Install nodemailer        if: success() # Only execute if the previous steps succeeded        run: npm install nodemailer
      - name: Send email notification        if: success() # Only execute if the previous steps succeeded        run: node .github/scripts/send-email.js "${{ secrets.EMAIL_USER }}" "${{ secrets.EMAIL_PASS }}" "${{ secrets.EMAIL_TO }}"
Finally, add the corresponding secrets on GitHub:
EMAIL_USER: sender email address (e.g., example@qq.com)
EMAIL_PASS: email authorization code (not the email password; for QQ mail, you need to generate an authorization code in settings)
EMAIL_TO: recipient email address
After that, push again, and you should receive an email:

Open the website, and you’ll see the content has been updated too!
Perfect – no more manual uploads. With the extra time, I can happily slack off!