Building a Full-Stack Monorepo Project with Turbopack, Biome, Next.js, Express, Tailwind CSS, and ShadCN
/ 20 min read /
Table of Contents 目录
This is a translation. Original: https://www.thehalftimecode.com/building-a-full-stack-monorepo-with-turbopack-biome-next-js-express-js-tailwind-css-and-shadcn/ GitHub repo: https://github.com/ivesfurtado/next-express-turborepo
As a developer or intern, you’ve probably faced the challenge of managing multiple apps or packages within a single project. Whether it’s building a backend API while developing a frontend app, or sharing UI components and utility functions between different parts of the project, things can quickly get out of hand.
That’s where monorepos come in. By organizing your code into a single repository containing multiple apps and shared packages, you can streamline your development workflow and improve collaboration. In this guide, we’ll walk you through setting up a monorepo using Turbopack , Biome, Next.js 15 , Express.js , Tailwind CSS , and ShadCN . We’ll also use pnpm as our package manager to optimize dependency management.
By the end of this tutorial, you’ll have a fully functional monorepo with two apps (Next.js and Express.js) and three shared packages (UI components, TypeScript types, and utility functions). Let’s get started!
Note: You’ll find the repo link at the end of the article. If you’ve never set up a monorepo before, I strongly recommend reading through the entire tutorial rather than just forking the repo.
Prerequisites
- Visual Studio Code (or a similar code editor that supports Biome)
- Biome VS Code Extension
- Node.js (recommended via NVM for easy version management)
What is a Monorepo?
Before we start building, let’s clarify what a monorepo is and why it’s useful.
Definition
Monorepo is a single repository that contains code for multiple projects or packages. Unlike setting up separate repositories for each application or shared library, everything is stored in one place.
Benefits of Using Monorepo
- Code Sharing: Easily share code between different applications (e.g., UI components or utility functions).
- Consistency: Maintain consistent dependencies and configuration across all projects.
- Simplified Collaboration: Since everything is in one place, developers working on different parts of the project can collaborate more easily.
- Atomic Changes: Make changes across multiple applications or packages in a single commit.
- Centralized CI/CD: Manage continuous integration and deployment pipelines from one place.
In this guide, we will create a monorepo (turborepo) containing:
- A Next.js application (frontend).
- An Express.js application (backend).
- Packages for UI components (using Tailwind CSS + ShadCN), shared types, and utility functions.
Why pnpm and Turbopack?
To make our monorepo efficient and scalable, we will use two key tools: pnpm for package management and Turbopack/Turborepo for fast builds.
pnpm
pnpm is an alternative to npm and Yarn, with the following advantages:
- Faster installation: pnpm installs dependencies faster by using hard links instead of copying files.
- Disk space efficiency: It saves disk space by avoiding duplicate dependencies.
- Workspace support: pnpm natively supports workspaces, making it ideal for monorepos where multiple projects share dependencies.
Turbopack
Turbopack is the new bundler from Vercel for Next.js. It’s designed to be much faster than Webpack, especially during development:
- Faster Hot Module Replacement (HMR): Turbopack speeds up development by only reloading the necessary modules when changes are made.
- Optimized production builds: Turbopack optimizes your production builds to make them smaller and faster.
- Seamless integration with Next.js 15: Turbopack supports Next.js’s new App Router structure out of the box.
With these tools in hand, let’s move on to setting up our project structure.
Project Structure Overview
Here’s what our final project structure will look like:
monorepo/├── .vscode/│ ├── extensions.json│ └── settings.json├── apps/│ ├── web/ # Next.js app│ └── server/ # Express.js app├── packages/│ ├── ui/ # Shared UI components (using Tailwind CSS + ShadCN)│ ├── types/ # Shared TypeScript types│ ├── tsconfig/ # TypeScript configuration│ └── utils/ # Shared utility functions├── .gitignore # Files not tracked by git├── biome.json # Biome configuration├── package.json # Project configuration├── turbo.json # Turbopack configuration└── pnpm-workspace.yaml # pnpm workspace configurationWe’ll organize the project into two main directories:
apps/: This will hold our two main applications—web(Next.js) andserver(Express.js).packages/: This will hold shared code that both applications can use—uifor shared UI components,typesfor TypeScript types,utilsfor shared utility functions, andtsconfigfor TypeScript configuration files.
Now that we have a high-level understanding of the structure, let’s start setting up the monorepo.
Setting Up the Monorepo
Step 1: Initialize a Monorepo with pnpm Workspaces
First, if you haven’t installed pnpm yet, install it globally:
Next, create your main project directory:
mkdir monorepo && cd monorepoInitialize a new workspace:
This command creates a package.json file at the project root. Now we need to tell pnpm which directories should be part of the workspace by creating a pnpm-workspace.yaml file at the root:
packages: - 'apps/*' - 'packages/*'This configuration tells pnpm that any folder inside apps/ or packages/ should be treated as part of the workspace.
Step 2: Configure Turbopack
Next, we will configure Turbopack by creating a turbo.json file in the project’s root directory:
{ "$schema": "https://turbo.build/schema.json", "globalDependencies": [ "**/.env.*local" ], "tasks": { "topo": { "dependsOn": [ "^topo" ] }, "build": { "dependsOn": [ "^build" ], "outputs": [ "dist/**", ".next/**", "!.next/cache/**" ] }, "lint": { "dependsOn": [ "^topo" ] }, "format": { "dependsOn": [ "^topo" ] }, "lint:fix": { "dependsOn": [ "^topo" ] }, "format:fix": { "dependsOn": [ "^topo" ] }, "check-types": {}, "dev": { "cache": false, "persistent": true }, "add-shadcn-component": { "dependsOn": [ "^topo" ] }, "clean": { "cache": false } }}This configuration defines how Turbopack should handle builds across your workspace.
Note the
add-shadcn-componentcommand — it’s a custom command that will be used in our UI package, so that new ShadCN components can be easily added directly from the root.
Step 3: Global Configuration
Next, we’ll update our root package.json to add scripts and dependencies.
{ "name": "monorepo", "private": true, "scripts": { "changeset": "changeset", "publish:packages": "changeset publish", "version:packages": "turbo build && changeset version", "add-shadcn-component": "turbo run add-shadcn-component -- --", "build": "turbo build", "dev": "turbo dev", "format": "turbo format --continue --", "format:fix": "turbo format --continue -- --write", "lint": "turbo lint --continue --", "lint:fix": "turbo lint --continue -- --apply", "clean": "turbo clean" }, "dependencies": { "@changesets/changelog-github": "^0.5.0", "@changesets/cli": "^2.27.1", "turbo": "^2.1.3" }, "devDependencies": { "@biomejs/biome": "^1.7.2", "typescript": "^5", "postcss": "^8.4.27" }, "packageManager": "pnpm@9.12.1"}For the Biome configuration, we’ll create a file called biome.json:
{ "$schema": "https://biomejs.dev/schemas/1.6.4/schema.json", "files": { "ignoreUnknown": true, "ignore": [ "node_modules/*", "*.config.*", "*.json", "tsconfig.json", ".turbo", "**/dist", "**/out", ".next" ] }, "organizeImports": { "enabled": true }, "linter": { "enabled": true, "rules": { "recommended": true, "complexity": { "noForEach": "off", "noUselessFragments": "off" }, "correctness": { "useExhaustiveDependencies": "off", "noUnusedImports": "warn", "noUnusedVariables": "warn" }, "style": { "noParameterAssign": "off" } } }, "formatter": { "enabled": true, "formatWithErrors": false, "indentStyle": "space", "lineEnding": "lf", "lineWidth": 120 } }A very important file is .gitignore, where we tell Git which files not to track.
# dependencies/node_modules/.pnp.pnp.js
node_modulespackages/*/node_modulesapps/*/node_modules.next
# next.js/.next//out/
# production/build
# misc.DS_Store*.pem
# debug.pnpm-debug.log*
# other lockfiles that's not pnpm-lock.yamlpackage-lock.jsonyarn.lock
# local env files.env.env*.local
# vercel.vercel
# typescript*.tsbuildinfonext-env.d.ts

# intellij.idea
dist/**/distpackages/*/dist
.turbo/test-results//playwright-report//playwright/.cache/
This configuration defines our project defaults. Now that we’ve set up the workspace configuration files, let’s continue to create our applications.
Step 3: .vscode Folder
The .vscode folder stores configuration settings specific to Visual Studio Code. These settings allow you to personalize and optimize VS Code for your project or workspace. There are two main types of settings:
- User Settings: Apply globally to all VS Code instances on your system. Great for settings you want to stay consistent, like font size or theme.
- Workspace Settings: Apply only to the current project. Useful for project-specific configuration, such as excluding certain folders from the file explorer (e.g.,
node_modules).
VS Code uses JSON files to store these settings, making customization and sharing via version control easy. For convenience, you can either modify the settings directly in the JSON file or use the Settings Editor, which provides a graphical interface.
For our project, we’ll create two files to store these configurations. First, create a folder named .vscode in the root directory. Then, create extensions.json:
{ "recommendations": [ "yoavbls.pretty-ts-errors", "bradlc.vscode-tailwindcss", "biomejs.biome" ]}The last piece of configuration we need is the global settings. Create a settings.json file:
{  "editor.codeActionsOnSave": {    "source.organizeImports.biome": "explicit",    "source.fixAll.biome": "explicit",  },  "editor.defaultFormatter": "biomejs.biome",  "editor.formatOnSave": true,  "tailwindCSS.experimental.classRegex": [    ["cva\\(([^)]*)\\)", "[\"'`]([^\"'`]*).*?[\"'`]"],    ["cx\\(([^)]*)\\)", "(?:'|\"|`)([^']*)(?:'|\"|`)"]  ],  "typescript.enablePromptUseWorkspaceTsdk": true,  "typescript.tsdk": "node_modules/typescript/lib",
  "typescript.preferences.autoImportFileExcludePatterns": [    "next/router.d.ts",    "next/dist/client/router.d.ts"  ],  "[typescriptreact]": {    "editor.defaultFormatter": "biomejs.biome"  },  "[typescript]": {    "editor.defaultFormatter": "biomejs.biome"  },  "[json]": {    "editor.defaultFormatter": "vscode.json-language-features"  }}
Creating the First Package (tsconfig)
To create the TypeScript configuration that will be used across our entire monorepo, as well as separate configs for our web and server packages, we’ll create our tsconfig package.
mkdir packages && cd packages && mkdir tsconfig && cd tsconfigWe’ll have 6 TypeScript configuration files:
- base:
base.json - web:
next.json - server:
express.json - ui:
ui.json - utils:
utils.json - types:
types.json
First, we’ll create our package.json:
{ "name": "@monorepo/tsconfig", "version": "0.0.0", "private": true, "license": "MIT", "publishConfig": { "access": "public" }}Then we’ll create our base.json configuration file (you can find every tsconfig setting here):
{ "$schema": "https://json.schemastore.org/tsconfig", "compilerOptions": { "strict": true, "noUncheckedIndexedAccess": true, "alwaysStrict": false, "module": "ESNext", "moduleResolution": "Bundler", "resolveJsonModule": true, "target": "ESNext", "lib": [ "DOM", "DOM.Iterable", "ESNext" ], "noEmit": true, "declaration": true, "declarationMap": true, "verbatimModuleSyntax": true, "moduleDetection": "force", "downlevelIteration": true, "allowJs": true, "isolatedModules": true, "esModuleInterop": true, "forceConsistentCasingInFileNames": true, "skipLibCheck": true, "skipDefaultLibCheck": true, "incremental": true, "tsBuildInfoFile": ".tsbuildinfo" }, "include": [ "**/*.ts", "**/*.tsx" ], "exclude": [ "node_modules", "src/tests" ]}Now we’ll create the next.json configuration:
{ "$schema": "https://json.schemastore.org/tsconfig", "extends": "./base.json", "compilerOptions": { "paths": { "@/*": [ "./*" ] }, "lib": [ "dom", "dom.iterable", "esnext" ], "allowJs": true, "skipLibCheck": true, "strict": true, "forceConsistentCasingInFileNames": true, "noEmit": true, "esModuleInterop": true, "resolveJsonModule": true, "isolatedModules": true, "jsx": "preserve", "incremental": true }}Then we need to create the express.json configuration file:
{ "$schema": "https://json.schemastore.org/tsconfig", "display": "ExpressJS Server", "extends": "./base.json", "ts-node": { "compilerOptions": { "module": "commonjs", "moduleResolution": "Node10" } }, "compilerOptions": { "outDir": "./build", "emitDecoratorMetadata": true, "experimentalDecorators": true, "module": "ESNext" }}Create a types.json configuration file for our shared types package:
{ "$schema": "https://json.schemastore.org/tsconfig", "display": "Shared Types", "extends": "./base.json", "compilerOptions": { "outDir": "./dist", "declaration": true, "emitDecoratorMetadata": true, "experimentalDecorators": true, },}Additionally, we need to add one last configuration file, ui.json, which will be used in our shared UI package.
{ "$schema": "https://json.schemastore.org/tsconfig", "display": "Shared UI", "extends": "./base.json", "compilerOptions": { "paths": { "@/*": [ "./*" ] }, "allowJs": true, "skipLibCheck": true, "strict": false, "forceConsistentCasingInFileNames": true, "noEmit": true, "incremental": true, "esModuleInterop": true, "resolveJsonModule": true, "isolatedModules": true, "jsx": "preserve" }}Finally, create the utils.json configuration:
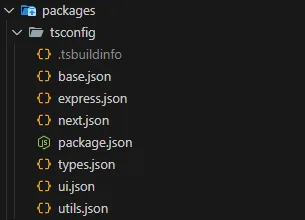
{ "$schema": "https://json.schemastore.org/tsconfig", "display": "Shared UI", "extends": "./base.json", "compilerOptions": { "paths": { "@/*": [ "./*" ] }, "allowJs": true, "skipLibCheck": true, "strict": false, "forceConsistentCasingInFileNames": true, "noEmit": true, "incremental": true, "esModuleInterop": true, "resolveJsonModule": true, "isolatedModules": true, "jsx": "preserve" }}This is what your tsconfig package folder looks like:
Congratulations, we’ve just finished configuring TypeScript. Now let’s move on to the exciting part: creating our application!
Creating the Application
Step 1: Set up the Next.js 15 App (web)
Create and navigate into the apps/ directory:
cd ../.. && mkdir apps && cd appsCreate a new Next.js app using pnpm:
pnpm create next-app@latest web --ts --app --turbopack --no-eslint --tailwind --src-dir --skip-install --import-alias @/*This command creates a new Next.js application in the web/ folder, enabling TypeScript, setting Turbopack as the default bundler, and Tailwind CSS.
To integrate our tsconfig package into the web app, we need to update the default package.json:
...,"dependencies": { "@monorepo/types": "workspace:*", "@monorepo/ui": "workspace:*", "@monorepo/utils": "workspace:*", "react": "19.0.0-rc-02c0e824-20241028", "react-dom": "19.0.0-rc-02c0e824-20241028", "next": "15.0.2"},"devDependencies": { "@monorepo/tsconfig": "workspace:*", "@types/node": "^20", "@types/react": "^18", "@types/react-dom": "^18", "postcss": "^8", "tailwindcss": "^3.4.1", "@biomejs/biome": "^1.7.2"}...,Now, update the default tsconfig.json:
{ "extends": "@monorepo/tsconfig/next.json", "compilerOptions": { "plugins": [ { "name": "next" } ], }, "include": [ "next-env.d.ts", "**/*.ts", "**/*.tsx", ".next/types/**/*.ts", "tailwind.config.ts" ], "exclude": [ "node_modules" ]}Add a biome.json so we can enable it on the folder:
{ "extends": ["../../biome.json"]}Your Next.js app is now set up! Let’s continue with setting up our backend application using Express.js.
Step 2: Set up the Express Application (server)
Navigate back to the apps/ directory and create an Express application:
cd .. && mkdir server && cd server && pnpm initUpdate the server’s package.json to add Express, its types, cors, morgan, and ts-node-dev:
{ "name": "server", "version": "1.0.0", "description": "", "main": "index.js", "keywords": [], "author": "", "license": "ISC", "scripts": { "dev": "ts-node-dev --transpile-only src/server.ts" }, "dependencies": { "@monorepo/types": "workspace:*", "express": "^4.21.1", "ts-node-dev": "^2.0.0", "cors": "2.8.5", "morgan": "^1.10.0" }, "devDependencies": { "@monorepo/tsconfig": "workspace:*", "@types/express": "^5.0.0", "@types/morgan": "^1.9.9", "@types/cors": "2.8.17" }}Add a tsconfig.json to the server:
{ "extends": "@monorepo/tsconfig/express.json", "include": [ "src" ],}Create a basic Express server in src/server.ts:
import cors from "cors";import express from "express";import morgan from "morgan";
const app = express();
app.use(morgan("tiny"));app.use(express.json({ limit: "100mb" }));
app.use(  cors({    credentials: true,    origin: ["http://localhost:3000"],  }),);
const port = process.env.PORT || 3001;
app.get("/", (_, res) => {  res.send("Hello from Express!");});
app.listen(port, () => {  console.log(`Server is running on http://localhost:${port}`);});
You now have a frontend (Next.js) and a backend (Express) application set up! Let’s move on to creating shared packages that both apps can use.
Creating Shared Packages
In this section, we’ll create three shared packages: one for UI components (ui), one for TypeScript types (types), and one for utility functions (utils). These packages will live under the packages/ directory.
Step 1: Create the utils Package
The first package we’ll create is for utility functions (utils). To set it up:
Create the folder in packages/ and initialize:
cd ../.. && mkdir packages && cd packages && mkdir utils && cd utils && pnpm init && mkdir src && touch src/styles.tsUpdate package.json to add scripts and exports:
{ "name": "@monorepo/utils", "version": "1.0.0", "description": "", "main": "index.js", "scripts": { "check-types": "tsc --noEmit", "build": "tsup", "lint": "biome lint ./src", "format": "biome format ./src " }, "keywords": [], "author": "", "license": "ISC", "dependencies": { "clsx": "^2.1.1", "tailwind-merge": "^2.5.4" }, "devDependencies": { "@monorepo/tsconfig": "workspace:*" }, "exports": { ".": "./src", "./styles": "./src/styles.ts" }}Add biome.json:
{ "extends": [ "../../biome.json" ]}Add tsconfig.json:
{ "extends": "@monorepo/tsconfig/utils.json", "include": [ "**/*.ts", ], "exclude": [ "node_modules" ],}The first (and only) utility function we will create is cn, a helper for conditionally merging Tailwind classes. It is heavily used in ShadCN components. Add the following dependencies:
pnpm add clsx tailwind-mergeAdd the general utility function cn in src/styles.ts:
import clsx, { type ClassValue } from "clsx";import { twMerge } from "tailwind-merge";
export function cn(...inputs: ClassValue[]) {  return twMerge(clsx(inputs));}
Step 2: Create the ui Package (Tailwind CSS + ShadCN)
Navigate back to the packages/ directory:
cd .. && mkdir ui && cd ui && pnpm initInstall React along with Tailwind CSS (as dev dependencies) and ShadCN (we’ll use the new york style):
pnpm add -D @types/react @types/react-dom autoprefixer postcss react tailwindcss typescriptpnpm add shadcn @types/react tailwindcss-animate class-variance-authority clsx tailwind-merge @radix-ui/react-iconsFollow similar steps to set up Tailwind CSS as we did in the Next.js application—initialize Tailwind CSS (npx tailwindcss init) and configure it in tailwind.config.ts:
import type { Config } from "tailwindcss";import tailwindcssAnimate from "tailwindcss-animate";import { fontFamily } from "tailwindcss/defaultTheme";
const config = {  darkMode: ["class"],  content: [    "./pages/**/*.{ts,tsx}",    "./components/**/*.{ts,tsx}",    "./app/**/*.{ts,tsx}",    "./src/**/*.{ts,tsx}",    "../../packages/ui/src/**/*.{ts,tsx}",  ],  prefix: "",  theme: {    container: {      center: true,      padding: '2rem',      screens: {        '2xl': '1400px'      }    },    extend: {      colors: {        border: 'hsl(var(--border))',        input: 'hsl(var(--input))',        ring: 'hsl(var(--ring))',        background: 'hsl(var(--background))',        foreground: 'hsl(var(--foreground))',        primary: {          DEFAULT: 'hsl(var(--primary))',          foreground: 'hsl(var(--primary-foreground))'        },        secondary: {          DEFAULT: 'hsl(var(--secondary))',          foreground: 'hsl(var(--secondary-foreground))'        },        destructive: {          DEFAULT: 'hsl(var(--destructive))',          foreground: 'hsl(var(--destructive-foreground))'        },        muted: {          DEFAULT: 'hsl(var(--muted))',          foreground: 'hsl(var(--muted-foreground))'        },        accent: {          DEFAULT: 'hsl(var(--accent))',          foreground: 'hsl(var(--accent-foreground))'        },        popover: {          DEFAULT: 'hsl(var(--popover))',          foreground: 'hsl(var(--popover-foreground))'        },        card: {          DEFAULT: 'hsl(var(--card))',          foreground: 'hsl(var(--card-foreground))'        }      },      borderRadius: {        lg: '`var(--radius)`',        md: '`calc(var(--radius) - 2px)`',        sm: 'calc(var(--radius) - 4px)'      },      fontFamily: {        sans: ["var(--font-sans)", ...fontFamily.sans]      },      keyframes: {        'accordion-down': {          from: {            height: '0'          },          to: {            height: 'var(--radix-accordion-content-height)'          }        },        'accordion-up': {          from: {            height: 'var(--radix-accordion-content-height)'          },          to: {            height: '0'          }        },      },      animation: {        'accordion-down': 'accordion-down 0.2s ease-out',        'accordion-up': 'accordion-up 0.2s ease-out'      }    }  },  plugins: [tailwindcssAnimate],} satisfies Config;
export default config;
We also need to configure postcss.config.mjs for Tailwind CSS:
/** @type {import('postcss-load-config').Config} */const config = {  plugins: {    tailwindcss: {},    autoprefixer: {},  },};
export default config;
Since we’ll also use Biome on this package, add a biome.json:
{ "extends": [ "../../biome.json" ]}Update package.json to add the tsconfig, utils package, and custom scripts:
{ "name": "@monorepo/ui", "version": "1.0.0", "description": "", "main": "index.js", "scripts": { "check-types": "tsc --noEmit", "add-shadcn-component": "pnpm dlx shadcn@latest add", "build": "tsup", "lint": "biome lint ./src", "format": "biome format ./src " }, "keywords": [], "author": "", "license": "ISC", "devDependencies": { "@monorepo/tsconfig": "workspace:*", "@types/react": "^18.3.12", "@types/react-dom": "^18", "autoprefixer": "^10.4.20", "postcss": "^8.4.47", "react": "19.0.0-rc-02c0e824-20241028", "tailwindcss": "^3.4.1" }, "dependencies": { "@monorepo/utils": "workspace:^", "@radix-ui/react-accordion": "^1.2.1", "@radix-ui/react-icons": "^1.3.1", "@radix-ui/react-select": "^2.1.2", "class-variance-authority": "^0.7.0", "clsx": "^2.1.1", "shadcn": "^2.1.3", "tailwind-merge": "^2.5.4", "tailwindcss-animate": "^1.0.7" }, "exports": { "./globals.css": "./src/styles/globals.css", "./postcss.config": "./postcss.config.mjs", "./tailwind.config": "./tailwind.config.ts", "./components/*": "./src/*.tsx" }}Create a tsconfig.json file:
{ "extends": "@monorepo/tsconfig/ui.json", "include": [ "**/*.ts", "**/*.tsx", "tailwind.config.ts", ], "exclude": [ "node_modules", ],}Create a stylesheet at src/styles/globals.css:
@tailwind base;@tailwind components;@tailwind utilities;
@layer base {  :root {    --background: 0 0% 100%;    --foreground: 222.2 47.4% 11.2%;
    --muted: 210 40% 96.1%;    --muted-foreground: 215.4 16.3% 46.9%;
    --popover: 0 0% 100%;    --popover-foreground: 222.2 47.4% 11.2%;
    --border: 214.3 31.8% 91.4%;    --input: 214.3 31.8% 91.4%;
—card: 0 0% 100%; —card-foreground: 222.2 47.4% 11.2%;
--primary: 222.2 47.4% 11.2%;--primary-foreground: 210 40% 98%;
--secondary: 210 40% 96.1%;--secondary-foreground: 222.2 47.4% 11.2%;
--accent: 210 40% 96.1%;--accent-foreground: 222.2 47.4% 11.2%;
--destructive: 0 100% 50%;--destructive-foreground: 210 40% 98%;
--ring: 215 20.2% 65.1%;
--radius: 0.5rem;
}
.dark { —background: 224 71% 4%; —foreground: 213 31% 91%;
--muted: 223 47% 11%;--muted-foreground: 215.4 16.3% 56.9%;
--accent: 216 34% 17%;--accent-foreground: 210 40% 98%;
--popover: 224 71% 4%;--popover-foreground: 215 20.2% 65.1%;
--border: 216 34% 17%;--input: 216 34% 17%;
--card: 224 71% 4%;--card-foreground: 213 31% 91%;
--primary: 210 40% 98%;--primary-foreground: 222.2 47.4% 1.2%;
--secondary: 222.2 47.4% 11.2%;--secondary-foreground: 210 40% 98%;
--destructive: 0 63% 31%;--destructive-foreground: 210 40% 98%;
--ring: 216 34% 17%;
--radius: 0.5rem;
} }
@layer base {
- { @apply border-border; } body { @apply bg-background text-foreground; font-feature-settings: “rlig” 1, “calt” 1; } }
ShadCN requires you to create a `components.json` ([enabling CLI usage](https://ui.shadcn.com/docs/components-json)):
```json{    "$schema": "https://ui.shadcn.com/schema.json",    "style": "new-york",    "rsc": true,    "tsx": true,    "tailwind": {        "config": "tailwind.config.ts",        "css": "src/styles/globals.css",        "baseColor": "slate",        "cssVariables": true    },    "aliases": {        "components": "src/",        "ui": "src/",        "utils": "@monorepo/utils/styles"    }}
Now you can start adding reusable UI components to this package! For example, to import the ShadCN Button component, just run the following command in the root workspace:
pnpm add-shadcn-component cardYou can find each ShadCN component here, as well as additional components built on top of it. Now we’re ready to set up our shared types package and integrate everything we’ve configured!
Step 3: Create the types package
The types package will contain shared TypeScript types that both applications can use. To create it:
Navigate back to packages/, create the folder and initialize it:
cd .. && mkdir types && cd types && pnpm initCreate a biome.json file:
{ "extends": [ "../../biome.json" ]}Create a tsconfig.json file:
{ "extends": "@monorepo/tsconfig/types.json", "include": [ "**/*.ts", ], "exclude": [ "node_modules" ],}The first type we’ll create is a simple API client so we can share types between server and web. Create a src/ folder and inside it a api/ folder. Then create simple-api-client.ts:
export interface GetTestResponse {  message: string;}
export type GetTest = () => Promise<GetTestResponse>;
export interface SimpleApiClient {  getTest: GetTest;}
Update package.json to add exports, scripts, and devDependencies:
{ "name": "@monorepo/types", "version": "1.0.0", "description": "", "scripts": { "build": "tsc", "lint": "biome lint ./src", "check-types": "tsc --noEmit" }, "keywords": [], "author": "", "license": "ISC", "devDependencies": { "@monorepo/tsconfig": "workspace:*" }, "exports": { ".": "./src/index.ts" }}Now create an index.ts in the src/api folder and export everything from simple-api-client.ts (you’ll replicate this pattern for other files to have a single import source):
export * from "./simple-api-client";Finally, create an index.ts in the src folder and export everything from api:
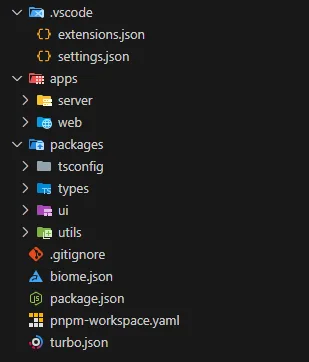
Our shared types package is all set up! Your repository should look like this:
Now, let’s move on to the final part of this tutorial: Integrating everything and running the development environment.
Running Your Monorepo Locally
Now that everything is set up, let’s run both applications locally!
Step 1: Install all dependencies
Install all dependencies in the workspace at once (remember to change directory back to the root):
pnpm install
This command will install all necessary dependencies for both applications (`web`, `server`) and all shared packages (`ui`, `types`, etc.).
### **Step 2: Run both applications simultaneously**
pnpm turbo run dev
This command will install all necessary dependencies for both applications (web, server) and all shared packages (ui, types, etc.).
This command launches your frontend (Next.js) (on port 3000) and your backend (Express) (on port 3001) at the same time!
Web and Server Integration
To create a simple integration between our applications and packages, we’ll develop a component that fetches data from the server using the shared types we created earlier in this tutorial. But first, let’s update our Tailwind CSS files and global styles to use the ones we defined in the UI package. Replace the contents of tailwind.config.ts with the following:
export * from "@monorepo/ui/tailwind.config";Now replace the contents of postcss.config.mjs with:
export { default } from "@monorepo/ui/postcss.config";In our root layout (src/app/layout.tsx), update the globals.css import to use the one we created in the UI package:
import "@monorepo/ui/globals.css";import "./style.css";import type { Metadata } from "next";import localFont from "next/font/local";
const geistSans = localFont({  src: "./fonts/GeistVF.woff",  variable: "--font-geist-sans",  weight: "100 900",});const geistMono = localFont({  src: "./fonts/GeistMonoVF.woff",  variable: "--font-geist-mono",  weight: "100 900",});
export const metadata: Metadata = {  title: "Create Next App",  description: "Generated by create next app",};
export default function RootLayout({  children,}: Readonly<{  children: React.ReactNode;}>) {  return (    <html lang="en">      <body className={`${geistSans.variable} ${geistMono.variable} antialiased dark`}>{children}</body>    </html>  );}
We do this so we can control our application UI styles and configuration from the shared UI package. That way, if we create another web application (e.g., an admin dashboard), we’ll have consistent styles!
To start developing our application, we’ll organize our web folder structure according to the following rule: components used only on a page should be placed in a folder named components inside the app directory at the same level as the page folder. Application-wide shared components should go in the src/components folder.
So let’s create a components folder inside the app directory (src/app/components) (we’ll create a component used only on the first page), and create a file named get-test.tsx with the following content:
"use client";
import type { GetTestResponse } from "@monorepo/types";import { Card, CardContent, CardHeader } from "@monorepo/ui/components/card";import { cn } from "@monorepo/utils/styles";import { useEffect, useState } from "react";
const GetTest = () => {  const [test, setTest] = useState<string>("");
  useEffect(() => {    const fetchTest = async () => {      const response = await fetch("http://localhost:3001/test");      const data: GetTestResponse = await response.json();      setTimeout(() => {        setTest(data.message);      }, 3000);    };    fetchTest();  }, []);
  return (    <div>      <Card>        <CardHeader>          <h1 className={cn("text-xl text-yellow-500", test !== "" && "text-green-500")}>Get Test</h1>        </CardHeader>        <CardContent>          <p>{test}</p>        </CardContent>      </Card>    </div>  );};
export default GetTest;
Looking at this file, we have a simple fetch to the server using the typed response we defined in the shared types, which makes handling the response easy. The server route will be defined soon. First, let’s complete the web part by importing the component in our page.tsx:
import GetTest from "./components/get-test";
export default function Home() {  return (    <div className="grid grid-rows-[20px_1fr_20px] items-center justify-items-center min-h-screen p-8 pb-20 gap-16 sm:p-20 font-[family-name:var(--font-geist-sans)]">      <GetTest />    </div>  );}
With the web setup done, go to the server application and update server.ts with the route we’ll use. Add the following route before app.listen:
app.get("/test", (_, res) => { const testJson: GetTestResponse = { message: "Hello from Express API!", }; res.json(testJson);});Finally, everything is set—you can run the entire application with the following command (remember to change directory back to the root):
You’ll see the component rendered on the page.

After the component renders, we fetch from the server in useEffect and set the state to render (the setTimeout isn’t necessary; it’s just to visualize the state change). Then you’ll see the following:

Summary
Congratulations! You’ve successfully set up a scalable monorepo with two applications—a frontend built with Next.js, styled with Tailwind CSS, enhanced with reusable components from ShadCN, and an Express backend—all managed efficiently with pnpm workspaces, plus extremely fast builds powered by Turbopack and near-instant linting with Biome!
Here’s what you accomplished today:
- Created two separate applications in a single repository.
- Set up four packages: three containing reusable code and one for TypeScript configuration.
- Used pnpm workspaces to link these packages between applications with efficient dependency management.
We’ve finished this tutorial. Now you’re free to let your imagination run wild and build anything you want using the best monorepo architecture.