Building a Front-End Scaffold (Part 1)
/ 8 min read /
Table of Contents 目录
When learning Vue or React, we’ve probably all used their scaffolding tools (create-vue, create-react-app). With scaffolding, we can quickly get a Vue or React project without spending effort on building the basic project skeleton, allowing us to develop features faster.
To make it easier to understand, I’ll try to explain the “ins and outs” of scaffolding step by step through a scenario. In the scenario, the protagonist — A Niu, a front-end developer who isn’t very good at writing code.
What is Scaffolding?
Before building our own scaffolding, let’s get to know it again! Scaffolding is: “A tool or framework used to quickly generate the basic structure, configuration files, and code templates of a project. It usually contains predefined directory structures, configuration files, dependency management tools, build tools, etc. The main purpose of scaffolding is to reduce repetitive work, improve development efficiency, and ensure consistency in project structure.”
In front-end development, scaffolding tools usually help us with the following tasks:
- Initialize project directory structure
- Configure development environment (e.g., Webpack, Babel, ESLint, etc.)
- Integrate commonly used libraries and tools (e.g., Vue, React, TypeScript, etc.)
- Provide code templates and best practices
Using scaffolding, we get an expected template project that already includes the infrastructure we need.
What Problems Does Scaffolding Solve?
- Tedious project initialization: Manually creating project directories, configuration files, installing dependencies, etc., is very time-consuming and error-prone. Scaffolding automates these steps, generating the project skeleton with one click.
- Unified development standards: Every team has its own code style, directory structure, and dependency management approach. Scaffolding can enforce these standards, ensuring team members work in a unified environment.
- Improved development efficiency: Through pre-configured development environments, build processes, and testing frameworks, scaffolding can greatly improve development efficiency, allowing developers to focus on implementing business logic.
- Reduced repetitive work: When using the same configurations and dependencies across multiple projects, scaffolding avoids repetitive work and increases code reuse.
- Lower learning cost: For new developers, scaffolding provides a clear project structure and best practices, lowering the learning curve.
- Team technical accumulation: If a team has multiple projects, and feature B implemented in project A is also needed in project C, accumulating it into scaffolding is a better way to promote it, reducing repetitive work and improving efficiency.
- Best practice accumulation: When we integrate configurations and capabilities into scaffolding, we have to consider whether they are the best implementation, whether they fit the team, code style issues, etc.
When We Don’t Need Scaffolding
- Existing scaffolding already meets our needs.
- The project is very simple; manually creating the project is a better choice.
- The team is small, the tech stack is very unified, everyone is familiar with project development standards, so scaffolding is unnecessary — it only adds extra process.
- Time and resources are limited: don’t build scaffolding at this time, as maintaining it also costs.
Quickly Running Through a Core Scaffolding Flow
Requirements Analysis
Our goal is to develop a scaffolding tool similar to vue cli, allowing us to download remote GitHub repository code using our own scaffolding tool. Let’s first experience create-vue:
npm create vue@latest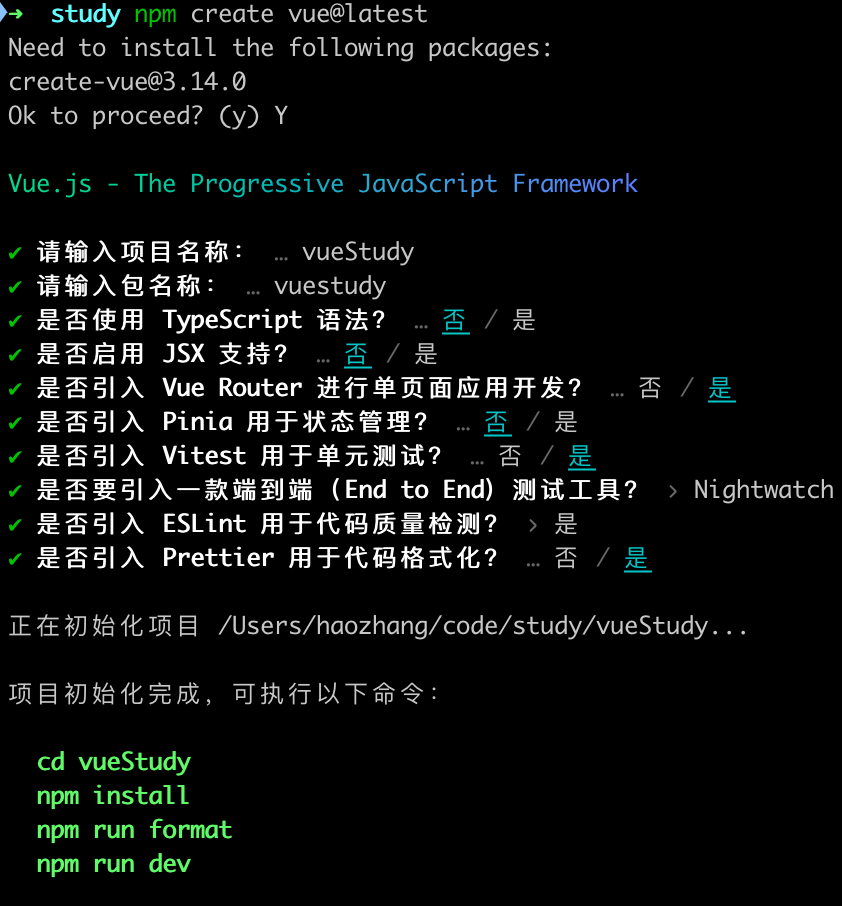
Through interaction, we get a basic project template. A simple analysis reveals three main steps:
- The user runs
npm create xxxin the terminal, then downloads a scaffolding package. - After downloading, an interactive page runs in the terminal. Through step-by-step interaction, we finally get the package we want.
- After the user completes the interaction logic, the corresponding code is installed locally. We need to provide friendly download progress prompts and some post-installation tips.
Feature Development
Step 1
Let’s develop step by step according to our analysis, and then optimize at the end. First, develop step 1 (project name create-lucky, note that if we want to create a project via npm create, the project name must start with create-).
# Create folder and entermkdir create-lucky && cd create-lucky# Initialize package.json and index.jsnpm init -y && nano index.js# Then enter the following code in index.js, note the first line must be #!/usr/bin/env node#!/usr/bin/env node
console.log("Hello from create-lucky!");
# To make index.js executable, add execute permission, then runchmod +x index.js
# Then modify package.json"main": "src/index.js","bin": {  "create-lucky": "src/index.js"},
# Local test, run npm linknpm link
# In any directory, run the following command to test the scaffoldingnpm create lucky
# Publish 1, first check npm registry: https://registry.npmjs.org/npm get registry
# Publish 2, if not registered for npm account, register first, follow the prompts to enter username, password, and email.npm login
# Publish 3, publish to npmnpm publish
# Check if publish succeeded, there may be a ten-second delay, go to https://www.npmjs.com/~luckysnail, where luckysnail is your npm account name
# Run npm create lucky locally to verify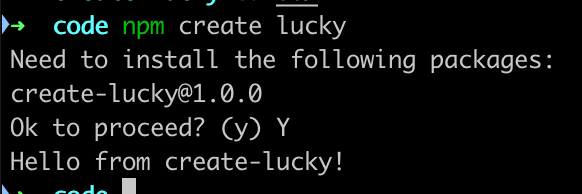
Seeing this confirms step 1 is complete!
Step 2
In this step, we need to create an interaction in the terminal so users can install the desired project using the scaffolding.
# Install inquirer: a library for command-line user interactionnpm i inquirer# Update src/index.js code
#!/usr/bin/env node
const inquirer = require("inquirer");
async function main() {  const answers = await inquirer.default.prompt([    {      type: "list",      name: "template",      message: "Please select the template you want to use:",      choices: ["Vue", "React", "React19", "NextJs"],    },    {      type: "input",      name: "customUrl",      message: "Please enter the project name:",    },  ]);
  let packageUrl = "";  if (answers.template === "custom-app") {    packageUrl = answers.customUrl;  } else {    packageUrl = `https://github.com/your-org/${answers.template}`;  }
  console.log(`You selected the package URL: ${packageUrl}`);}
main();# Re-run npm link, test, then publish and test again
More inquirer usage: https://www.npmjs.com/package/inquirer
Step 3
Finally, we need to generate the corresponding code based on the user’s selection.
# Install required libraries, chalk: terminal font styles; ora: display loading animations; download-git-repo: download and extract git repositoriesnpm i chalk ora download-git-repo
# src/constants.js define constants/** List of projects */export const PROJECT_LIST = [ { name: "vue", desc: "vue3 + pinia + vue-router", value: "https://github.com/axin-s-Template/vue-light-starter.git", }, { name: "React19", desc: "React 19 + Tailwind 3 + Biome + RSBuild + shadui/cn lightweight starter template", value: "https://github.com/axin-s-Template/react19-light-starter", }, { name: "React", desc: "React lightweight template (suitable for simple apps), using Vite + TypeScript + TailwindCss + shadcn/ui + Zustand + react-router-dom simple SPA starter template", value: "https://github.com/axin-s-Template/react-light-starter", }, { name: "NextJs", desc: "Next.js 14+ basic starter template", value: "https://github.com/axin-s-Template/Nextjs-Boilerplate", },];
# Set package.json's "type": "module",
# Update src/index.js#!/usr/bin/env node
import inquirer from "inquirer";import chalk from "chalk";import ora from "ora";import { promisify } from "util";import downloadGitRepo from "download-git-repo";import { PROJECT_LIST } from "./constants.js";
const download = promisify(downloadGitRepo);
async function main() { const answers = await inquirer.prompt([ { type: "list", name: "template", message: "Please select the template you want to use:", choices: PROJECT_LIST.map((item) => ({ name: `${item.name} - ${item.desc}`, value: item.name.toLowerCase(), })), }, { type: "input", name: "projectName", message: "Please enter the project name:", validate: (input) => { if (!input.trim()) { return "Project name cannot be empty"; } return true; }, }, ]);
const selectedTemplate = PROJECT_LIST.find((item) => item.name.toLowerCase() === answers.template);
if (!selectedTemplate) { console.log(chalk.red("No matching template found")); return; }
const spinner = ora("Downloading template...").start();
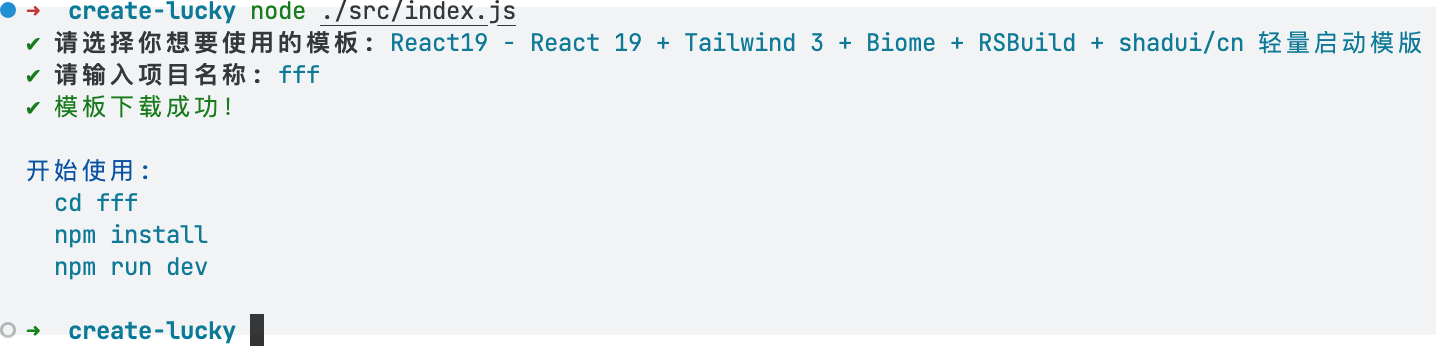
try { const repoUrl = selectedTemplate.value.replace("https://github.com/", "").replace(".git", ""); await download(repoUrl, answers.projectName); spinner.succeed(chalk.green("Template downloaded successfully!")); console.log(chalk.blue("\nGetting started:")); console.log(chalk.cyan(` cd ${answers.projectName}`)); console.log(chalk.cyan(" npm install")); console.log(chalk.cyan(" npm run dev\n")); } catch (err) { spinner.fail(chalk.red("Download failed: " + err.message)); process.exit(1); }}
main().catch((err) => { console.error(chalk.red(err)); process.exit(1);});Here, we run node ./src/index.js. If you see this, it means everything is fine!
At this point, our basic scaffolding is complete! We can publish it to the npm registry and try it again. Remember to run npm unlink create-lucky first. Then run npm create lucky. Remember to modify the version in package.json each time you publish.
Optimizations
The current version of this scaffolding tool still has many shortcomings:
- It uses JS, which is hard to maintain. Scaffolding is usually needed by teams, so the scaffolding code should be standardized.
- It’s cumbersome to test: using
npm linkfor testing, then needingnpm unlinkto cancel the link. - It lacks command parameter capabilities, e.g.,
-v,--help, etc., which are essential for a command-line tool. - It doesn’t support dynamically generating project information, e.g., initializing basic project info (name, description, etc.) when creating from a template.
- The terminal isn’t visually appealing or cool — which is actually important since the first impression of your scaffolding is the terminal experience.
Therefore, we can use monorepo + @clack/prompt to optimize for the next version.
- Use monorepo for better code maintenance and validation.
- Use @clack/prompt to provide more beautiful and cool terminal interactions.
I’ll write another post about the optimizations!
Summary
First, thank you for reading this far. If you’ve read this, you probably think building your own scaffolding is valuable. In my opinion, scaffolding has two main values:
- For yourself: I think scaffolding brings the biggest benefit to the individual. During the development of scaffolding, you come up with your own best practices, you build your own development standards, and this cultivates a personal engineering mindset — a pursuit of perfection.
- For others: Others can quickly set up a project skeleton using your scaffolding. They benefit from your best practices, saving them time. Therefore, after development, we need to write documentation to promote our scaffolding.